
 Save
Save
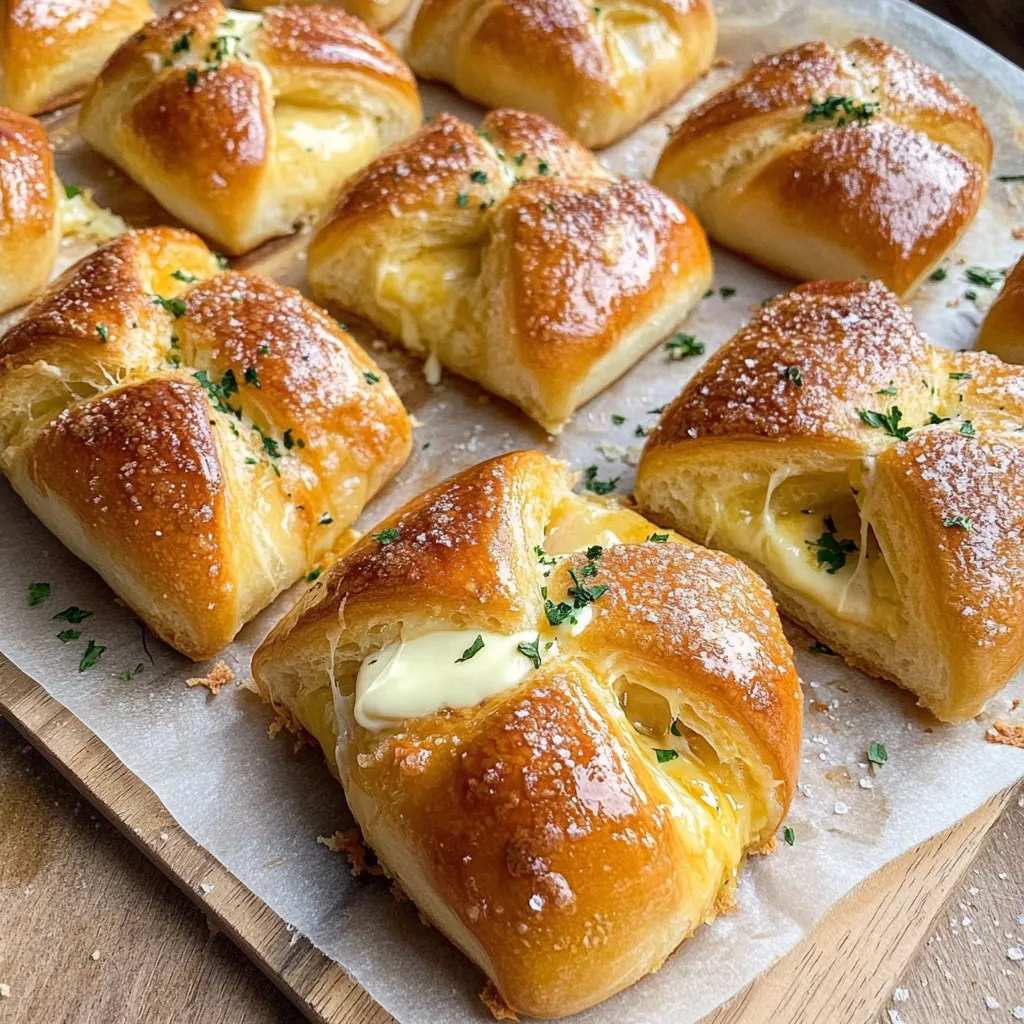
Fluffy, sweet buns packed with tangy cream cheese and soaked in buttery garlic goodness make for something you won't know how to label—just know you won't want to stop snacking. I came across these during a wild internet search last summer and figured the wacky combo was worth a shot. First batch vanished right before my eyes! Pulling them out all bubbling and golden, with cream cheese sneaking out the sides and that crazy-good garlic scent, is pure magic.
Last month, my neighbor Jen showed up just as I took a fresh batch from the oven. She pretended to resist because she was “cutting carbs,” but one whiff and she caved. Three buns later, she was asking for the how-to, licking her fingers as she wrote. These have that effect—diet plans just vanish when they're warm and fresh.
Tasty Ingredients
- Hawaiian sweet rolls - Gotta have that hint of sweetness, so don’t swap for regular ones. If you let them air out for a bit, they’re even better—soak up more garlicky butter without falling to pieces. I just leave them open while I prep everything else.
- Cream cheese - Room temp is best, or you’ll end up fighting to get it into the buns. I’ve hurried it up by putting the package on the warm stove top while I preheat the oven.
- Sweetened condensed milk - This really amps up the richness without overdoing the sweetness. It’s perfect in both the filling and the custard. Makes everything a little caramel-y and balances the garlic.
- Fresh garlic - You really want fresh, not jarred, for the punch of flavor. It chills out a lot in the oven, so even if it seems strong when raw, the final taste is awesome.
- Parmesan cheese - If you’ve got the real stuff, grate it. That salty hit on top is what brings the whole thing together. If I’m low on parm, a bit of mozzarella mixed in totally works.
 Save
Save
Simple Steps
- Serving Moment:
- Let the buns cool for about five minutes. The filling is seriously hot and letting it sit keeps everything gooey, but not so runny that it spills everywhere.
- Baking Attention:
- Watch them near the end—they brown up fast! In my oven, I start checking at 12 minutes. The smell will tip you off too. Once it's irresistible, it's time.
- Dipping Method:
- This bit is messy but kind of fun. I use tongs and dip each bun super quick—just a second or so on all sides. Learned the hard way: leave them in longer and you'll have soggy buns. Fast dip is best!
- Filling Technique:
- If you don’t have a piping bag, just cut a small opening in a zip-top bag. Squeeze filling deep into each bun’s cuts. Don’t worry about looking perfect, it all melts together anyway.
- Cutting Strategy:
- Serrated bread knives are king here. Gently saw—not press—making sure to cut about three-quarters of the way in. Go too shallow, you can’t get enough filling in. Too deep, the bun falls apart when you dip it.
First time I made these, I used cold cream cheese and regretted it immediately. It was a pain to mix, and the filling wouldn’t pipe at all. Now I always let it warm up first. My kid loves making slices in the buns and says we’re “making bread flowers.” Even my husband, who’s never been fussed about bread, now hangs out by the oven when these are baking.
Awesome Matchups
You can serve these with just about anything. We love them with saucy Korean beef—those buns soak up everything. On lazy brunch days, I serve them alongside scrambled eggs and it hits just right. Honestly, sometimes I put out a salad, dish up buns, and call that dinner. No one's ever mad about it!
Easy Changes
I’ve mixed things up with these a lot. Try a spoonful of gochujang in your garlic butter for a spicy boost. Chopped green onions or chives in the cream cheese not only taste fresh but look pretty. Around the holidays, I’ll grate in a little orange zest for fun. If Hawaiian buns are out, brioche is a good backup—just toss in another tablespoon of condensed milk for that hint of sweetness.
Advance Prep Perks
Hosting? Make the cream cheese filling the day before and pop it in the fridge in its bag—just let it warm up before using. If you want, you can assemble the buns (not dipped yet), stash them covered in the fridge, and then dip and bake straight from cold. They just need a few more minutes in the oven.
 Save
Save
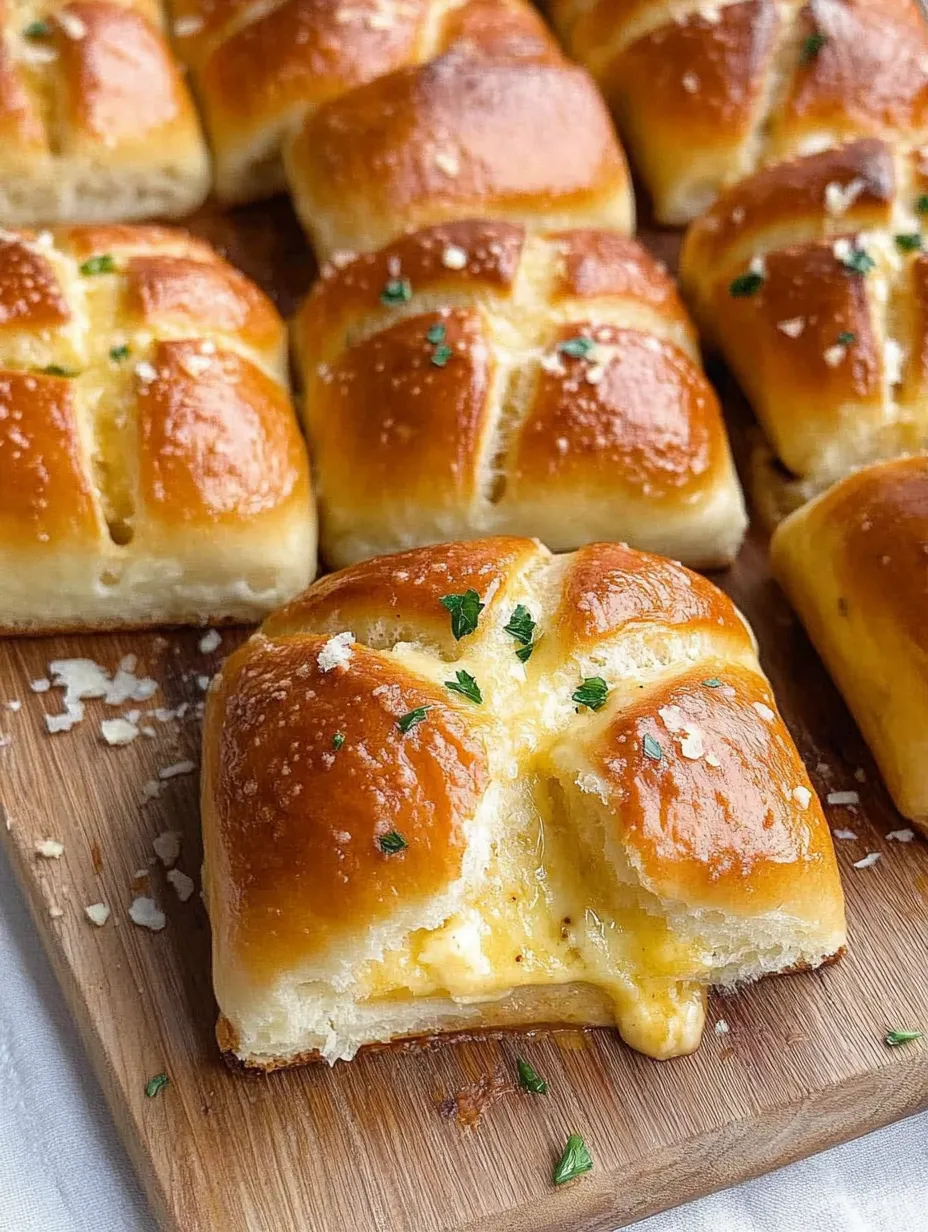
I’ve whipped up these Korean cream cheese garlic buns for everything—weekday dinners, holiday parties, you name it. People always talk about the crazy flavor combo (and go for seconds). My mother-in-law, who swears by her old-school rolls, even asked how to make them last Christmas. That’s the biggest compliment if you ask me. They’re now my no-fail, crowd-pleaser choice when I want to surprise everyone and know there’ll be nothing left by the end.
Recipe FAQs
- → Can I swap Hawaiian rolls for another type of bread?
- Sure! Hawaiian sweet rolls have the perfect sweetness, but brioche or another soft roll would also work. Just consider adding an extra tablespoon of sweetened condensed milk to the filling to keep the same sweet-savory balance.
- → What’s the purpose of drying the rolls before making this?
- Leaving the rolls out to dry slightly helps them soak up the flavorful garlic butter. If in a rush, you can skip this step, though the texture might change a bit. Toasting the rolls lightly is another quick option.
- → Is it possible to make these ahead of time?
- You can prep the cream cheese filling and garlic mixture the day before and chill them. Let the cream cheese soften before using. You can assemble the buns an hour beforehand, but they’re best baked fresh for the best results.
- → What should I do if I want them less garlicky?
- Easy fix! Cut the garlic amount down to 1 tablespoon for a gentler flavor. Roasting the garlic till soft could also work—it’ll tone down the intensity while keeping a sweet, subtle garlic taste.
- → How do I store leftovers properly?
- Keep any extras in a sealed container in the fridge for up to 3 days. To reheat, warm them up in the oven at 300°F for 5-7 minutes. And hey, they’re even tasty straight from the fridge if you’re in a hurry!