
 Save
Save
Turn classic sushi on its head with these bold salmon sushi bites. No rolling, just scoop and bake in muffin tins. Wanna wow your friends or jazz up a weekday meal? These little guys are eye-catching, simple, and full of that crave-able sushi taste, all packed in tidy single servings.
I whipped these up on a whim one dinner party night because I’d promised sushi, but time got away from me. Folks loved them so much they keep asking for these over anything else. These little savory bites are now my go-to starter for almost any occasion!
Tasty Ingredients
- Green onions and sesame seeds: Sprinkle these on top for a burst of color and a bit of crunch
- Optional spicy mayo: Mix up 1/4 cup Kewpie and 1 tablespoon sriracha to drizzle over your sushi cups for a little heat
- Rice wine vinegar: 1 tablespoon, mixed in while the rice is hot so everything sticks the way it should
- Sushi rice: Start with 2/3 cup (uncooked), go for short-grain so you get that classic sushi stickiness
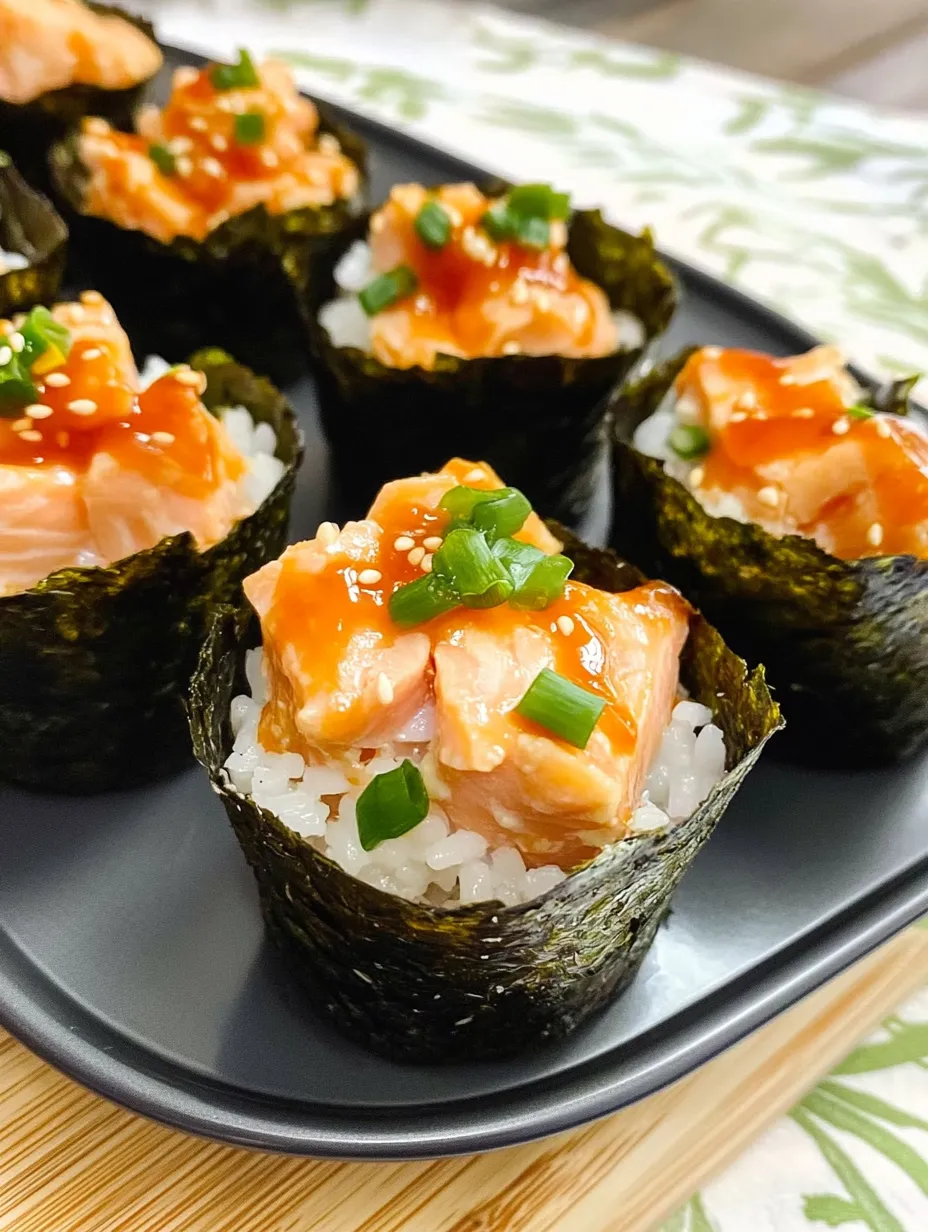
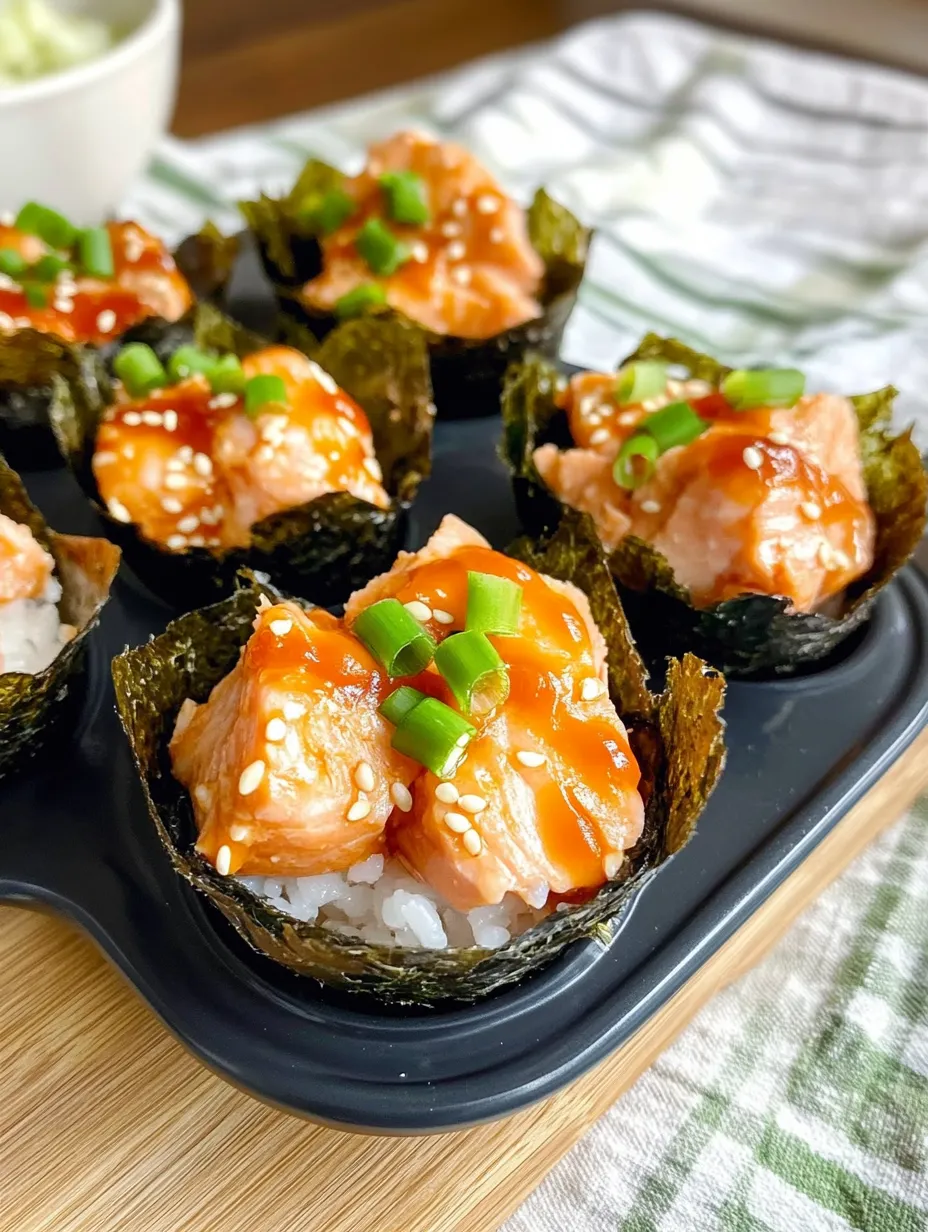
- Nori sheets: You’ll want 3, each cut into 4 squares to make your edible cups
- Soy sauce: Pour in 1 1/2 tablespoons for that salty, deep punch
- Sesame oil: Only a 1/4 teaspoon needed—gives a real fragrant kick
- Sriracha: One tablespoon brings the heat but tone it down or up as you like
- Kewpie mayonnaise: Two tablespoons of this Japanese-style mayo keeps things creamy and a little tangy
- Salmon: One pound, diced small (wild-caught gives the best taste and texture)
Simple How-To Guide
- Garnish and Serve:
- Pull your sushi cups from the oven, pop 'em out, and put them on a serving plate. Squeeze on that spicy mayo and drop on green onions plus sesame seeds. Serve while the nori's still crisp and the filling's warm.
- Bake:
- Slide the loaded muffin pan into your hot oven and bake about 8 or 9 minutes 'til the salmon’s done. For an extra crispy bite, use the broiler for a minute or two—just keep an eye out so they don’t burn.
- Add Salmon:
- Drop around 2 tablespoons of your spicy salmon mix into each rice cup. Fill them up almost to the top since the salmon will shrink a little as it cooks.
- Form Cups:
- Push each nori and rice square into a muffin cup, making sure the nori edges peek above the rim and the rice spreads a bit up the sides to make a little bowl for your filling.
- Assemble Sushi Cups:
- Lay out your nori squares and put about 2 tablespoons of seasoned rice in the middle of each. Press down gently so it stays in the center and holds shape.
- Prepare Spicy Mayo:
- Want spicy mayo? Just stir Kewpie and sriracha together in a little bowl ‘til smooth and all the same color. Squeeze bottle works best, but a spoon is fine too!
- Make Spicy Salmon Mixture:
- Toss the diced salmon with Kewpie, sriracha, soy sauce, and sesame oil in a bowl. Mix it gently so the chunks stay together. Let it soak up those flavors as you hustle with the rest.
- Prepare Rice:
- Cook your rice however the bag says—pot or rice cooker both work. While it’s steamy hot, dump it in a bowl and splash in the vinegar, mixing with a light hand so it doesn’t get mashed. This helps it soak in that tang.
- Preheat Oven:
- While you’re setting up, crank the oven to 400°F. This is just the right heat to cook the salmon through without making it dry, and your nori gets nice and crisp on the edges too.
 Save
Save
Nori sheets really steal the show here. The first time I made these for my friend Keiko, she couldn’t get over how the nori kept its bite and shape. Now she asks for these every single time she’s in town. Perfect little mashup of classic flavors in a new, fun format.
Prep Ahead Ideas
Want to get a jump on things? Prep the rice and salmon mix up to a day before, stash them in the fridge, and do the actual assembly and baking right before you want to eat. Or, bake the entire batch in advance, cool, and keep in the fridge for two days. Warm them at 350°F for five minutes, garnish, and you're good to go.
Easy Ingredient Swaps
These are super flexible for what you’ve got or the way you eat. Skip the salmon and try a mix of diced avocado, carrot, and cucumber in the same sauce for a veggie version. Out of Kewpie? Mix plain mayo with a splash of rice vinegar. Looking for more fiber? Brown rice works in place of sushi rice—just press hard so the cups hold together, since brown rice isn’t as sticky.
Smart Ways to Serve
For parties, arrange these on a platter with little dishes of pickled ginger, wasabi, and tamari or soy for dipping. Hungry for a full meal? Add a bowl of miso soup and maybe a quick cucumber salad. They also rock on an Asian-inspired snack table with potstickers, spring rolls, and edamame. Or let friends top their own cups at a DIY garnish bar so everyone gets what they like.
 Save
Save
Recipe FAQs
- → What kind of salmon works best?
Fresh salmon filets in top condition are your best pick. If you want an authentic taste, go for sushi-grade salmon.
- → Can I swap out the salmon for another type of seafood?
Definitely! You could replace it with tuna, cooked shrimp, or your preferred choice of fish. Modify the spices to fit your selection.
- → How do I stop the nori from getting soggy?
Make sure the salmon mixture and rice aren't too wet. Baking the nori also keeps everything crisp.
- → Can these be made ahead of time?
They're tastiest when fresh. But, if needed, you can prep the rice and salmon early and put them together just before baking.
- → What’s a good substitute for spicy mayo as a topping?
If you'd rather skip the heat, plain mayo or a bit of soy sauce works great. Sweeter options like teriyaki or eel sauce are good too.