
 Save
Save
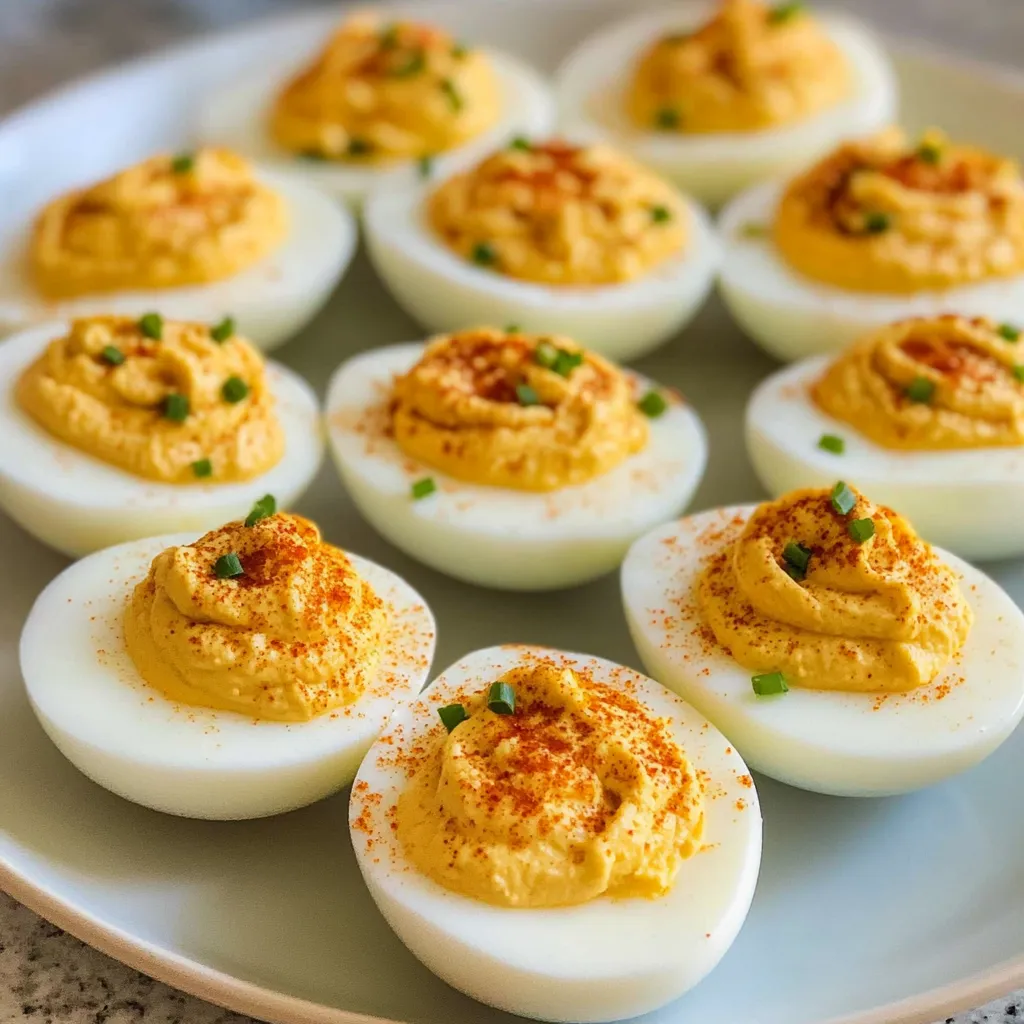
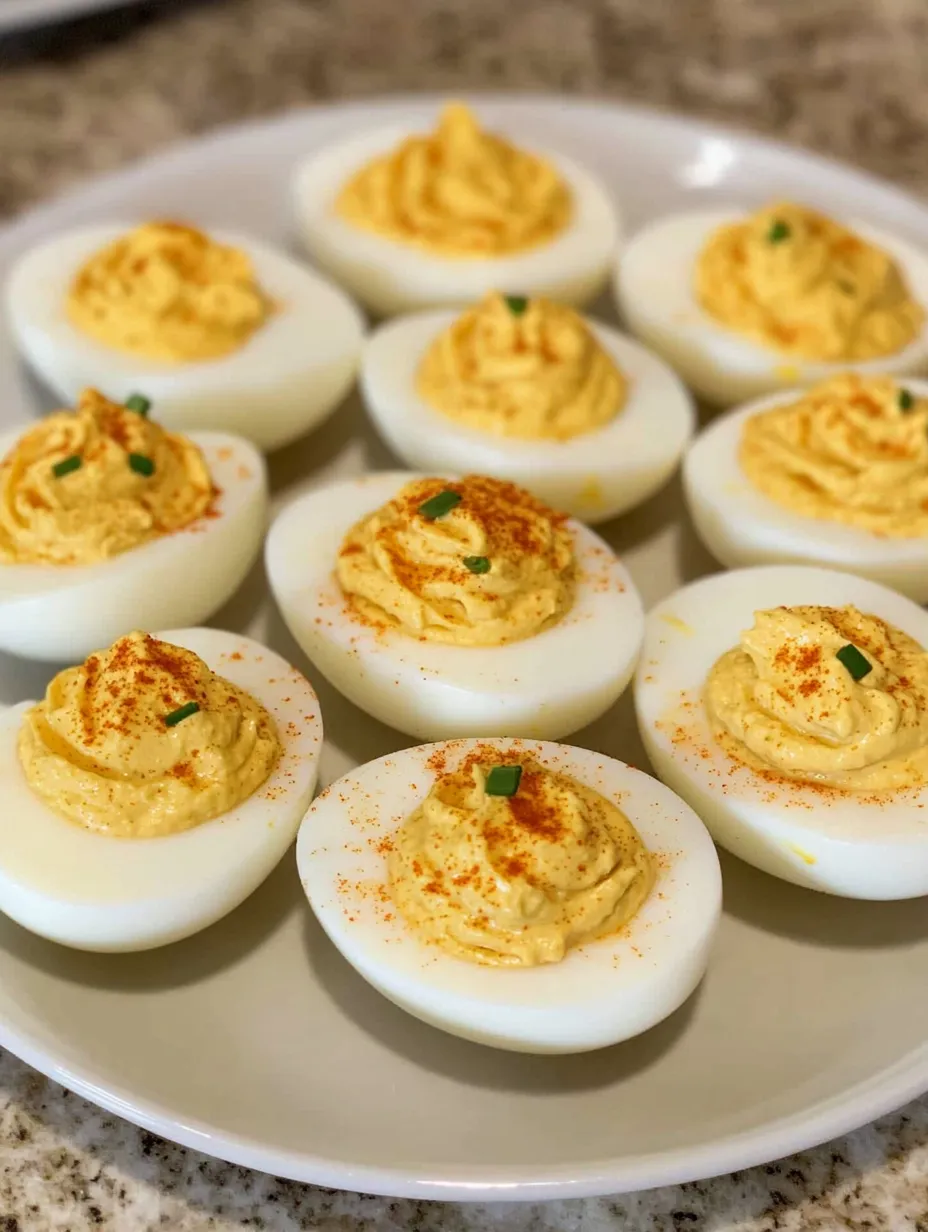
Whenever there's a family get-together, I whip up these classic eggs, and they always vanish in no time. The trick is swapping regular mayo for Miracle Whip—it brings that sweet and tangy vibe you just don't get from mayo alone. The relish? That gives these bites a fun crunch and a flavor burst you won't find in other versions. Folks always bug me for the how-to at potlucks, so I'm finally sharing all my little secrets.
Easter rolled around and my sister-in-law, who says she can't stand eggs, tried one just to be polite. She wound up eating four! She begged me to spill what makes mine stand out—it all comes down to the kick from Miracle Whip plus the pop of relish. If you want that familiar flavor, stick to these two and skip the substitutes.
Tasty Ingredients
- Large eggs: perfect little cases for loading in the filling
- Miracle Whip: creamy with a bright zing—way different from regular mayo
- Yellow mustard: gives that signature color and a punch of flavor
- Sweet relish: brings bursts of sweet and crunchy bites every time
- Apple cider vinegar: pops the flavor and gives things a fresh twist
- Just a bit of sugar: softens the tang and ties everything together
I tried changing it up with Dijon mustard and skipping the relish, but I always go back to this good old combo. Early on I used plain mayo because that's what was in the fridge—turned out okay, not great. Once I switched to Miracle Whip, everything changed. You just can't beat that sweet-tangy taste in these eggs.
 Save
Save
Smart Egg Prep
- Getting eggs ready:
- First up, grab a big bowl, fill it with ice and water for your ice bath—this is your insurance for easy peeling and stopping the cooking. I used to forget this part and ended up with those weird green-ish yolks. Give your eggs plenty of space in the pot—packing 'em in makes them crack easier. A little salt in the water helps keep any cracks from making a mess.
- Cooking slow and easy:
- Drop your eggs in the pot, cover with cold water (about an inch over). Bring it up to a boil on high, but once the water starts rolling, lower the heat so it doesn't get too wild. I use a tea strainer or slotted spoon to lower the eggs—that way, no cracking. As soon as they're all in, let the water gently boil again. Cook them for 14 minutes exactly, so you get set yolks that are still creamy.
- Chilling out:
- As soon as the timer beeps, get those eggs out and into your ice bath ASAP. This trick not only cools them off fast but also loosens the shell for easier peeling. Give them at least 10-15 minutes to hang out in that cold bath. Don't skimp here—warm eggs just don't peel right. When I have time, I leave them in the fridge for an hour to get even chillier.
- Shells off the easy way:
- When the eggs are nice and cold, gently knock them around on your counter to crack the shell, then start peeling from the fat end—that's where the air pocket is. If pieces stick, run them under cold water so the shells slip right off. Double check there's no bits of shell left—crunchy surprises are no fun.
- Getting filling just right:
- Slice your eggs longways with a sharp knife for smooth edges. Pop the yolks into a bowl. Use a fork to smash them up till they're totally smooth—lumps make for a chunky filling. Mix in Miracle Whip, sugar, vinegar, and mustard. Stir until creamy. Toss sweet relish in last—it keeps those bits whole for pops of flavor.
- Making them look great:
- For family meals, I scoop the filling with a spoon. For special events, I pipe the filling using a plastic bag with a corner snipped off or a fancy piping tip. Dust them with paprika for color or add some snipped chives for freshness if you want. Stash finished eggs covered in the fridge until it's time—chilling makes the filling set and taste even better.
My very first time making these eggs was a total mess—I overcooked them, skipped the cold bath, and ended up with yolks that looked sad and grayish, and the peeling part was a nightmare. Now that I've got my steps down, they're spot on every single time. Pro tip: letting eggs sit out to warm up before boiling stops most cracks from happening.
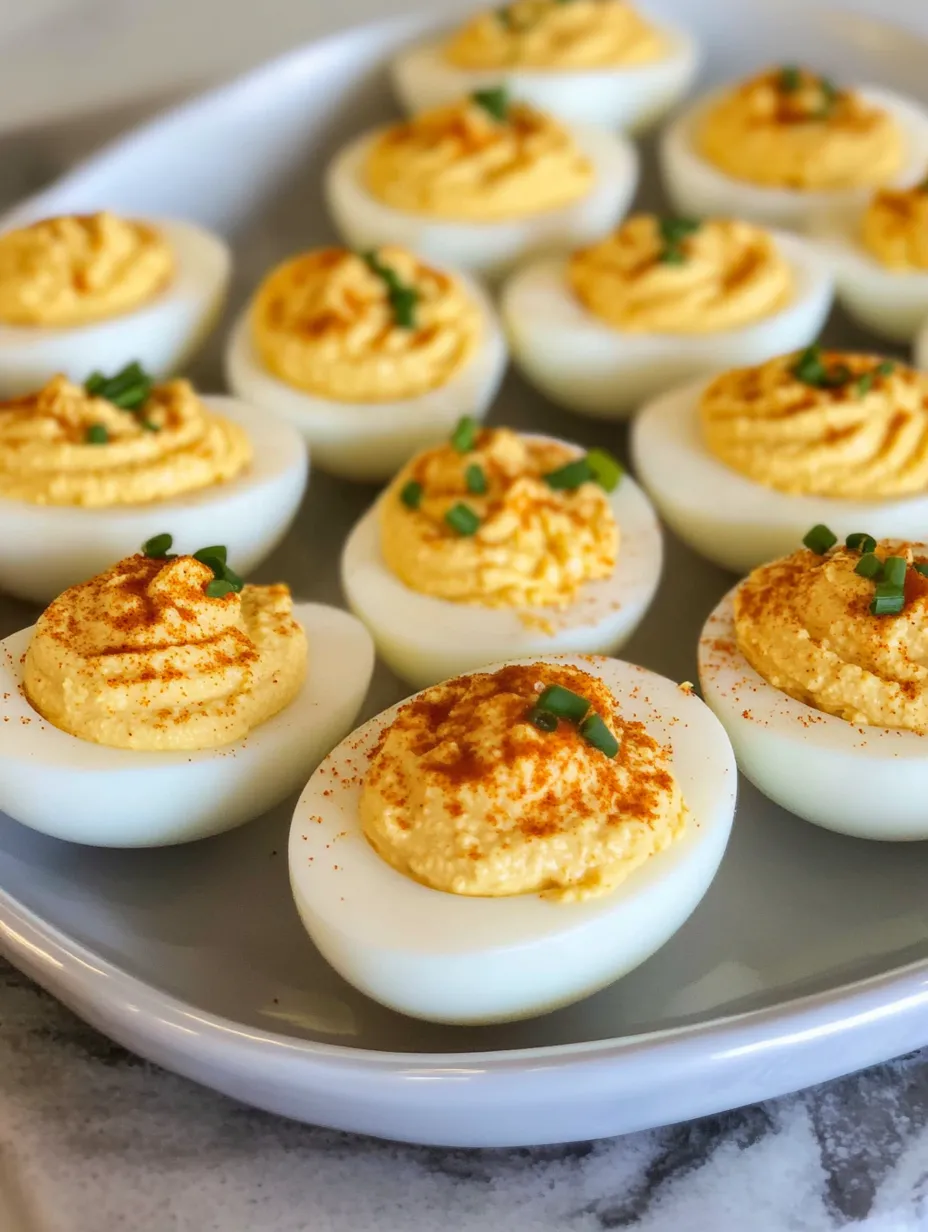
Fun Presentation
If it's just another get-together, I lay these eggs out on a plain plate. For fancier things, I use grandma's special egg platter so they don't slide around. No egg plate? Toss them on some salad leaves—they'll look great and stay put. I always make extras since someone (usually my husband) nabs a couple before we serve.
 Save
Save
Creative Twists
Want some zip? Splash in a little hot sauce or a pinch of cayenne. Festive times call for a smidge of horseradish in the mix. If you wanna get fancy, top with crispy bacon or an olive. For a lighter version, you can mix in Greek yogurt, but the all-Miracle Whip version is still my top pick. My kiddo loves a dash of dill for a fresh, herby taste.
I've made these so many times, I usually eyeball everything instead of measuring. But I've listed out the measurements for you here—so you'll nail that perfect balance that gets these eggs gobbled up fast every time. They're straightforward, no-fuss, and hit the spot every single time!
Recipe FAQs
- → Can these be prepped the day before?
- Totally! Cover them and store them in the fridge up to a day early. Just pull them out when you’re ready to dig in.
- → Why pick Miracle Whip over mayo?
- It’s sweeter and a little tangy, which gives the eggs a fresh flavor twist. But if you like mayo better, swap it in!
- → How do I keep eggs from being hard to peel?
- Older eggs (at least a week) peel easier. After boiling, toss them in ice water right away, and start peeling from the wider end.
- → What’s the trick to centered yolks?
- Set eggs on their sides in the carton for a day before you boil. This helps the yolks stay put in the middle.
- → Can I mix in other flavors?
- Of course! Bacon crumbles, chopped jalapeños, or even a little hot sauce will kick things up.
- → How do I carry these to events without a mess?
- Use a deviled egg container or pack them in a snug dish with damp paper towels underneath. Save the toppings for when you get there!