
 Save
Save
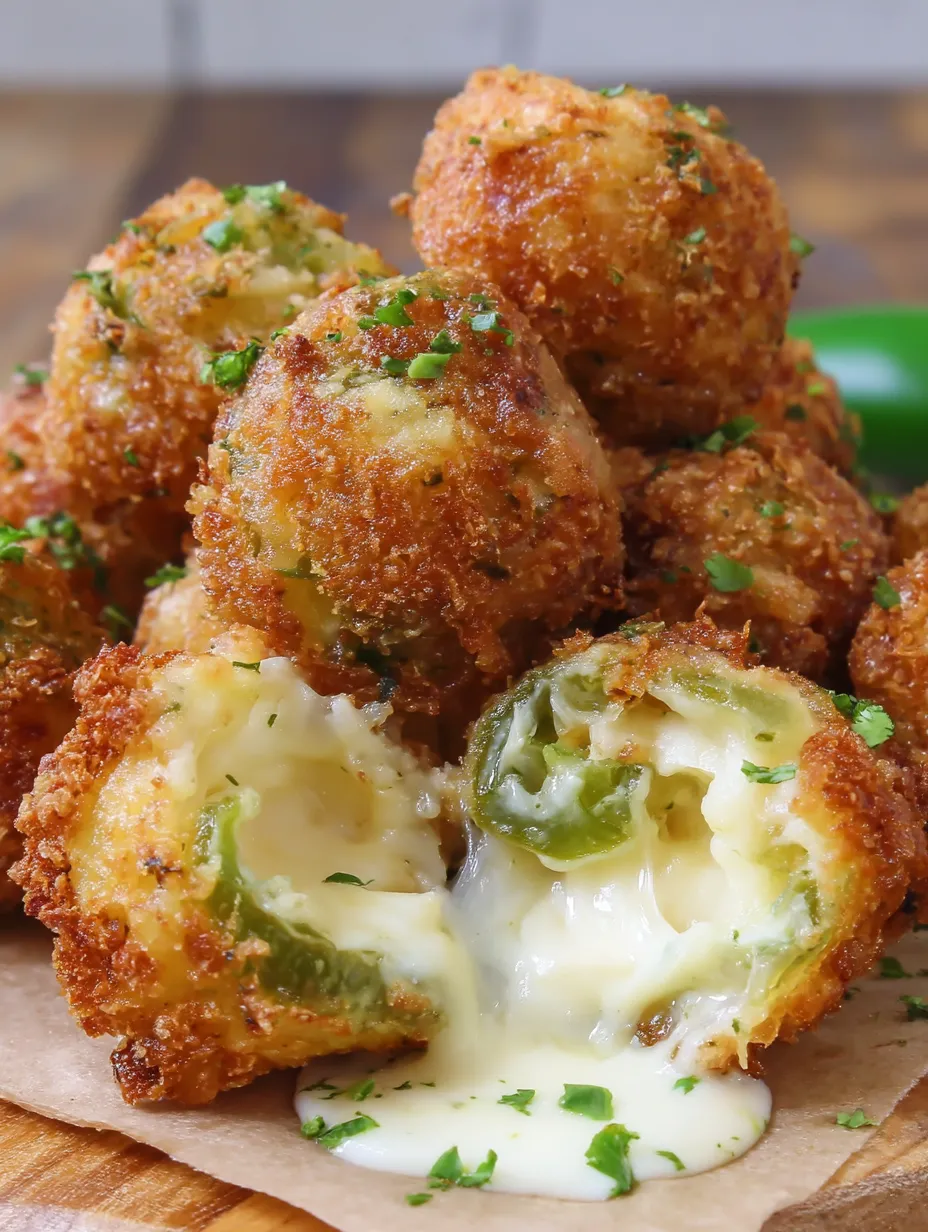
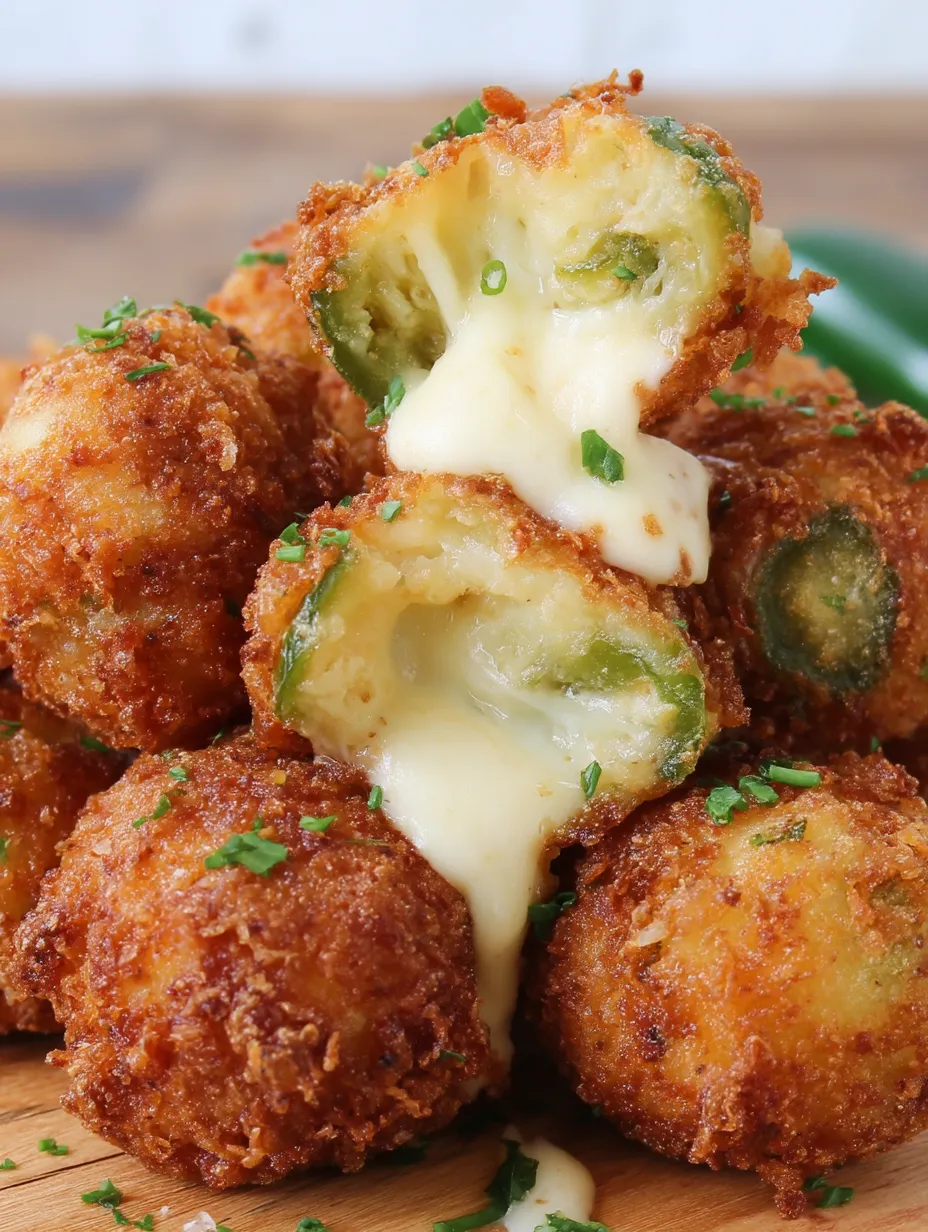
These cheesy bites came about when I wanted to whip up those mouthwatering appetizers my gang loves from Texas Roadhouse. We always rack up a big bill there, so I thought I'd figure it out at home. The trick? Chill that cheesy filling until it's just firm enough to shape, but not rock solid—otherwise, you won't get that gooey center. Every bite is pure bliss, with extra crispy crumbs on the outside and hot, melty, spicy cheese hiding inside. Trust me, they'll vanish from the plate before you know it!
My brother showed up at his Super Bowl party with these, thinking he'd have leftovers. Nope—not even close. They disappeared before halftime. Folks kept hunting down who made "those cheesy bites" and snapped pics so they could try making them, too. Even my mother-in-law, who usually avoids any heat, went back for seconds and thirds and called them "really good."
Tasty Ingredients
- Pepper jack cheese bricks - I always grate it at home since bagged shredded cheese doesn't hold together as well
- Fresh jalapeños - Toss in as many as you like, but leaving them out makes it kind of bland
- Breading setup - You'll need flour, an egg and milk blend, and your favorite seasoned breadcrumbs
- Spice mix - A dash of garlic powder, paprika, and cayenne gives it a real kick
- Deep fry oil - Enough to cover the bites so they get cooked all over evenly
 Save
Save
Simple Steps to Make Them
- Getting Everything Ready
- Grate the pepper jack as chunky or fine as you like. Chop your jalapeños super small. Remove seeds if you’re not into spicy, or keep them in if you want extra fire. Mix those together so you get peppers spread everywhere in the cheese.
- Shape the Bites
- Grab some of the cheese mix and squeeze tight between your hands to make balls about an inch and a half across. Really press them together, or they'll fall apart in the fryer. Stick them on a parchment covered pan.
- Chill Before Cooking
- Slide that pan into the freezer for half an hour. Letting them firm up matters—a lot—so they don’t end up melting away. While they’re chilling, start heating your oil up to 350 and get your bowls lined up for breading.
- Breading Line
- Line up three shallow bowls. Put flour in one, beat milk with egg in the next, and combine breadcrumbs, paprika, garlic powder, and cayenne in the last one. That’s what makes the coating extra tasty.
- Bread Each Ball
- When they're nice and cold, roll each ball in flour, then dunk in the egg mix, then roll around in seasoned breadcrumbs. Gently press the coating on so it sticks, then put them back on the pan.
- Time to Fry
- Drop just a few in the oil at a time so you don't crowd them. Fry at 350 degrees for three or four minutes till they're nicely crisp and golden. Don’t mess with the oil temp—too hot, they burn. Too cool, they go soggy.
- Ready to Eat
- Take them out with a slotted spoon and let them rest on paper towels briefly. Eat right away for that melty center and crunchy shell! Pair with your go-to dipping sauce like ranch, marinara, or anything else you like.
I learned the hard way: not freezing long enough led to the cheese running right out and leaving a sad shell behind. Now, I always make sure they’re well-chilled before frying. Plus, a thermometer changed my whole frying game—once I wrecked a batch with wild oil temps, I never went without one again.
Tasty Match-Ups
They're awesome as party starters with sides of ranch, blue cheese dressing, or any marinara. Grab a cold beer or sweet tea to kill the heat from the jalapeños. Put these out with wings, potato skins, or mozzarella sticks and you've got a killer snack tray.
Fun Ways to Switch It Up
Use a sharp cheddar and some cream cheese for a richer bite. Or mix in bacon bits to the filling—that's always a hit. Love serious spice? Swap in serrano chiles, or tip in a little hot sauce with your cheese. Changing up the seasoning in the crumbs makes every batch a new treat.
How to Save Extras
They’re at their very best when hot and fresh, but you can prep up to the breading stage and freeze. Fry them from frozen and just add one more minute. Any fried leftovers? Heat them in a 400 oven for 5 minutes to crisp back up. Still tasty, just not quite the same as the first go.
 Save
Save
These made-at-home rattlesnake bites are my go-to magic trick for winning over a crowd. They hit that perfect combo: crisp, cheesy, and with just enough spice to keep things fun. Once you try the method a couple times it’s actually really easy. I’m always amazed—sometimes the most impressive snack for a crowd is something super simple and budget-friendly!
Recipe FAQs
- → Why is freezing the balls before frying necessary?
- It’s the trick to keeping them together! Without freezing, the cheese will melt too fast in the hot oil and you'll have a mess instead of a snack.
- → Is baking a good alternative to frying?
- It’s possible to bake them at 400°F for 15-20 minutes, although you’ll lose that deep, crunchy texture. Frying really makes them shine!
- → What dips go best with these?
- Classic ranch works great, though marinara, spicy mayo, and sour cream dips also pair nicely with the spicy cheese.
- → Can I prepare them ahead of time?
- Yes! Bread them and stash them in the freezer for up to a month. When you're ready, fry them straight from frozen and add a couple extra minutes of cooking time.
- → How can I tell when they’re fried to perfection?
- They’ll be golden and float to the top of the oil. When you cut into one, cheesy goodness should be oozing out!