
 Save
Save
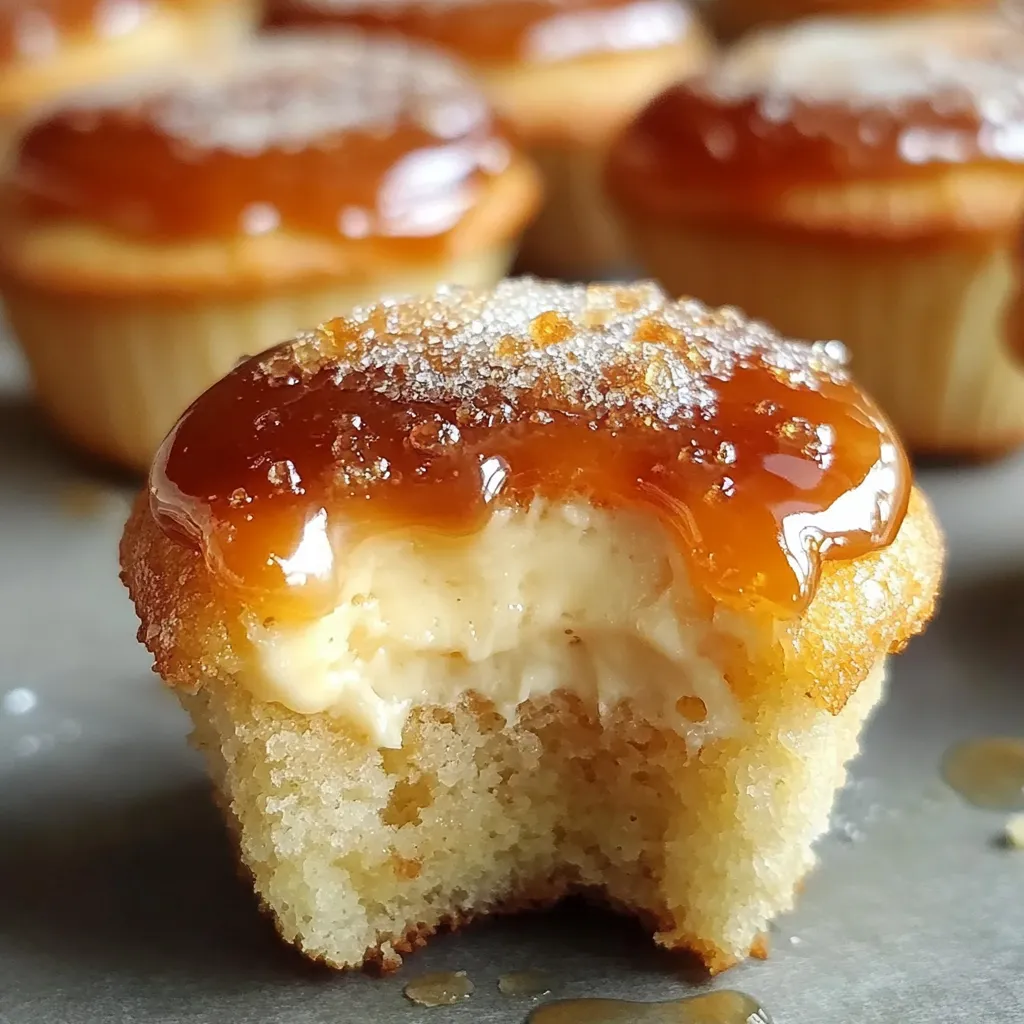
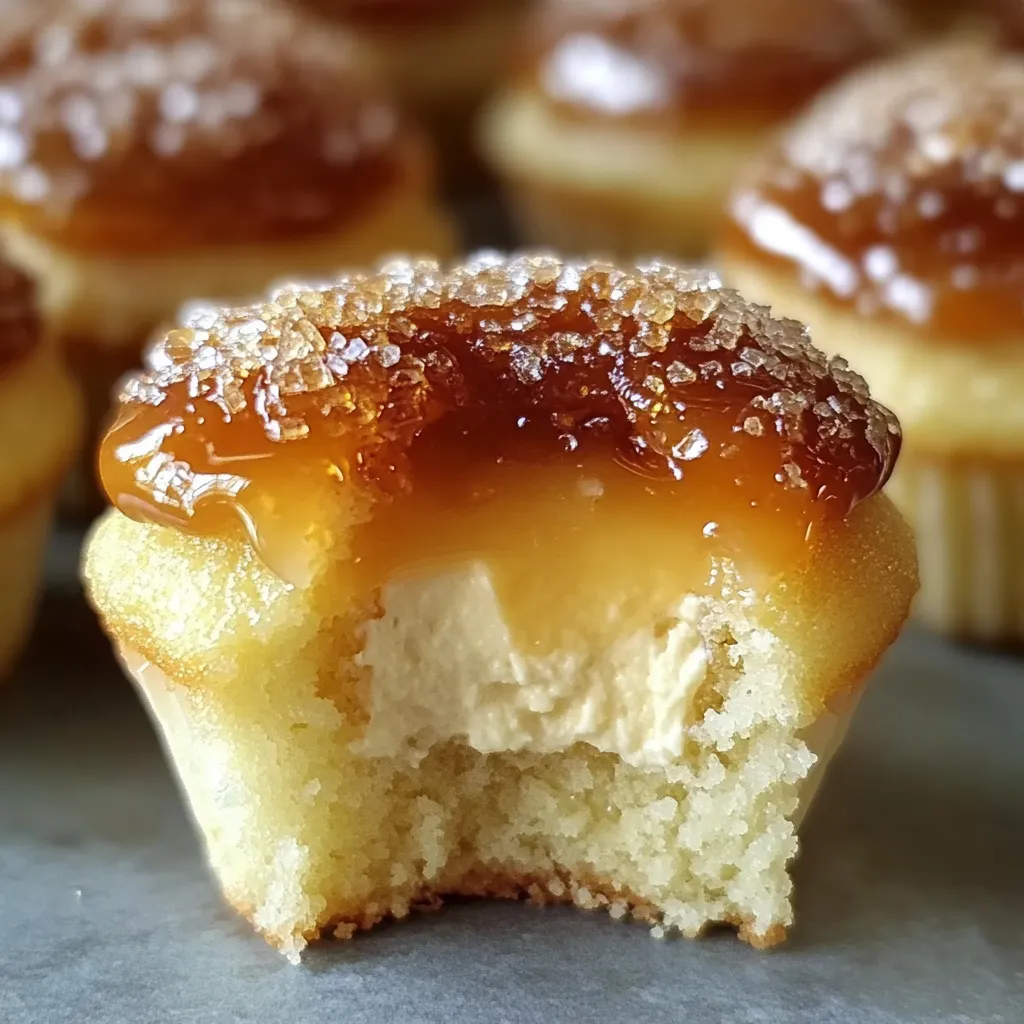
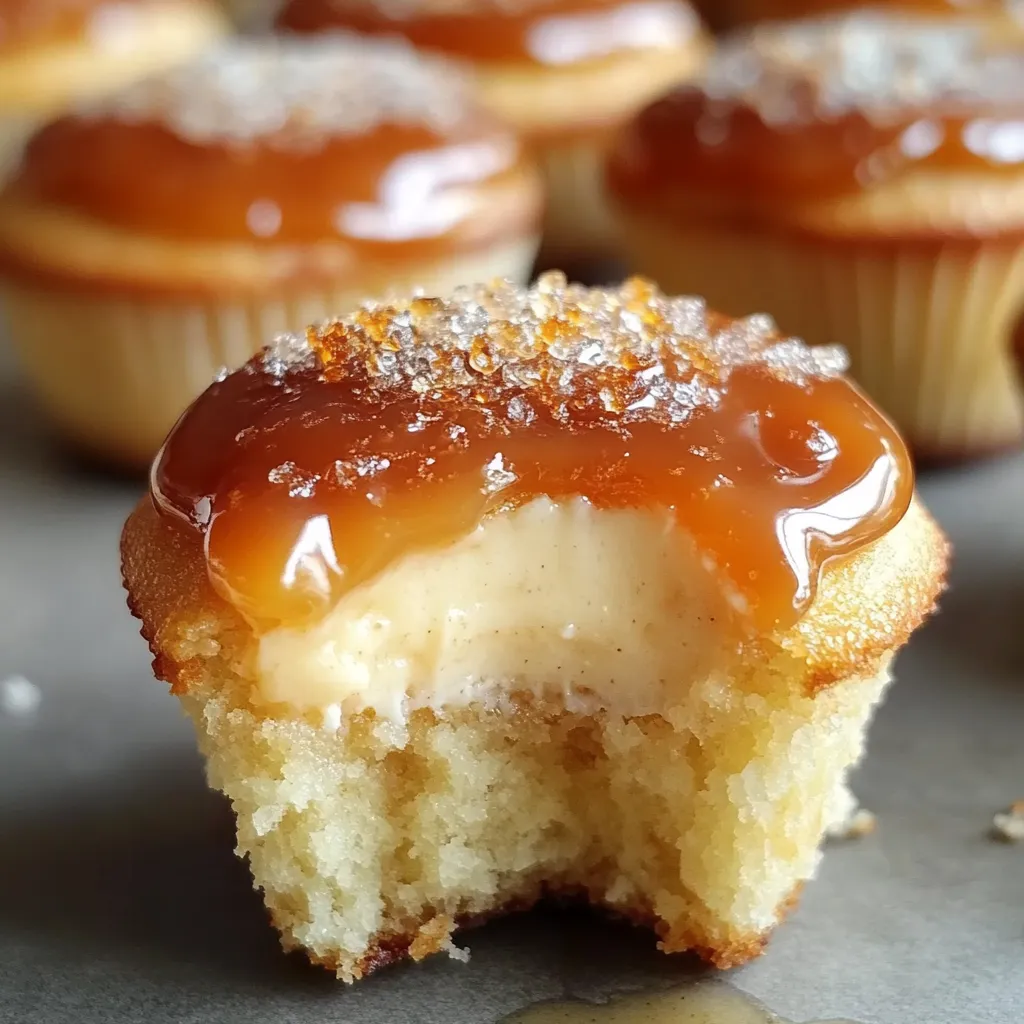
These treats mash up two classic sweets—crème brûlée and cupcakes—in tiny, craveable form. They've got a layer of buttery graham crust on the bottom, dreamy vanilla-speckled cheesecake in the middle, and a crisp sugar shell on top that cracks apart with every bite. You get this killer combo of super smooth filling inside and caramel crunch on top that you'll want to eat again and again. I made them for my sister's engagement bash because she couldn't pick between the two desserts. People haven't stopped asking for them since.
The first time I shared these at a dinner get-together, even the pickiest eater couldn't resist—after just one try, he shouted, "This is what heaven tastes like." Nothing beats those little bursts of vanilla bean throughout the creamy layer. And watching everyone break into the crackly top always gets the table talking and laughing together.
Irresistible Ingredients
- Whole Vanilla Beans: Give tons of real-deal taste and cool little specks in every bite. Find ones that feel plump and a little oily for big flavor.
- Sour Cream: Balances out the sweetness and makes things silky. Go for full-fat for the best results.
- Fresh Heavy Cream: This makes everything extra creamy and lush. You need it for that true crème brûlée vibe.
- Cream Cheese: Rich, tangy, and super smooth—it’s the base for the cheesecake layer. Let it come to room temp and always pick full-fat.
- Granulated Sugar: Needed for both the creamy filling and the crunchy top. Use finer sugar inside and regular for the brûlée finish.
- Quality Eggs: Give structure, help it set, and make the filling velvety smooth. Farm-fresh with golden yolks look and taste best.
- Graham Crackers: The classic bottom layer with a little honey flavor and perfect crunch. Old-school honey grahams deliver the real taste.
How to Bake Them
- Add Crunchy Base:
- Fire up your oven to 325°F so you don’t overbake later. Drop cupcake liners (go with something plain) into a muffin tin. Mix melted butter, a touch of sugar, and crushed grahams until the mix feels like wet sand. Scoop out a spoonful to each cup and use a flat thing (like a shot glass bottom) to pack it down tight—don’t skip this or your crust will fall apart.
- Make Creamy Middle:
- Soften your cream cheese and beat it until smooth in a big bowl; this gets rid of lumps right away. Gradually beat in sugar, then crack in the eggs one at a time and make sure each is mixed before you add the next. Stir in sour cream and heavy cream to take it over the top. Slice open a vanilla bean, scrape out the seeds, and toss them plus a splash of vanilla in. These seeds look fancy and taste even better.
- Bake Softly:
- Fill the crusts up about three-fourths with the batter. Gently tap the pan on your counter to pop any air bubbles—less cracking later. Bake 20-25 minutes until the outsides look set and the middles still jiggle slightly. That little wobble is what you want! Let them cool to room temperature first, then chill for a couple hours (or overnight); this keeps the tops dry and the flavors perfect.
- Top with Sugar Crunch:
- Only right before you eat, sprinkle each cupcake with an even layer of sugar—don’t go overboard or it’ll taste burnt. Take a kitchen torch, hold it about two inches above, and move in slow circles until the sugar melts and goes golden. Give it two minutes to harden, then crack through and dig in. Torch just before serving so you get that perfect break between crispy shell and creamy cheesecake.
 Save
Save
The first time I tried chilling them too soon, I ended up with soggy cheesecakes and failed sugar tops. My pastry chef buddy set me straight: cool slowly, or nothing sets right! Now, it's a family tradition to watch the torching just before dessert. My daughter even helps coat the tops with sugar, and everyone loves grabbing one for birthdays or anniversaries. It’s a new favorite tradition at our house.
Serving Magic
They look great all by themselves, but you can take them up a notch. Set them out on a cake stand with fresh berries and some mint for a party—everyone will take notice, and the berries add a chill, tangy twist.
For a fancier meal, serve each cupcake on its own little plate. Dust the plate with powdered sugar and pop on a few raspberries or blackberries for color. A tiny mint sprig on the side, or even an edible flower, brings a touch of flair and freshness.
Fun Twists
Espresso Style: For a coffee buzz, mix in a tablespoon of espresso powder to the batter and swap coffee extract for the vanilla. Use chocolate graham crackers as the base and dust some cocoa over the top after you torch the sugar. It goes great with after-dinner coffee.
Zesty Citrus: Want something brighter? Toss in a tablespoon of orange or lemon zest to your mix. Use a splash of lemon juice or a drop of orange extract. After bruleeing, decorate with little strips of candied citrus peel. It’s awesome for a sunny brunch or picnic.
Salted Caramel Upgrade: Spoon a dollop of thick caramel in the center before baking. Once torched, sprinkle with fancy sea salt like fleur de sel. You get sweet with salty and loads of caramel flavor for a next-level treat.
Keep It Fresh
Store Like a Pro: To keep them in top form, stick them in a container with a lid in the fridge. Single layer works best. They're good for up to three days, though the tops will slowly lose that hard crackle as they chill longer.
Get Ahead of the Game: You can bake the cupcake part up to two days ahead—just cover and chill. Wait to brûlée them until you’re ready to serve so the sugar stays crisp. Makes party time easy and breezy.
Freeze 'Em: Don’t brûlée yet, but you can freeze the plain cheesecakes for a month. Wrap each up snug in plastic, then freeze. Thaw overnight in the fridge, let them warm up a bit, then brûlée and eat.
 Save
Save
What I love most isn't even the taste—it's the memories these cupcakes spark every time. The torching turns dessert into a mini show, making any meal feel special. They started as a way to compromise, but now they're something everyone expects at my house for birthdays or big dinners. Fancy yet super fun to eat, these cupcakes totally steal the spotlight at both casual hangouts and dressy dinners. It's wild how a simple cupcake, with some French vibes, can suddenly feel pretty magical.
Recipe FAQs
- → Can I make these without needing a kitchen torch?
- Absolutely! Instead, use your broiler. Put the cooled treats on a baking tray, sprinkle sugar on top, and broil for no longer than a minute or two. Keep an eye on them—burning happens fast! The torch gives better results, but this still works.
- → Can I swap out vanilla beans for extract?
- Sure, just double the vanilla extract to 2 teaspoons. While extract works fine, beans give a stronger flavor and those pretty black flecks that make it extra special.
- → Why did the tops of my cheesecakes crack?
- Cracks usually happen if you overbeat the batter, bake it too long, or cool it too fast. Just mix everything until combined, take them out when the centers are still a little wobbly, and let them cool slowly.
- → How early can I prepare these treats?
- You can get the cheesecake part ready 2–3 days ahead. Keep them cold and covered while waiting. But don't torch the sugar topping until you're ready to serve. That way, it's fresh and crunchy!
- → Can you freeze these for later?
- Yep, after they're baked and cooled (skip the sugar topping), wrap each one in plastic and foil. Freeze for up to 2 months. When you're ready, thaw in the fridge overnight and brûlée the tops right before serving.