
 Save
Save
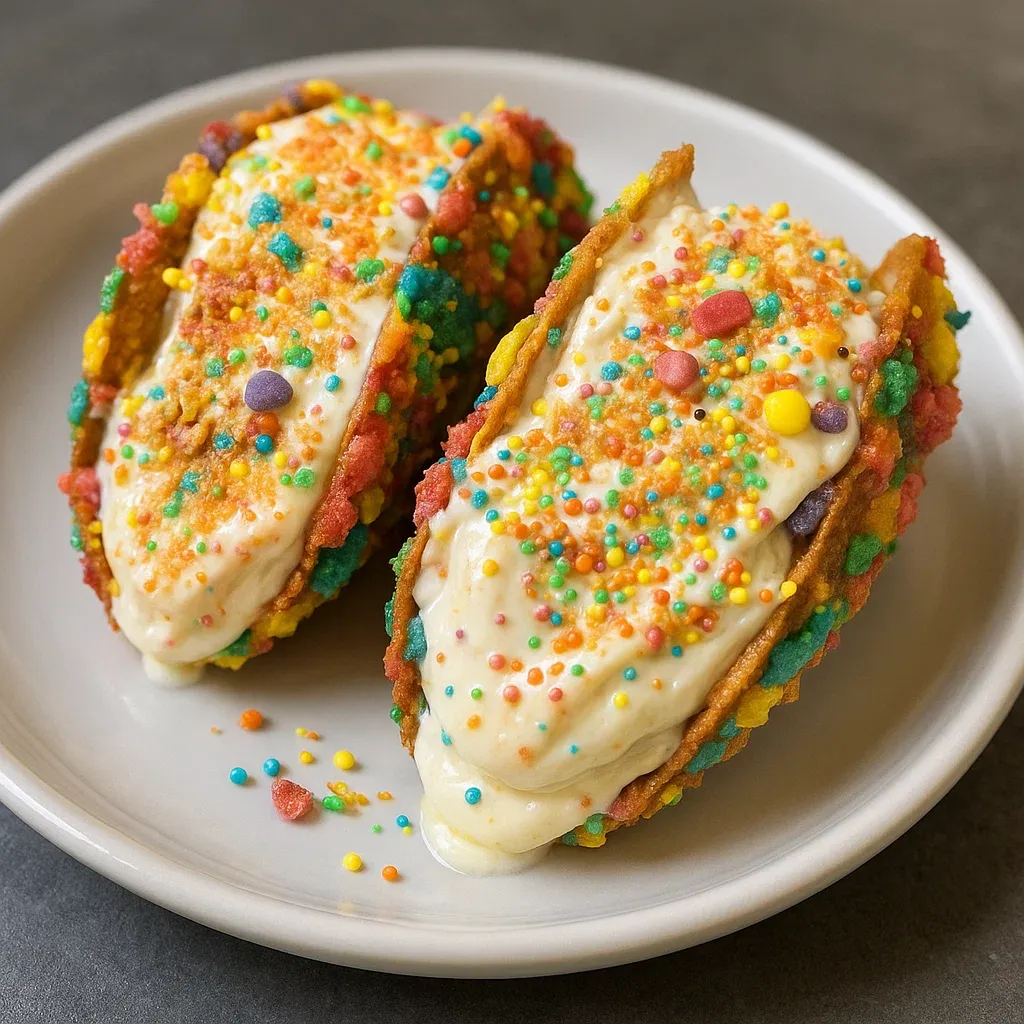
These fruity cereal cheesecake pockets turn ordinary breakfast cereal into a mind-blowing sweet treat. The mix of bright, crunchy shells stuffed with smooth cheesecake makes a fun twist that both youngsters and grown-ups can't get enough of.
I whipped up these colorful goodies for my niece's summer birthday last year. The kids couldn't take their eyes off the bright colors, and surprisingly, the adults kept coming back for more. They've now become our go-to family dessert whenever we're celebrating something special.
What You'll Need
- 3 cups bright fruity cereal: Gives that eye-popping crunch and sweet taste for your shells
- 1/2 cup melted unsalted butter: Helps stick the cereal pieces together and adds a rich flavor
- 8 oz softened cream cheese: Makes the filling super smooth - go with full fat for the best results
- 1/2 cup sifted powdered sugar: Adds sweetness without any graininess - don't skip the sifting step
- 1 tsp pure vanilla extract: Brings a warm, comforting note to the overall taste
- 1 cup whipped cream: Makes your filling light and fluffy, almost like eating a cloud
- Extra fruity cereal for topping: Adds more crunch and makes them look amazing
How To Make Them
- Mix Up Your Shell Base:
- Combine your colorful cereal with the melted butter until every piece gets a good coating. Make sure your butter's warm but not hot enough to melt the cereal bits. This mix will create taco shells that have just the right amount of crunch and won't fall apart.
- Form Your Taco Shells:
- Push the mixture into taco-shaped forms or flip over a muffin tin for an easy hack. Push down firmly so they'll stay together. Stick them in the fridge for at least 30 minutes - this cooling time makes sure your shells won't break when you fill them later.
- Make Your Creamy Filling:
- Take your soft cream cheese and beat it with an electric mixer for about 2 minutes until it's fluffy and smooth. Slowly add in your powdered sugar and vanilla, mixing between each addition. Keep going until everything looks silky with no lumps at all.
- Make It Fluffy:
- Gently fold your whipped cream into the cream cheese mix. Start with just a third of the whipped cream to lighten things up, then add the rest. Use a gentle figure-eight motion with your spatula to keep all those air bubbles that make the filling so light and mousse-like.
- Put Everything Together:
- Take your hardened shells from the fridge and fill each one with plenty of the cheesecake mixture. You can use a piping bag for a fancy look or just spoon it in for something more casual.
- Add The Finishing Touch:
- Scatter some extra cereal on top, pushing them slightly into the filling so they stick. Eat them right away for the best crunch-to-cream contrast, or chill them for up to an hour if you prefer the filling a bit firmer.
 Save
Save
The vanilla extract really makes this dish special. It might seem like a small thing, but it works magic by connecting the tangy cream cheese with the sweet cereal flavors. My grandkids always argue about who gets to sprinkle the extra cereal on top - it's become a special family moment we all look forward to.
Keeping Them Fresh
You can keep these treats in your fridge for up to three days, though the shells will get softer as time passes. For the best results, store them in one layer in a sealed container, with parchment paper between layers if you need to stack them. If you're planning ahead, keep the shells and filling separate in the fridge until you're ready to put them together just before serving.
What To Serve With Them
These bright treats look great next to fresh berries which add nice color contrast and tasty flavors. For fancy occasions, add a small scoop of vanilla ice cream or drizzle some white chocolate over them. They also go great with colorful drinks like strawberry lemonade for the kids or some bubbly pink wine for the adults at parties.
Fixing Common Problems
If your shells break apart too easily, you probably need more butter or didn't press them firmly enough when shaping them. Just add more melted butter, a teaspoon at a time, until the mix sticks together when pressed. If your filling turns out too runny, check that your cream cheese was soft enough and your whipped cream was beaten until it formed stiff peaks before mixing. Putting the finished tacos in the fridge for 30 minutes can help firm up filling that's too soft.
 Save
Save
Recipe FAQs
- → What’s the trick to stable cereal shells?
Make sure every piece of cereal is completely coated in butter, then press firmly into the molds. Chill them for at least half an hour to get them firm and sturdy.
- → Can I tweak the filling to try new flavors?
Absolutely! Add some zesty citrus, a splash of fruit puree, or even a dash of extract to change up the taste.
- → How can this dessert work for vegans?
Switch out cream cheese and whipped cream for plant-based substitutes. Use a non-dairy butter alternative for the cereal shells too.
- → Is it possible to make these ahead of time?
Yes! Prep your cereal shells in advance and keep them sealed up in a container. Just add the filling when you're ready to serve.
- → Got ideas for other fun toppings?
Try a sprinkle of crushed cookies, chopped nuts, or even colorful candy. A drizzle of melted chocolate is always a crowd-pleaser too.