
 Save
Save
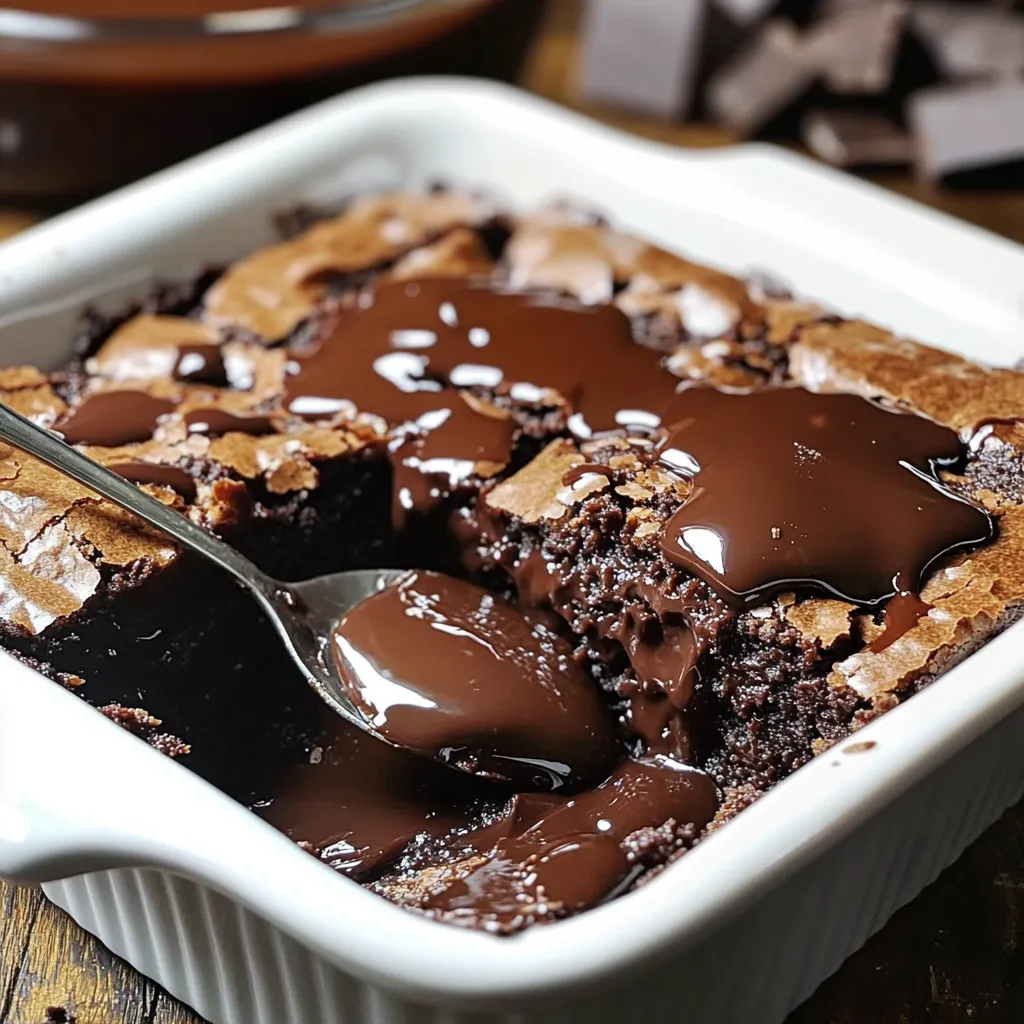
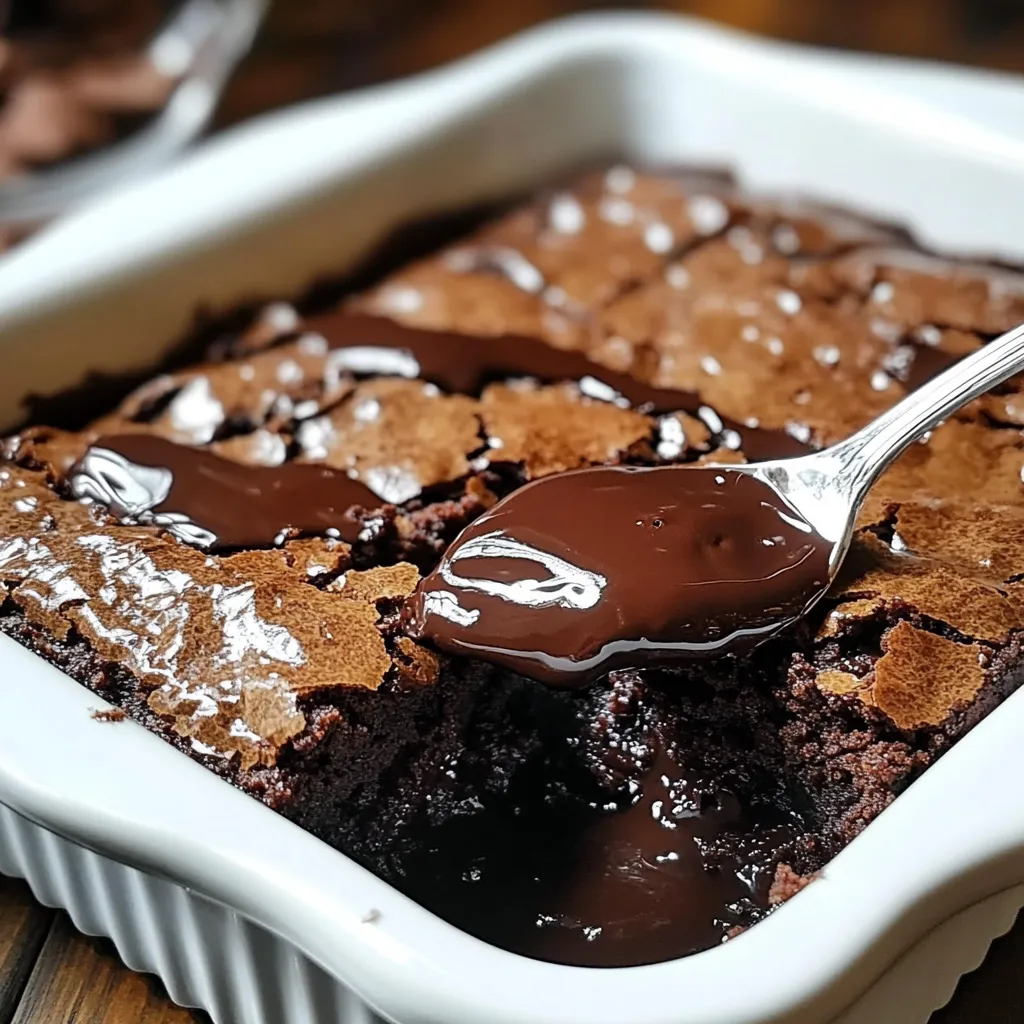
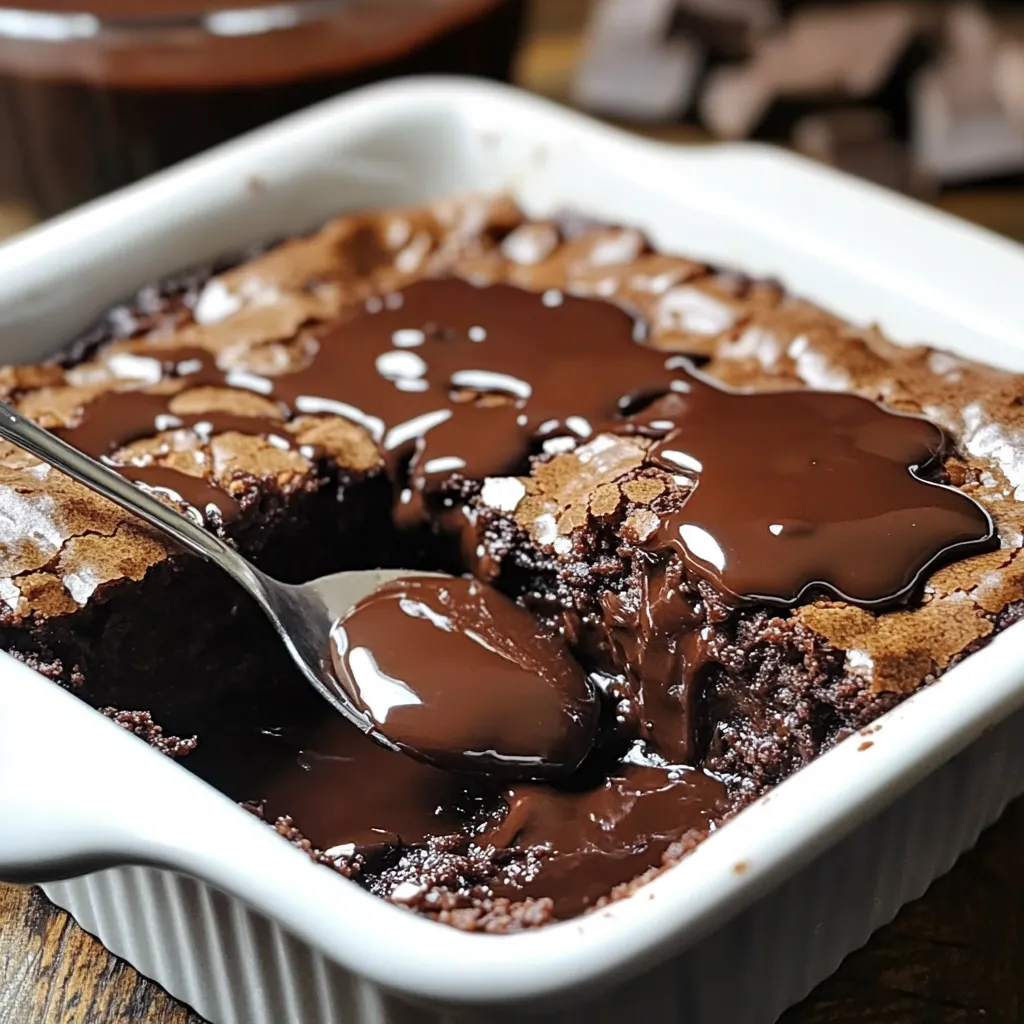
Melt-in-your-mouth chocolate turns into something truly special, thanks to this easygoing Southern classic. You've got a decadent combo here: light, fluffy topping with rich, gooey chocolate sauce underneath—no swirling or fancy tools needed. Just classic ingredients and a fuss-free approach, which is exactly how folks down South like to bake up crowd-pleasers that everyone wants seconds of.
The first night I brought this to a block party, I got surrounded by folks wanting the secret. They couldn’t believe how simple it was—way easier than making brownies from a mix! Now I’m always the chocolate cobbler person at potlucks, and I never bring home leftovers.
Irresistible Ingredients
- Boiling water: Starts the magic, turning dry stuff on top into warm chocolate goo
- Vanilla extract: Makes everything smell dreamy and dials up the cocoa notes
- Milk: Moistens your batter and adds that nice golden color
- Baking powder: Fluffs everything up so it isn’t too heavy
- All-purpose flour: Gives it shape and lightness, as long as you measure with care
- Unsweetened cocoa powder: Brings rich chocolate taste, keeping sweetness just right
- Granulated sugar: Sweetens and helps form that caramelized top
- Unsalted butter: Lays down a buttery base that you control for saltiness
If you've got dark cocoa powder on hand, use it for a bolder, just-sweet-enough flavor that really stands out. Regular cocoa is fine, but the extra depth from the dark stuff makes this dish more special with zero extra hassle.
Simple Steps
- Final Touches Before Serving
- Spoon the warm cobbler into bowls, making sure each person gets gooey sauce and cake on top. Add a scoop of vanilla ice cream—it’ll melt a bit and taste incredible with the hot chocolate underneath.
- Time to Bake
- Slide your dish into that hot oven and bake for about 35–40 minutes. Check that the top looks set but is still a little soft in the middle—if it wiggles, that’s perfect. Let it chill for about 15 minutes so you don’t burn your tongue and everything thickens up a bit.
- Let the Water Work Its Magic
- Boil some water and carefully pour it all over the sugar-cocoa topping—don’t stir, no matter how much you want to. Trust that everything separates just right in the oven thanks to heat and density.
- Add the Sweet Topper
- Mix up the extra sugar and cocoa in a fresh bowl, then shake it evenly across the batter. You want everything covered for proper chocolatey goodness.
- Spread the Batter
- Pour the batter over your melted butter in the dish—just ease it on and don’t mix those layers together. It’ll look like a mess, but that’s what you want.
- Melt Butter in the Oven
- Get your oven going at 350°F. Toss the butter into your baking dish and let it melt while the oven heats. Pull the dish out when the butter’s fully melted—don’t wait for it to brown.
 Save
Save
My grandma said you should gently poke the middle to check if it’s done. The top ought to feel set but still bounce back because it’s jiggly underneath. This trick works better than a timer—just like the old-school cooks did it.
Tasty Combos
Want to make it extra special? Top with some whipped cream and a splash of bourbon for something grown-up. Spoon on some tart berries on the side for a bright pop. You can even pour warm caramel over the top if you’re feeling fancy for a fun twist.
This dessert fits almost anywhere. Dish it into cute bowls with a fresh mint sprig for fancier gatherings. Or keep things cozy and serve from the baking pan for Sunday supper. If you need to bring it somewhere, pack it in a warmed container to keep it perfect until dessert time. Every version keeps the cozy vibe no matter what.
Creative Twists
Tweak it your way for a custom treat. Stir a teaspoon of espresso powder into the dry mix for more depth—no coffee flavor, just extra chocolatey. Toss in half a cup of toasted pecans for Southern crunch. Or grate some orange peel into the butter to brighten the whole thing up.
It’s easy to swap flavors and still nail the method every time. Want a Mexican chocolate spin? Add some cinnamon and a dash of cayenne to your dry stuff. Feeling minty? Switch part of the vanilla with peppermint extract. You can go from milk chocolate to extra dark, based on if you like it sweeter or more intense.
Storing Tips
Want to keep leftovers tasting great? Cover them on the counter for up to two days and the texture stays just right. For longer, stash in the fridge up to five days—just know it’ll go more pudding-like and lose some layers. A quick 20–30 seconds in the microwave brings the gooey goodness back.
Don’t just reheat—turn extras into something new. Layer cold cobbler and whipped cream in cups for a quick chocolate trifle. Spoon it over cake slices with berries for a sweet mash-up. Or blend it into softened ice cream and freeze again for chocolate cobbler ice cream—trust me, it’s awesome.
This old-school chocolate cobbler was tucked away in my grandma’s cookbook, all stained from so many bake-offs. Our family has tried loads of desserts, but this one keeps coming back. It’s got just the right balance—fancy taste, easy ways. Whether it’s shared with guests or eaten in pajamas, this simple classic is pure Southern comfort—welcoming, warm, and totally impossible to resist.
 Save
Save
Recipe FAQs
- → If it’s called a cobbler, why isn’t there fruit?
- This is a chocolate twist on the usual cobbler. Though fruit is common in traditional ones, here the chocolate gives a different taste but keeps the same saucy bottom and soft, cakey top.
- → Can I prep this dessert ahead of time?
- Totally! You can make it a few hours early. Just warm it up before serving for the best taste. It keeps in the fridge up to 4 days, but it’s best fresh.
- → What happens if I stir after adding the water?
- The layering magic won’t work! Skipping the stir is key. The hot water makes the sauce on the bottom, while baking firms up the top into cake. Stirring ruins that balance.
- → Can I switch out regular cocoa for dark cocoa?
- Yep, you can! Dark cocoa (including Dutch-processed) gives an even bolder chocolate taste. Swap it straight across for the same amount as the regular cocoa.
- → How can I tell when the cobbler's done?
- The surface should firm up and have a brownie-like texture. A toothpick poked into the top should come out almost clean, but the bottom will stay saucy. Don’t overbake!