December at my place usually means something chocolaty is in the oven, but honestly, I'm ruined for anything else after these peppermint brownies. I first made them when I needed a festive treat for a neighbor's cookie swap about three years back. The mix of rich, fudgy chocolate with cool, minty frosting and crunchy candy cane bits is unbeatable—no basic brownie compares now. People who try them always want to know how I made them. It happens every single time.
Irresistible Peppermint Brownies
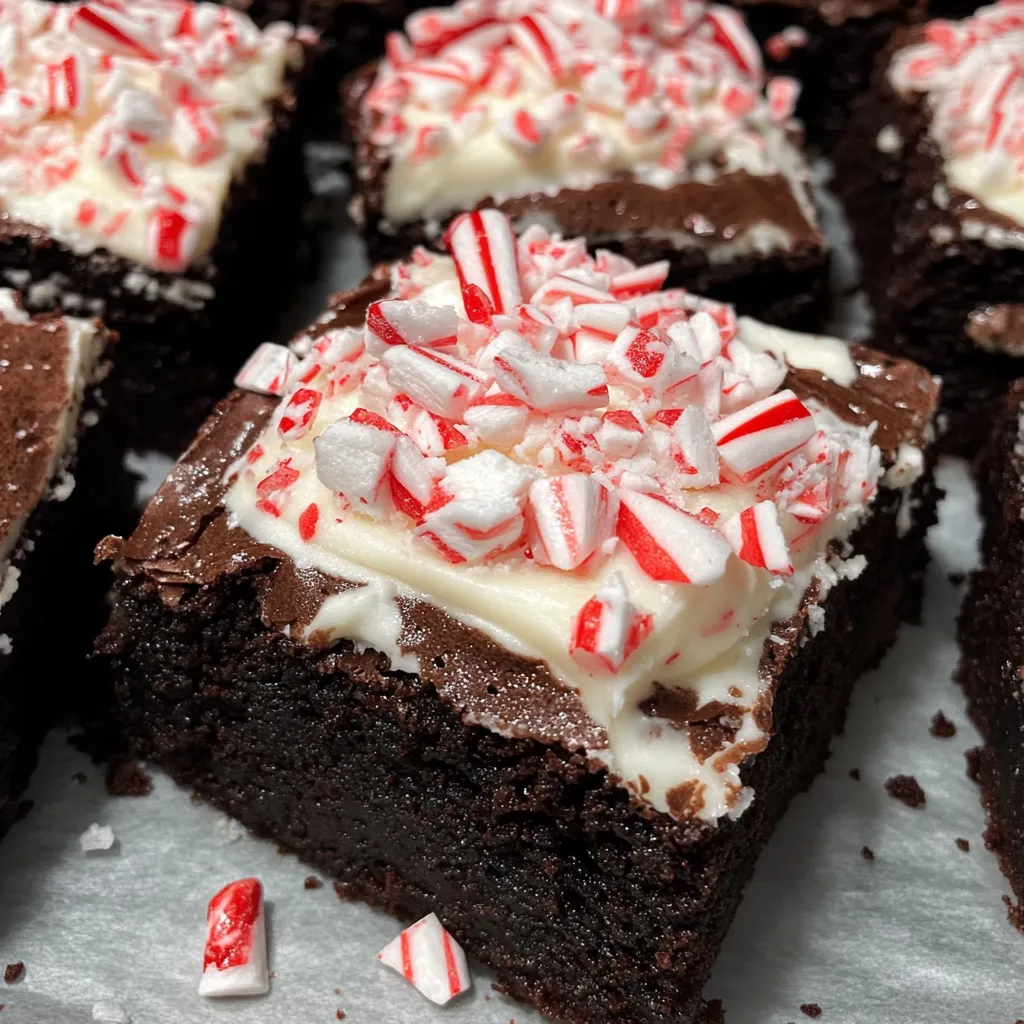
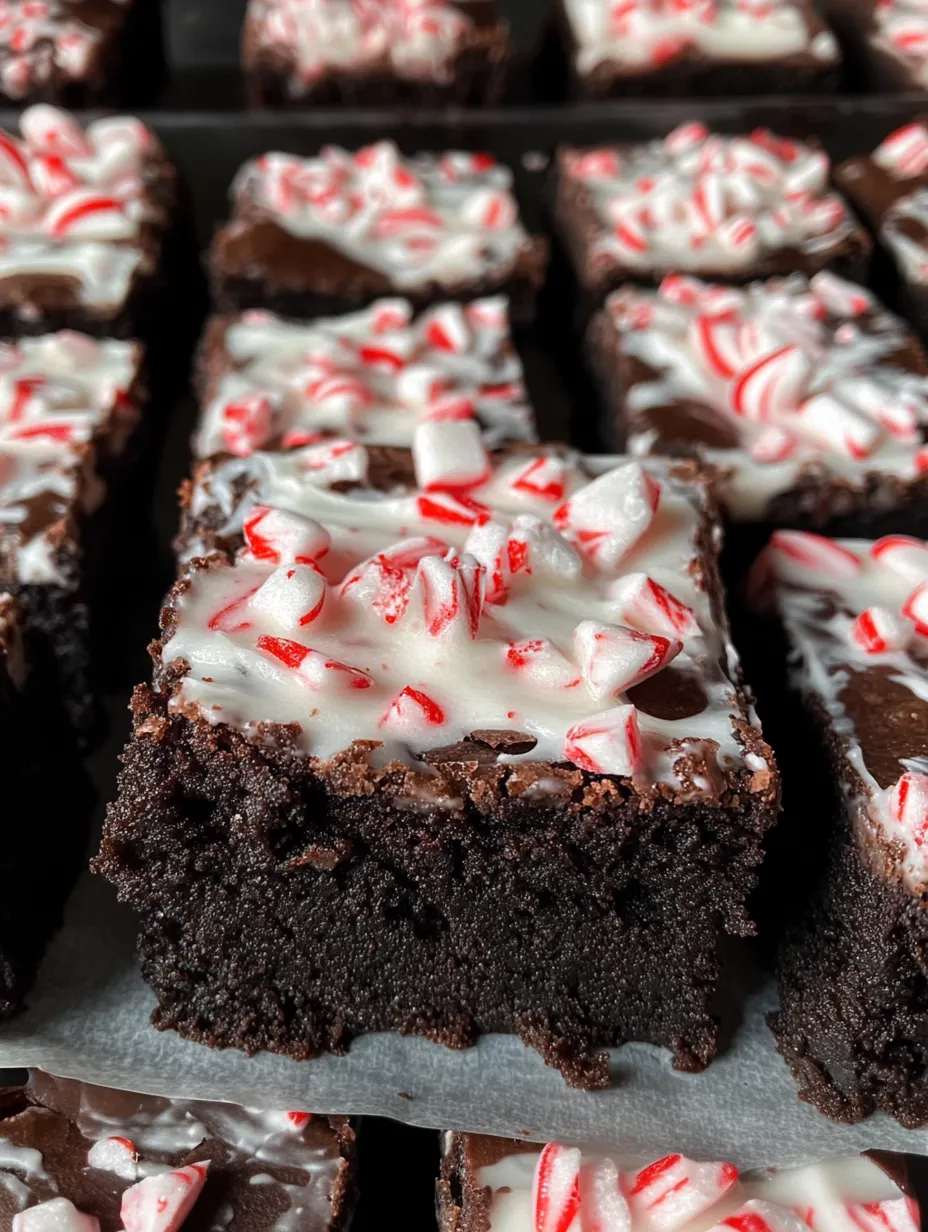
They’re basically the holidays in every bite with that gooey chocolate and fresh mint frosting
These look pretty impressive, but you don’t need fancy decorating skills at all
The bits of candy cane get a little soft in the topping, so every bite is the perfect mix of crunchy and creamy
After a day in the pan, the flavors just get even better and everything blends together
Last December I baked these for my kid’s dance party and just watched moms totally lose their cool. One literally followed me out the door demanding all the details. There's not really a secret—just getting that minty chocolate balance down so neither flavor takes over. It took a few tries but now I can't mess them up.
Ingredients List
All-purpose flour has to be measured just right if you want them chewy, not cakey—too much ruins the texture
The eggs need to be at room temp before mixing so you get that shiny crackled top—straight from the fridge won’t work
Unsalted butter lets you tweak the salt level just how you like. I’ve used salted in a pinch, but it kind of messes with the taste
Dutch-processed cocoa powder makes the chocolate smoother, but regular cocoa works if that's all you have—whatever you do, skip the hot chocolate mix
Pure vanilla isn’t extra—if you leave it out, the chocolate layer tastes kind of flat next to the mint
Pull out the brownies when a toothpick picks up a few moist crumbs and they’ll be the fudgiest
Combine the dry stuff gently at the end using a spatula—mix only until you can’t see flour anymore, or they’ll get tough
Add eggs in one at a time and stir well before tossing in the next—makes them glossy and gives the best texture
Whisk that sugar with melted butter until it just starts looking lighter—don’t rush, or you’ll end up with a grainy bite
Slowly melt the butter on super low heat and take it off as soon as it’s all melted to avoid a burnt flavor
Set your oven just a little hotter if you know it runs cold—knowing how your oven bakes seriously matters
Good to Know
Peppermint extract brands can be crazy strong, so less is more until you taste
The center is always fudgier than the edges—you’ll have a crowd fighting for those middle pieces
For super clean cuts and no dragging sticky bits, use a plastic knife
Toss them in a container overnight—they're even better the next day
The first time I made these, I dumped in way too much peppermint extract and instantly regretted it—the frosting tasted like toothpaste. Brand strength really matters, so now I add a little at a time and taste as I go. My mom came up with the idea of adding crushed candy cane on top. No joke, it totally leveled them up—now they've got the crunch and some extra holiday colors.
Top Pairings
Put these out on some vintage Christmas plates, toss a few pine branches around, and you’ll have a holiday vibe in seconds. They look awesome all stacked up on a cake stand too. Serve them with a mug of hot cocoa and loads of real whipped cream, or if you’re feeling extra, a splash of peppermint schnapps in your hot chocolate makes everything feel fancier.
Fun Ways to Mix It Up
Pour warm dark chocolate over the mint layer, then sprinkle over the candy cane for a crazy good finish. Fold some white chocolate chips into the batter and you’ll get pockets of creamy sweetness. If you’re all about chocolate, melt half a bag of semisweet chips into the butter for a bigger chocolate punch.
Easy Storage
Leave these in an airtight box at room temp for four days. The mint flavor gets stronger after a while, so making them ahead works great. If you have to stack, stick parchment paper in between so nothing glues together. Pop them in the fridge for an even fudgier bite, though I think they’re yummiest at room temp. Want to freeze? They handle it well—just let them thaw uncovered and sprinkle on fresh candy canes if the color fades.
SavePeppermint Brownies Crowdpleaser | homebitesbyana.com
Pro Tips from the Baker
Skip parchment and line your pan with foil—it pops out way easier, so your squares come out clean
If you chill them for a half hour before cutting, you’ll get nice-neat edges like a pro
Bake just until the middle is a little underdone and that fudgy texture will win everyone over
These peppermint brownies are now what everyone expects me to bring for the holidays. My friends start hinting about them before fall even ends. There’s something about the deep chocolate flavor and fresh mint that just screams this season. They started as something random I tried but now they're a staple in my family's traditions. Even my kid—who usually can’t stand mint—grabs seconds. And my mother-in-law? She asks for the instructions every year like she’s never seen them before, even though she always remembers.
Recipe FAQs
→ Is it okay to prepare these chocolate treats in advance?
Of course! Keep them sealed in a container for up to 3 days at room temperature or refrigerate for a week.
→ Do these treats freeze well?
Yes, they freeze great. Use parchment between layers in an airtight container, and they’ll last in the freezer up to 3 months. Let them thaw in the fridge overnight.
→ What if mint extract isn’t available?
Crush a couple of candy canes into the frosting as a substitute. The flavor won't be as strong, but it still works.
→ Can I swap homemade brownies for a mix?
Totally! Follow the box instructions, then once cooled, add your peppermint frosting and crushed candy canes.
→ How do I know they’re baked just right?
Stick a toothpick in the center. A few moist crumbs are perfect, but wet batter means they need more time. Don’t bake too long or they’ll dry out.
Peppermint Treats
Chocolatey bars with creamy mint frosting and crushed candy topping. A cozy, winter-ready dessert to share or enjoy alone!
Heat your oven to 350°F. Line a square 8x8 pan with some parchment paper, making sure to leave extra hanging over the edges for easy lifting later.
Step 02
In a heatproof bowl, melt the butter. Stir in sugar until smooth. Mix in eggs one at a time, then toss in the vanilla. Finally, gently add the cocoa powder, flour, and salt, mixing just enough to combine.
Step 03
Spread the brownie mixture evenly in the lined pan. Bake for 20-25 minutes, checking with a toothpick—it should have a few soft crumbs. Set them aside to cool completely in the pan.
Step 04
Beat the softened butter until it's creamy. Slowly mix in the powdered sugar. Stir in milk and peppermint essence until smooth. If you'd like, fold in some food coloring to get a light pink hue.
Step 05
Smooth the frosting over the cooled brownie base, or swirl it for a pretty effect. Sprinkle the crushed candy pieces on top, slice into square portions, and you're ready to dig in!
Notes
Keep them fresh by storing in an airtight box at room temperature for up to three days.
For a crunchier candy topping, sprinkle the crushed mints just before you eat.
You can pop leftovers in the freezer and thaw on the counter when needed.
Required Equipment
Square 8x8 pan
Parchment paper sheets
Bowls for mixing
A whisk or spoon
Optional: Electric mixer for frosting
Allergen Information
Review each ingredient for potential allergens and consult a healthcare professional if needed.
Includes gluten (from wheat)
Contains eggs
Has dairy ingredients
Nutrition Facts (Per Serving)
These details are for informational purposes only and don’t replace medical advice.

 Save
Save
 Save
Save
 Save
Save