
 Save
Save
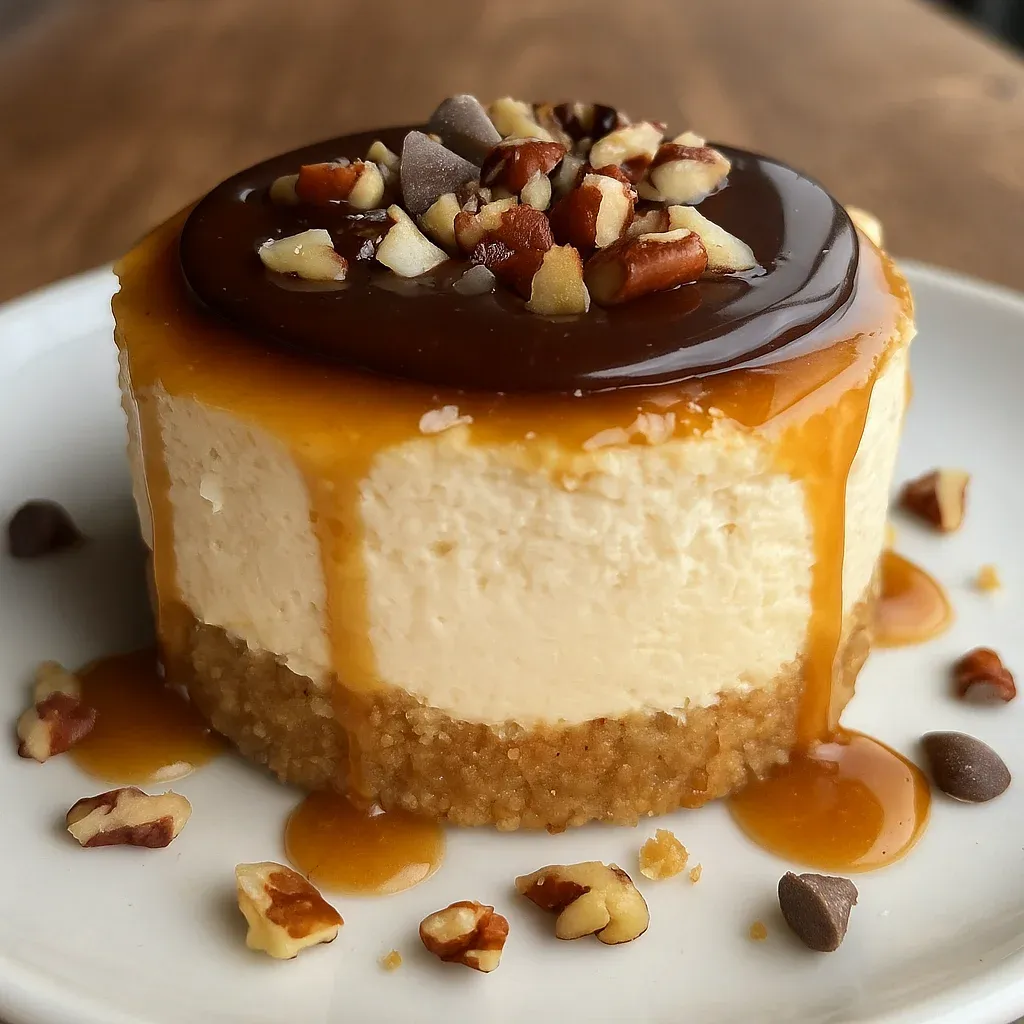
These no-bake turtle mini cheesecakes are my go-to trick for wowing friends without sweating over a hot stove. Each little treat combines a crumbly graham base with smooth cream cheese topping, all crowned with gooey caramel, melty chocolate, and toasted pecans—capturing that classic turtle candy magic in bite-sized cheesecake form.
I created these mini treats for my kid's party when our oven broke down unexpectedly. They turned out so tasty that nowadays my family asks for them even though our oven works just fine.
What You'll Need
- Graham crackers: They make a sweet, buttery bottom layer for your cheesecakes. Grab the good brands for better taste and crunch.
- Sugar: One tablespoon gives the crust just enough sweetness. Plain white sugar does the job perfectly.
- Butter: Go with unsalted so you can add salt if needed. When melted, it sticks the crust together and adds a rich flavor.
- Cream cheese: Don't skimp on fat here—full-fat makes everything creamier. Let it warm up before using for the smoothest mix.
- Powdered sugar: It blends into the filling without leaving any grainy bits. Run it through a strainer first if you want it super smooth.
- Vanilla extract: Real vanilla extract works best here. Its warmth pairs nicely with the sweet caramel.
- Heavy whipping cream: Pick one with at least 36% fat to make sure your filling sets up right. Keep it in the fridge until you're ready to use it.
- Caramel sauce: Buying it saves time but making your own tastes amazing. Look for a thick one that won't run all over.
- Semi sweet chocolate: Get something that melts well. The slight tang cuts through the sweetness of the other stuff.
- Pecans: They give that must-have crunch and true turtle candy feel. Warm them in a dry pan first to bring out their flavor.
How To Make Them
- Get Your Containers Ready:
- Set out your little paper cups or tiny springform pans. Put paper cups on a solid tray that fits in your fridge. This setup makes everything easier and stops messes when you move them to chill.
- Mix Up The Base:
- Stir graham cracker bits with sugar and melted butter until everything looks wet. When squeezed, it should stick together but still feel a bit crumbly. A shot glass works great to push it down firmly and create a slight rim up the sides. Press hard so it won't fall apart when served.
- Whip The Filling:
- Beat cream cheese until it's completely lump-free before adding anything else. When you mix in the powdered sugar and vanilla, stop and scrape the bowl often to catch any unmixed bits. Everything should look smooth and fluffy before moving forward.
- Get The Right Texture:
- Add cold cream and keep mixing until everything turns into a thick, fluffy mix that holds its shape. This usually takes 3-4 minutes of beating. The filling should form soft peaks and stay put when spooned onto the crusts.
- Put Them Together:
- Share the filling equally among all the crusts, filling each about three-quarters full. An ice cream scoop or piping bag helps make them all the same size. Dip a spoon in cold water and use the back to smooth each top perfectly flat.
- Fix The Toppings:
- For the chocolate mix, warm the cream until it almost bubbles, then pour it over chopped chocolate. Let it sit two minutes before stirring until shiny and smooth. If your caramel seems too thick to drizzle, warm it slightly.
- Add The Final Touches:
- Start with caramel, leaving a small edge around each cheesecake. Then add some chocolate, spreading it gently to create that turtle dessert look. The warm chocolate will settle nicely onto the cold filling. Sprinkle chopped pecans and tiny chocolate chips on top while the chocolate's still a bit warm so they stick properly.
 Save
Save
Making your own caramel sauce really takes these treats to another level. My grandma taught me that adding just a tiny bit of sea salt to the caramel brings out amazing flavors that make these cheesecakes special. Whenever I make them, I remember those times in her kitchen learning how to get caramel just right.
Prep Ahead Ideas
You can make these mini cheesecakes up to two days before you need them. After they've set, just cover them loosely with plastic wrap. I think it's best to put the toppings on no more than 8 hours before serving so everything looks and tastes its best. The filling actually gets better after a day in the fridge as all the flavors mix together.
Ways To Serve
These little cheesecakes look great by themselves, but you can also create a fancy dessert platter with fresh berries, extra caramel, and some softly whipped cream around them. For special events, try sprinkling cocoa powder on the plates first, or top each cheesecake with a small chocolate decoration. They taste wonderful with coffee or a tiny glass of amaretto after dinner.
Keeping Them Fresh
These treats stay good in the fridge for about 5 days if you keep them in a sealed container. If you need to stack them, put some parchment paper between the layers. You can freeze them for up to 2 months, but the caramel and chocolate might change a bit when they thaw. If you do freeze them, I'd wait and add the toppings after thawing for the best results.
 Save
Save
Recipe FAQs
- → Can I use a premade caramel sauce?
Definitely! A premade caramel sauce saves time, but making it from scratch can bring a richer flavor.
- → What helps the filling stay firm?
Beat powdered sugar and cream cheese until smooth, then whip in heavy cream until you get those thick, fluffy peaks.
- → Which chocolate works best for topping?
Semi-sweet or dark chocolate gives a rich taste, but if you like something sweeter, milk chocolate works too.
- → Can I prepare these ahead of time?
Yes, you can make them a day earlier and chill them in the fridge until you're ready to serve.
- → What could I substitute for graham crackers?
If you're out of graham crackers, try using crushed Oreos, digestive biscuits, or vanilla wafers instead.