
 Save
Save
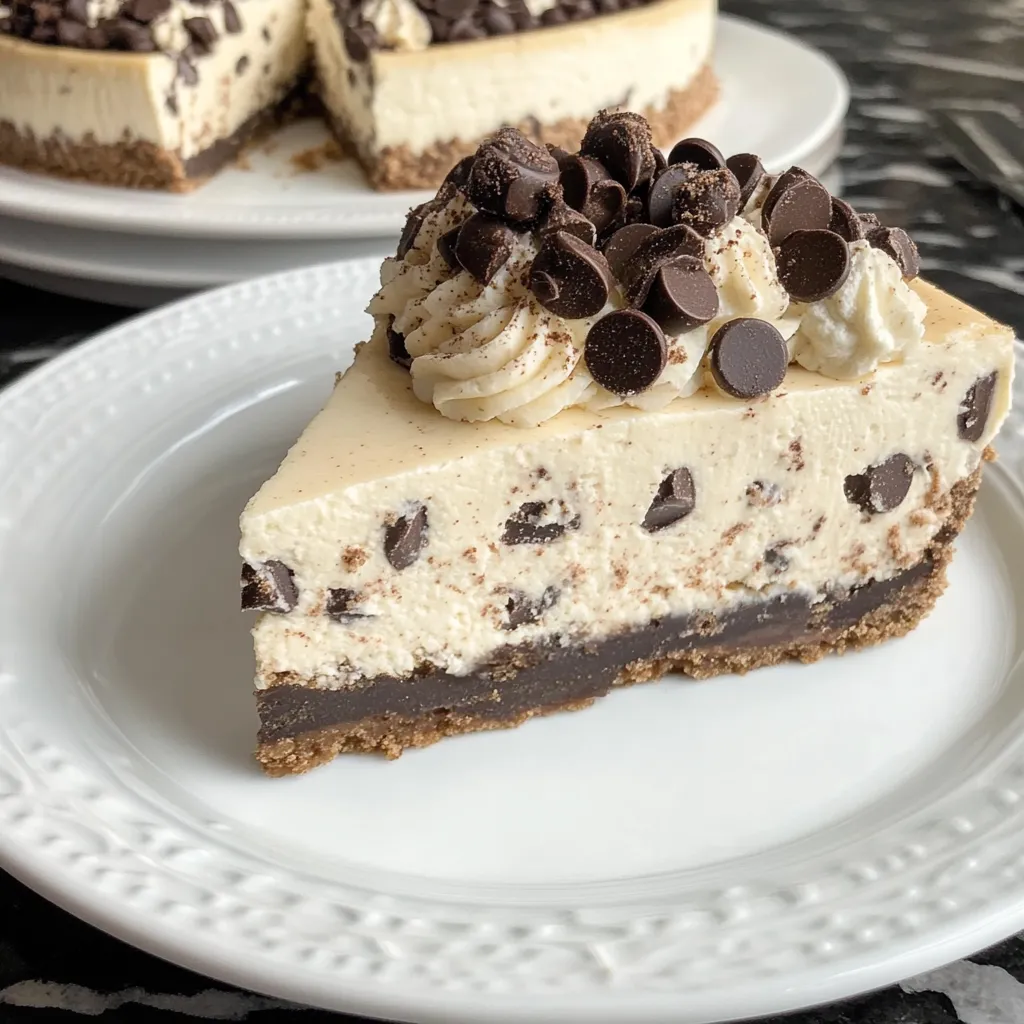
This loaded, no-bake cookie dough and cheesecake mashup started because my family literally can't agree on what to have for big celebrations—cheesecake or chocolate chip cookies. So, I just blended them into one crazy-good dessert that checks everyone's boxes! You've got silky cheesecake with soft pieces of cookie dough all throughout, and a cookie dough crust at the bottom. It’s got different flavors and textures in every bite, comes together without firing up the oven, and always gets a bunch of compliments.
Even my brother-in-law, who’s a total dessert skeptic, went for seconds last time I made this! My friend's teen ditched birthday cake for this, and my neighbor always checks if I'm gonna bring "that cookie dough cheesecake stuff" whenever we have a potluck. Basically, something magical happens when you mix cookie dough and cheesecake—even folks who usually say no to sweets turn into dessert lovers.
Dreamy Ingredients
- Cream cheese: This is what makes the filling rich and thick. I always grab regular, full-fat stuff and let it sit on the counter to warm up so it mixes super smooth. I’ve tried lighter versions, and they just don’t hold up or taste as good.
- Edible cookie dough: Here’s the trick: I always make sure to bake the flour for a few minutes first so it’s safe to eat raw. After that quick step, the dough tastes just like the stuff you’d sneak while baking cookies—no risk!
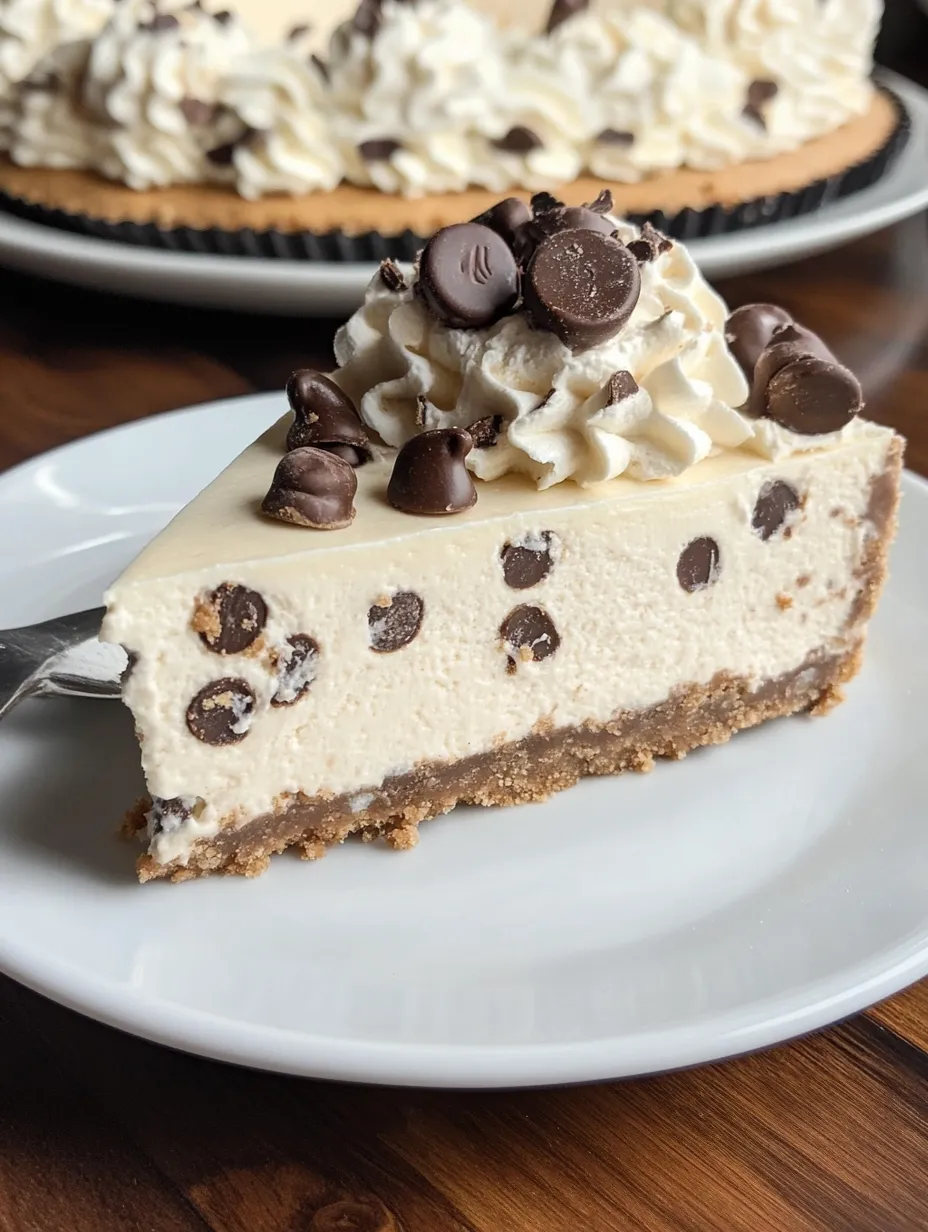
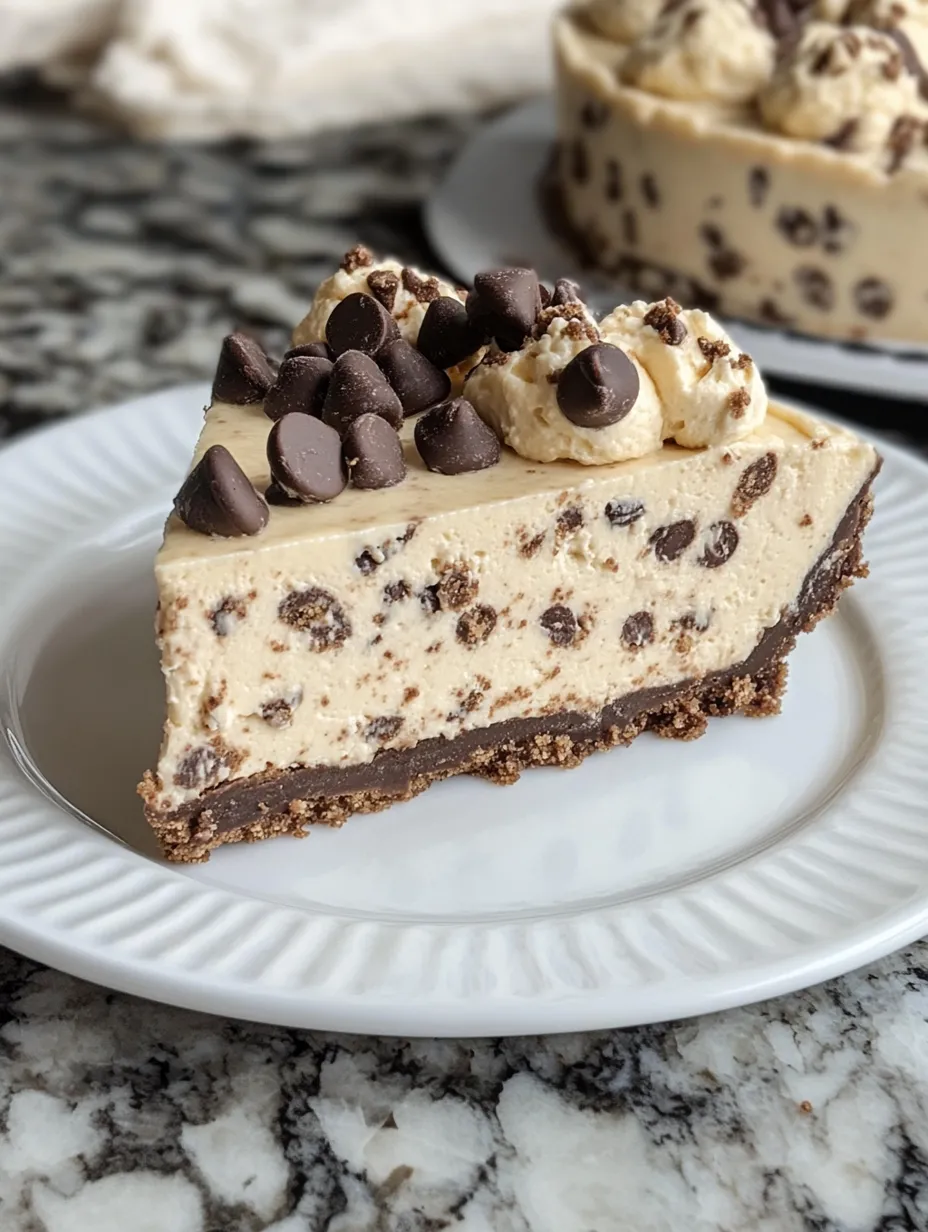
- Mini chocolate chips: Little chips work best. They spread out nicely and don’t sink or make cutting the cheesecake weird (big chips always gave me trouble).
- Heavy cream: Brings a light, whipped feel both in the filling and for the topping. Trust me—milk or half-and-half just don't work. I once tried, and the cheesecake never set up right.
- Powdered sugar: Helps the whipped cream hold its shape and adds just enough sweetness. I prefer it over regular sugar since it dissolves easily and makes everything extra smooth.
 Save
Save
Step-by-Step Walkthrough
- Show-stopping finish
- The magic is in the final touches. I grab a piping bag and swirl big puffs of whipped cream all along the edge, then top each with a cookie dough ball. Toss on some mini chips for sparkle. If it's for a big celebration, I've even drizzled chocolate on top—major wow moment.
- Chilling pays off
- Don’t try to rush the chill time! Let it sit at least 6 hours in the fridge, though overnight is best. I learned the hard way—cut too early and it all turns to goo. Now I just knock it out a day before and wake up to perfect, easy slices.
- Mixing in cookie dough
- For that perfect cookie dough spread, I make the dough balls two ways—tiny ones for folding into the cheesecake and bigger ones for the top. I roll them in my hands so they're smooth and ready. Stir the little ones in gently right at the end so they stay chunky, not totally mixed in.
- Whipped cream magic
- You'll get the best whipped cream if everything's super cold. I even pop my bowl and beaters in the freezer for 15 minutes before starting. Whip the cream up slowly, then faster as it thickens for sturdy peaks. Sometimes I'm impatient and skip chilling stuff, but then my cheesecake is too soft to slice cleanly.
- Getting the creamiest filling
- Soft cream cheese is the trick. Leave it out until totally soft—otherwise, no amount of mixing gets rid of lumps! Beat it with powdered sugar until smooth before adding other stuff. Scraping the bowl a lot helps get it all even.
- Safe cookie dough tips
- Always bake the flour before making dough you plan to eat raw. I just spread it on a tray and stick it in a 300°F oven for about 5-7 minutes. It totally kills germs but doesn't make the flour weird. Cool it off completely or your butter will melt and make a mess—yep, learned that one early on. Now I always heat-treat extra to keep just in case!
I ended up making this for the first time basically by accident—I had extra cookie dough and decided to stir some into my usual no-bake cheesecake, and it was a huge hit. From there, I went bigger with a cookie dough crust and kept playing around with the amount of cookie dough until every bite was just right but the cheesecake still held up. Pretty wild how an experiment turned into everyone’s new favorite!
Fun Serving
This showoff dessert deserves a little fanfare! I take it out about 15 minutes before cutting so it softens up, but still slices neatly. Want crisp, perfect cuts? Heat up a big knife with hot water, dry it off, then slice away. Wipe and heat it again each time for those pretty wedges. For special dinners, I’ll bring out some warm chocolate sauce on the side so everyone can drizzle as much as they want.
Cool Twists
This cheesecake is the ultimate blank canvas for switching things up! Craving peanut butter? Mix half a cup creamy PB into your dough and add peanut butter chips instead of chocolate. Feeling festive? I’ve stirred in crushed peppermint with a swirl of white chocolate on top. Chocolate addiction? I add a scoop of cocoa to the filling for extra chocolate in every bite. Coffee fan? Throw a spoon of instant espresso powder in—it makes an awesome mocha-cookie dough combo.
Chill Storage
This treat keeps well for five days in the fridge, but good luck making it last that long! Store covered so it doesn’t pick up fridge smells. For best looks, I decorate with whipped cream and cookie dough balls just before serving, even if I made the base in advance. Need to prep farther ahead? Wrap it up and freeze for up to a month, then thaw in the fridge. You can even freeze single pieces for when you crave something sweet later.
 Save
Save
This chilled cookie dough cheesecake came about when a summer heatwave made turning on the oven the last thing I wanted to do, and now it's my go-to for parties, hot or cold! There's just something about blending that smooth cheesecake with sweet cookie dough bites that gets people excited. It takes some time mostly for chilling, not hands-on work, and the payoff is totally worth it. Kids and grownups both love how it mixes that classic cookie dough taste with the cool, creamy texture of cheesecake—honestly, it’s special every time!
Recipe FAQs
- → Why is heating the flour important?
- Raw flour can have bacteria lurking in it. Warming it up to 160°F (71°C) zaps those germs, making it safe for raw treats.
- → Can this dessert be prepared in advance?
- Totally! You can make it 1-2 days early. Just keep it covered and let it chill in the fridge until you're ready.
- → Is store-bought cookie dough an option?
- Sure thing! Just make sure it says 'safe to eat raw.' While homemade has better flavor, pre-made dough saves time.
- → How long does it last in the fridge?
- It'll stay good up to 5 days if kept sealed in the fridge.
- → Can I put this in the freezer?
- Yep! Skip the decor and freeze it for up to 2 months. Let it defrost overnight in the fridge, then decorate before serving.