
 Save
Save
I stumbled upon these Thin Mint Marshmallow Brownies during cookie season when three boxes of Thin Mints were tempting me from my pantry. I could've just munched them straight from the box like everyone else, but where's the thrill in that? Instead, I turned them into something way more over-the-top delicious.
My usually quiet father-in-law took one bite and blurted, "Heavens above, woman! Are you trying to finish me off?" before promptly helping himself to another piece. This coming from a guy who typically calls desserts either "okay" or "overly sweet." I think that counts as a win.
Delicious Layer Components
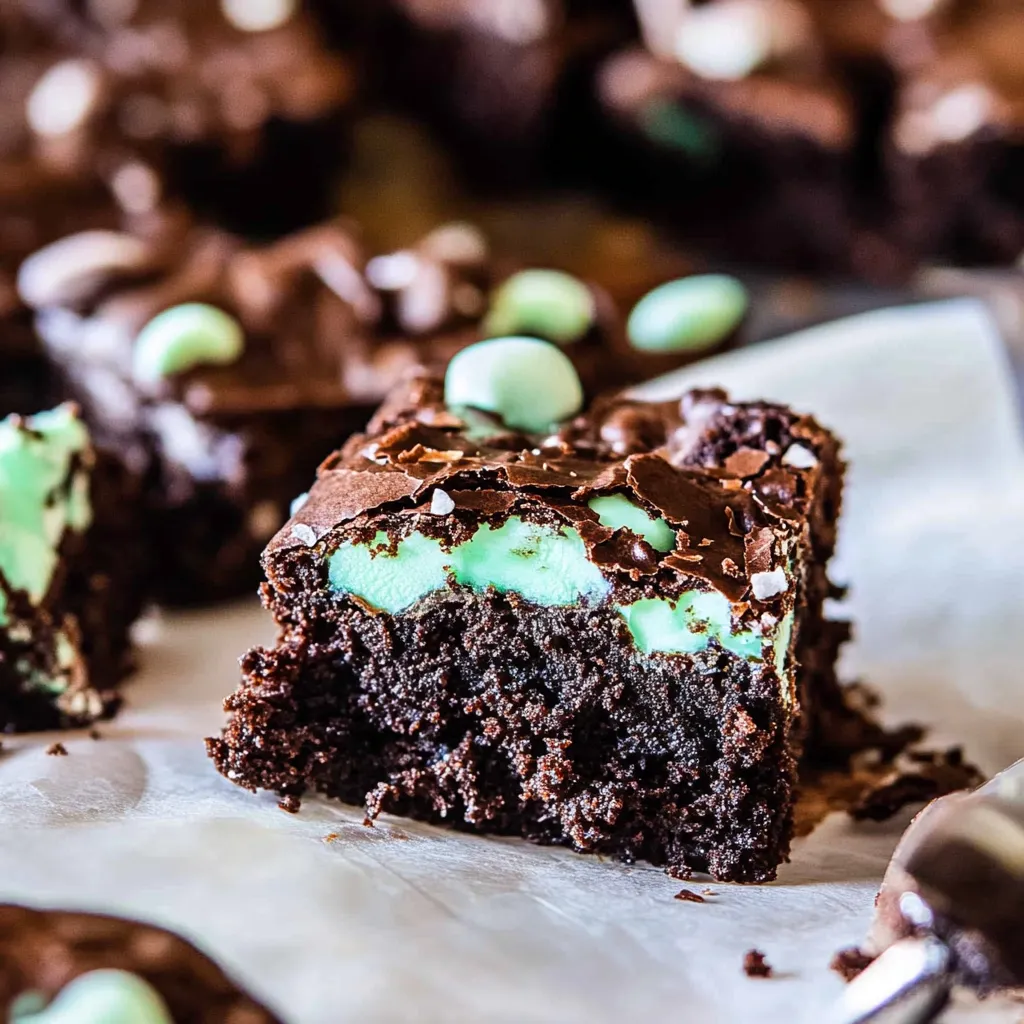
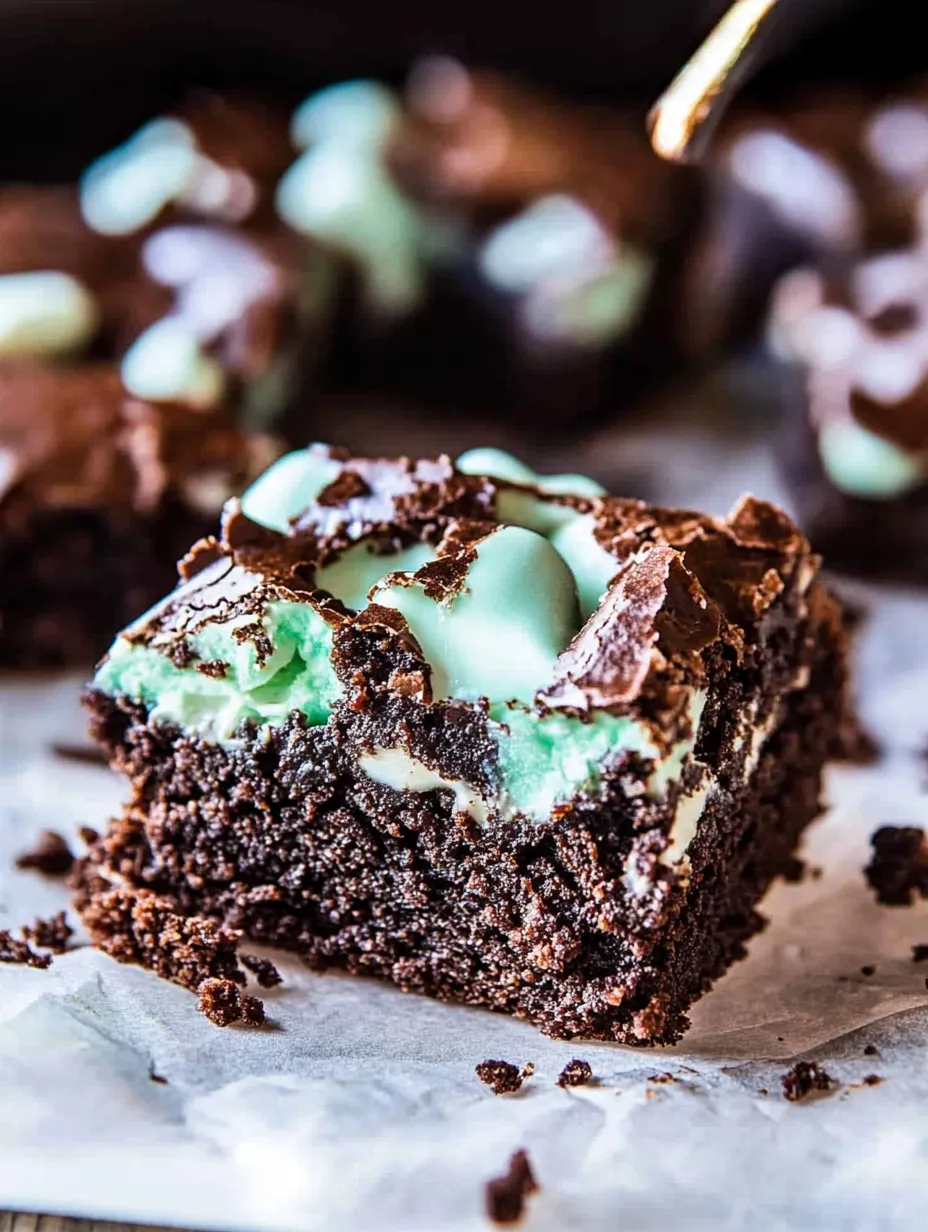
- Rich brownies: Store-bought mix is fine but homemade with browned butter takes it up a notch
- Marshmallow fluff: That wonderful puffy stuff in jars
- A smidge of peppermint extract: The trick is NOT going overboard
- Smashed Thin Mints: Because two mint layers taste better than one
- Extra chocolate: Because why stop at just two chocolate elements?
 Save
Save
Tasty Creation Steps
- Brownie Foundation Tricks
- Whether you choose scratch-made or boxed mix, what matters is getting that perfect fudgy consistency. For homemade ones, try browning the butter first - it adds this toasty, caramel-like flavor that makes everything better. Either way, don't cook them too long! You want them slightly undercooked when they leave the oven since they'll finish up while cooling. Your toothpick test should show a few damp crumbs still stuck to it.
- Marshmallow Tricks
- Here's the common mistake - folks add too much peppermint flavor. Trust me, this stuff packs a punch. We're talking just 3-4 tiny drops, tops. Mix it into the marshmallow fluff BEFORE you put it on the cooled brownies. And don't try spreading it on warm brownies or you'll end up with a melted mess. The secret to a smooth even layer is getting your spatula slightly wet with hot water first - the sticky stuff won't cling as much.
- Cookie Breaking Approach
- Don't grind the Thin Mints into tiny bits - you want noticeable chunks. I toss them in a plastic bag and hit them with a rolling pin, aiming for pieces roughly dime-sized. Some will be tinier, some bigger - that mix of textures is what makes these treats so amazing. Scatter them across the marshmallow while it's still sticky so they stay put.
- Last Chocolate Touch
- This part isn't required but really makes them stand out. Melt some chocolate chips with a bit of shortening or coconut oil for smoothness, then drizzle across the top. You can get fancy with decorating tools, but I just use a regular spoon and swing it back and forth quickly for a splatter art look. Let this harden before slicing for the neatest cuts.
A few weeks ago I brought these to my reading group, and one friend who was "keeping an eye on her diet" first said no thanks. Half an hour later, I spotted her in the kitchen sneaking a piece "just to sample." That night she texted me at midnight asking how to make them because she "couldn't quit thinking about them." That's what these brownies do - they stick in your memory.
Tasty Alternatives
When Girl Scout cookies aren't available, grab Keebler Grasshoppers or Mint Oreos instead. Around the holidays, throw crushed candy canes on top rather than cookies. For March festivities, add a tiny bit of green coloring to the marshmallow part. In hot weather, mix some fresh mint into the brownie mix for a cooling twist.
Ways To Enjoy
Since they're so decadent, cut into tiny squares - folks can always grab another piece (and they will). For a totally indulgent treat, serve warm with vanilla ice cream on top. They look stunning on a dessert platter - the dark bottom, white middle, and cookie bits create a beautiful display.
Fixing Common Problems
If your marshmallow starts sliding around, your brownies weren't cool enough before adding it. Stick the whole pan in the freezer for 15 minutes to firm up. If they seem too soft to slice, cool them in the fridge first. If the mint taste is too powerful (happens to everyone), balance it out with some warm chocolate sauce before serving.
 Save
Save
I've baked these Thin Mint Marshmallow Brownies many times now, changing little things each round, and they always get rave reviews. There's something about mixing chocolate, mint and marshmallow that brings back childhood memories while feeling fancy enough for any get-together. Plus, they're a fun way to back your neighborhood Girl Scouts while making sure your favorite pants won't fit anymore. Totally worth it.
Recipe FAQs
- → Can I replace Thin Mints with regular Oreos?
- Sure, but you'll need to add a little peppermint extract to bring out the mint flavor. Just mix 1/4 teaspoon with the marshmallow layer—it works nicely!
- → What's the benefit of browning butter?
- It gives the brownies a deeper, nutty flavor with hints of caramel. If you're in a rush, you can skip this step, but it really does elevate the taste.
- → How far ahead can I make these?
- You can make them a day or two early—they actually taste better chilled. Keep them in a sealed container for up to 4 days.
- → Is it okay to freeze these?
- Yes, but only before adding the marshmallow and cookie toppings. The marshmallow doesn't freeze well and can get runny when thawed.
- → What do I do if the mint flavor's overwhelming?
- Peppermint extract can be strong! Add extra marshmallow creme to tone it down if it's already mixed in. Next time, use just a small drop at a time.