
 Save
Save
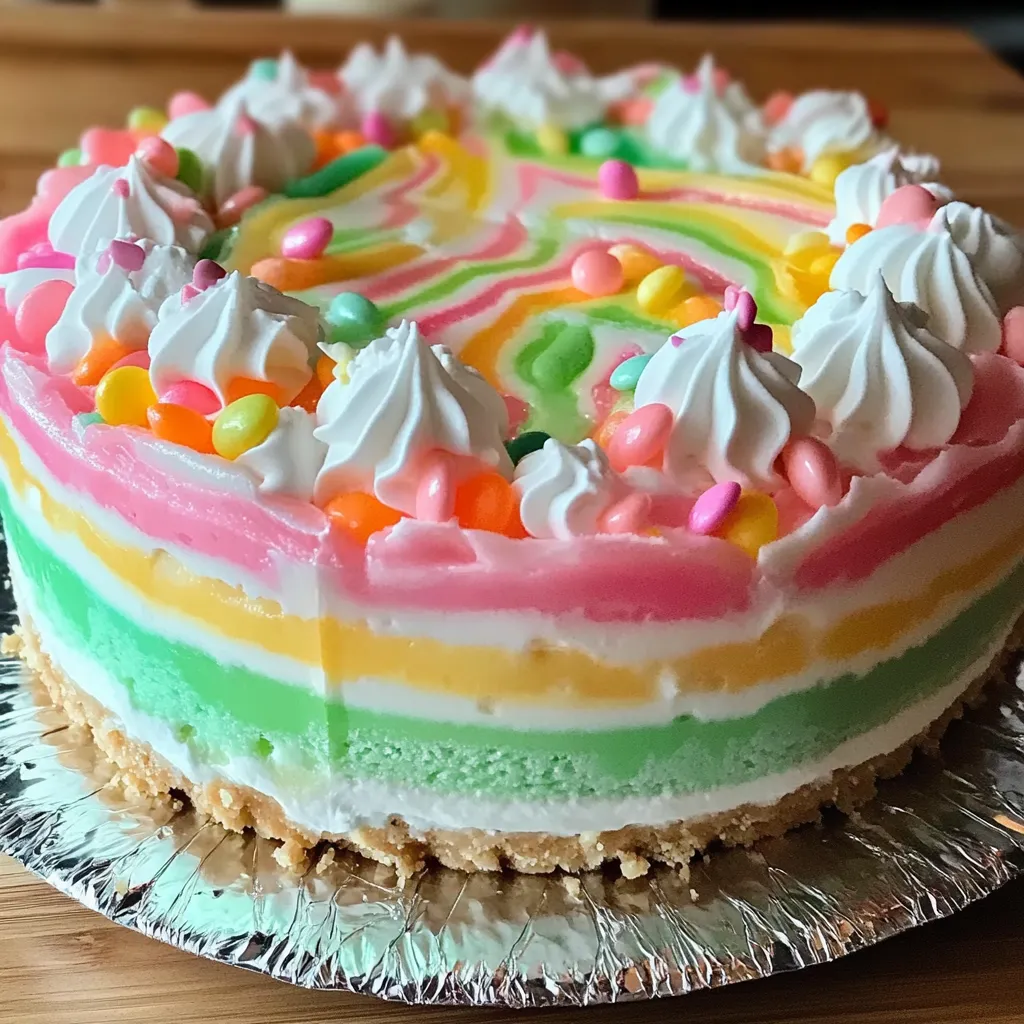
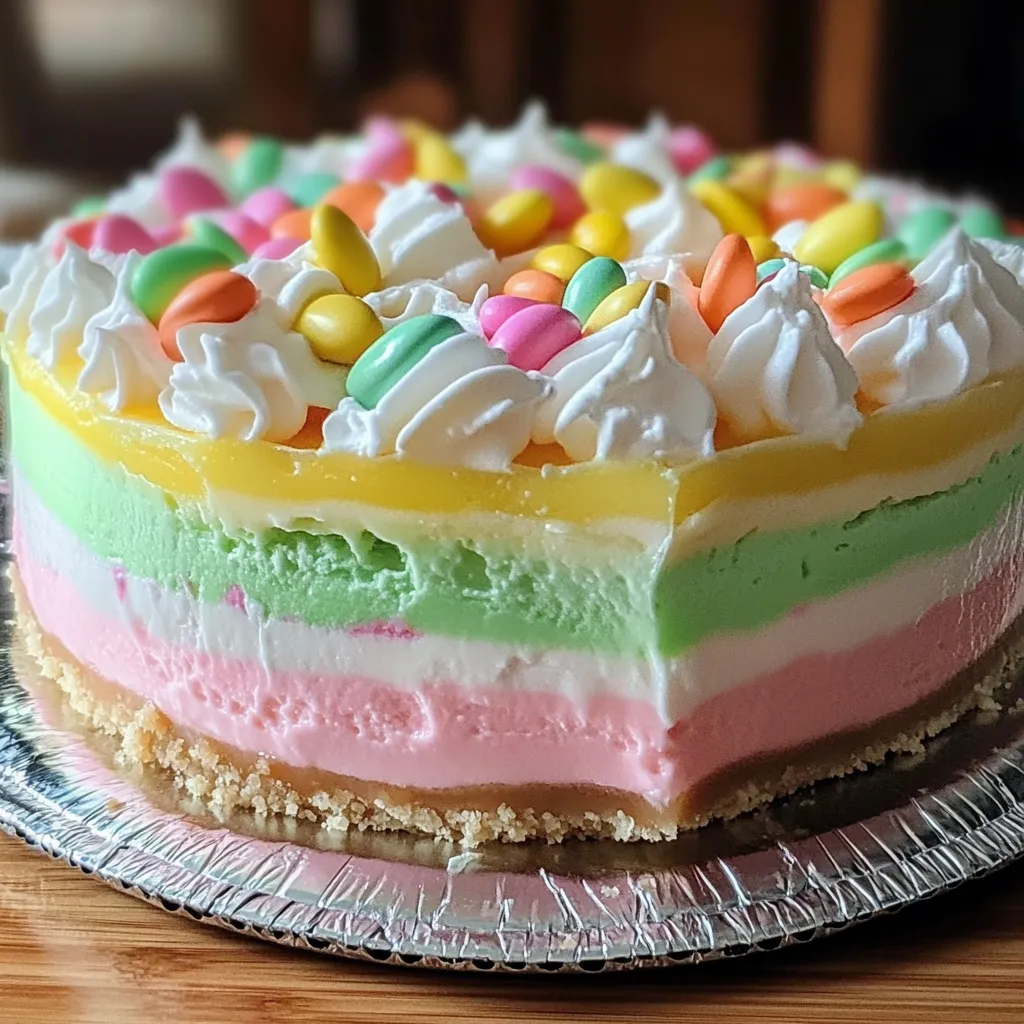
No-bake Easter jello pie packs color and sweet creaminess in every bite, plus you don't need your oven. Smooth cream cheese sits between jiggly, pastel jello layers, creating a look that pops at any springtime get-together. It's a cool make-ahead dessert, and the crunchy graham cracker crust, creamy center, and wobbly jello top are fun for everyone to dig into.
Last Easter, I showed up with this bright pie, and even my nephew—normally not fussed over sweets—kept asking for more "rainbow pie." His happy grin made all those layers so worth it. I switch up the shades for other holidays, but nothing beats the soft, pastel look at Easter. It's still our top family favorite every spring.
Incredible Pie Ingredients
- Easter decorations: Throw on jelly beans, mini eggs, or pastel sprinkles at the end to turn your dessert into an eye-catching party star.
- Whipped topping: Go with a sturdy brand for piping fun designs, though plain whipped cream is tasty too.
- Cold water: Chill your jello mix before building so everything stays put.
- Jello powders: Mix and match fruity flavors and gentle colors—berry, lime, lemon, and strawberry look great together for spring vibes.
- Vanilla extract: Make sure it's the real thing. It brings warm notes and ties everything together with fruit.
- Graham cracker crust: Use a premade crust or bake your own. The buttery crunch at the base is key against all that softness on top.
- Cream cheese: Choose brick-style and leave it out on the counter so it softens—it blends smoother and tastes richer.
- Granulated sugar: Fine sugar melts right in, so the creamy layer turns out nice and silky instead of grainy.
- Boiling water: You want it really hot to fully melt the jello—no gritty clumps allowed.
Layer Making Steps
Getting Started with Bottom Jelly
Tip one jello flavor into a bowl, add the boiling water, and stir till even the tiniest crystals dissolve. You want everything totally smooth. The heat helps the jello set up that signature jiggle later on.
Cool Down First Layer
Pour in your cold water and gently stir again to help start the setting. Split the jello—half goes straight into your crust, the rest you'll save for the top. Now the base starts to firm up in the fridge.
Give It Time to Set
Pop the pie in the fridge, making sure it sits flat. Chill for about 40 minutes. When the jello is just semi-set and still a little sticky if you tap it, you're good to go.
Mix That Creamy Center
Whip softened cream cheese until it’s super smooth—lumps are the enemy here. Add sugar next, keep mixing till everything's fluffy. Splash in the vanilla at the end and fold until blended.
Add the Middle Cream
Gently take the pie out and layer the cream cheese mix right on top of your set jello. Start in the middle, work outwards, and use a spatula to keep it smooth—don’t press down hard or you’ll mess up the jelly.
Chill Again
Stick it back in the fridge for another 40 minutes, letting the cream layer block off the bottom. Don’t rush it—time now means colorful, separated layers later.
Finish The Top Layer
As the middle chills, dissolve the next jello flavor just like the first. Let it cool all the way to room temp, then carefully pour over the cream cheese—use a spoon to spread the stream and avoid breaking the layers.
Final Chill Session
Let the completed pie hang out in the fridge for at least six hours, or let it lounge overnight. Everything sets perfectly, and when you cut it, each layer shows off clear and neat.
 Save
Save
My grandma taught me to look for the "ripple test" before building the next layer—if you nudge the pan and the jello shakes a bit but isn’t a liquid mess, it’s ready. She made desserts look perfect every time, and taking it slow always got us that wow-factor at family parties.
Switch up the colors for all kinds of parties—red and blue for July celebrations, orange and deep purple for Halloween. My kiddo asked for rainbow, so we juggled six mixing bowls and it was super bright. She said it was “the best non-cake cake ever.”
Mastering the fridge timing is everything. If your jello is too hot, it’ll melt the layer below and ruin the look. Wait too long, though, and it’s too stiff to pour. Make sure the cream cheese is soft but not melted—otherwise you get lumps or soggy layers. Get these temps right, and your pie turns out spot-on.
Party-Ready Displays
This beauty really shines in the middle of the dessert table. Pop it on a raised cake stand, ring it with spring flowers or a few chocolate bunnies, and you'll have everyone reaching for a slice first.
For small servings, build it in glass cups or mini jars. They show off the stripes, plus everyone gets their own treat. Finish each one with a chocolate egg or a cute candy on top for bonus points.
Build a snack table and line this pie up with pastel cookies, macarons, or a bowl of fresh berries. All the colors work together and there’s something for every sweet tooth at your party.
Fun Twists
Want a taste of the tropics? Use coconut cream and pineapple jello for your layers. Sprinkle shredded coconut in the crust and pop pineapple bits on top—now it’s ready for sunny days.
Need something a little grown up? Swap half the cold water for chilled bubbly wine in the jello mix—just let the fizz settle before using. It brings a sophisticated, subtle sparkle to the whole thing.
Lighter options work too: sugar-free jello and lower-fat cream cheese still turn out pretty and tasty. The texture’s a little different, but it’s friendly to all sorts of diets. You can use dairy-free cream cheese; just check the setting time is enough.
Keeping It Fresh
Store in the fridge ‘til it’s almost time to serve. It’ll hold together best cold. Slice it up no more than 15 minutes after pulling from the cold for the neatest slices.
Use plastic wrap pressed right onto the cut pie so moisture doesn’t drip onto the jello layers. It’s tasty for three days—after that, the crust starts to get soggy.
Freeze slices on a baking sheet till firm, then double wrap them. To eat, thaw overnight in the fridge. Sometimes the layers separate when frozen, but most still look pretty good.
It feels downright magical to put this cheerful jello treat together. Kids light up when they spot all those colors, and everyone knows happiness is about to be served. There are flashier desserts, but nothing beats the pure fun of a layered jello pie. It hooks the whole family, from my grandma’s careful guidance to my kid tackling her first rainbow. Try it for yourself and make some bright spring memories—it’s one tradition you won’t want to skip.
 Save
Save
Recipe FAQs
- → Can I pick other jello flavors?
- Of course! Mix it up with different flavors and shades. For Easter vibes, pastel jello like lemon, strawberry, lime, or berry blue looks great. You can even layer similar colors for an ombre look.
- → How early can I prepare this dessert?
- It’s fine to make this dessert a day or two in advance. Just keep it chilled and covered. Wait until right before serving to add the whipped topping and decorations so they look their best.
- → Can I swap whipped topping for homemade whipped cream?
- Sure thing! Beat 1 cup of heavy cream with 2 tablespoons of sugar and a dash of vanilla until it forms soft peaks. Just know it won’t hold up as long as the store-bought kind.
- → Why didn’t my jello layers firm up?
- Make sure each layer gets at least 30-45 minutes to set in the fridge before adding the next one. Also double-check the boiling and cold water ratios, and let each layer almost firm up before layering more jello.
- → What’s good for decorating?
- Light, small candies like jelly beans, pastel M&Ms, mini chocolate eggs, or sprinkles are the best choice. Heavier candies can sink in, so steer clear of those! Fresh berries also work as a light and tasty option.