
 Save
Save
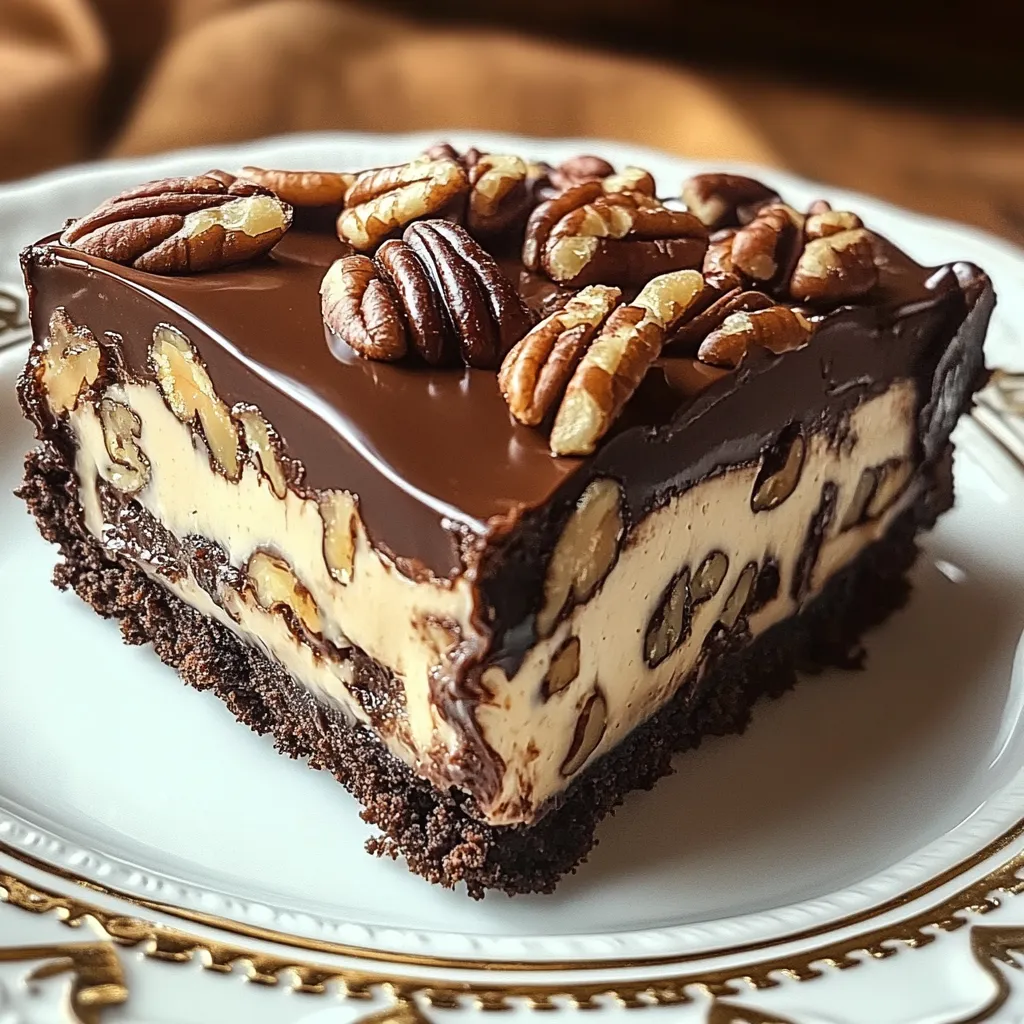
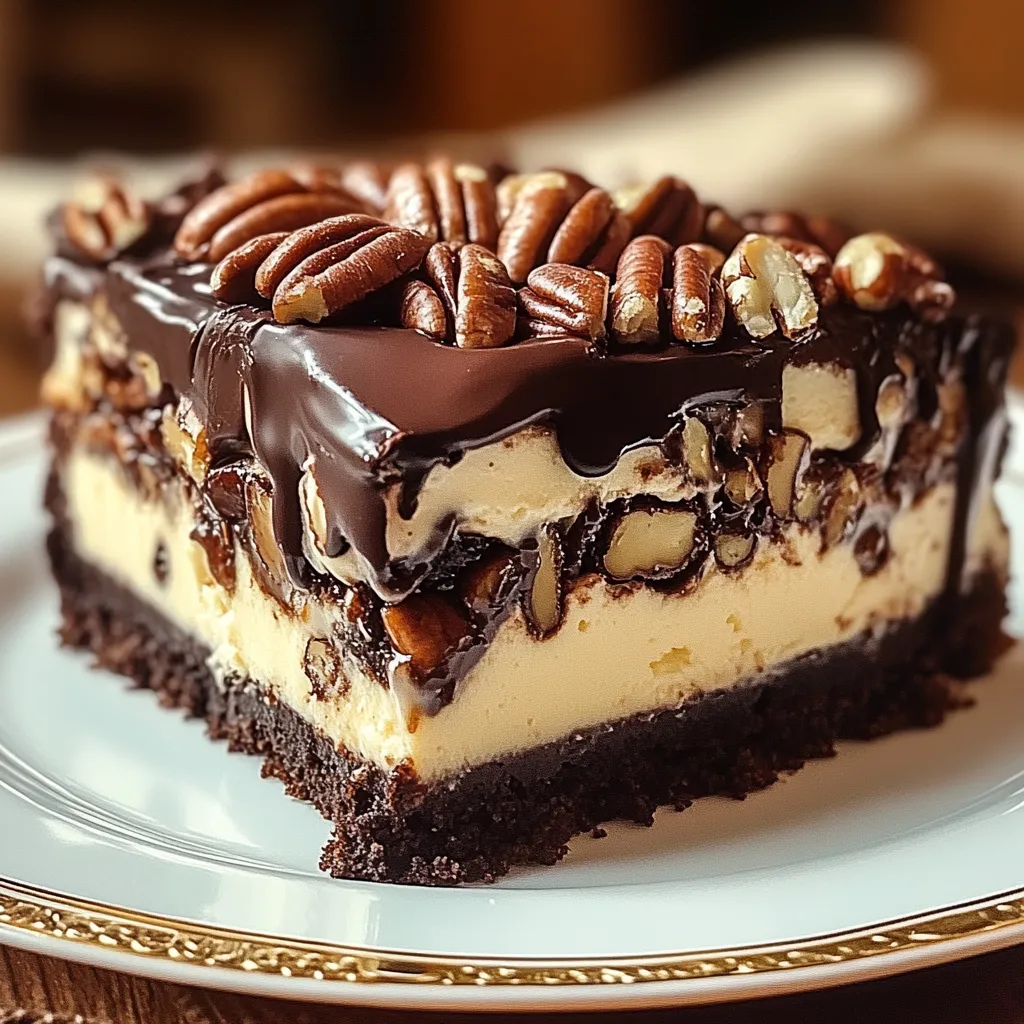
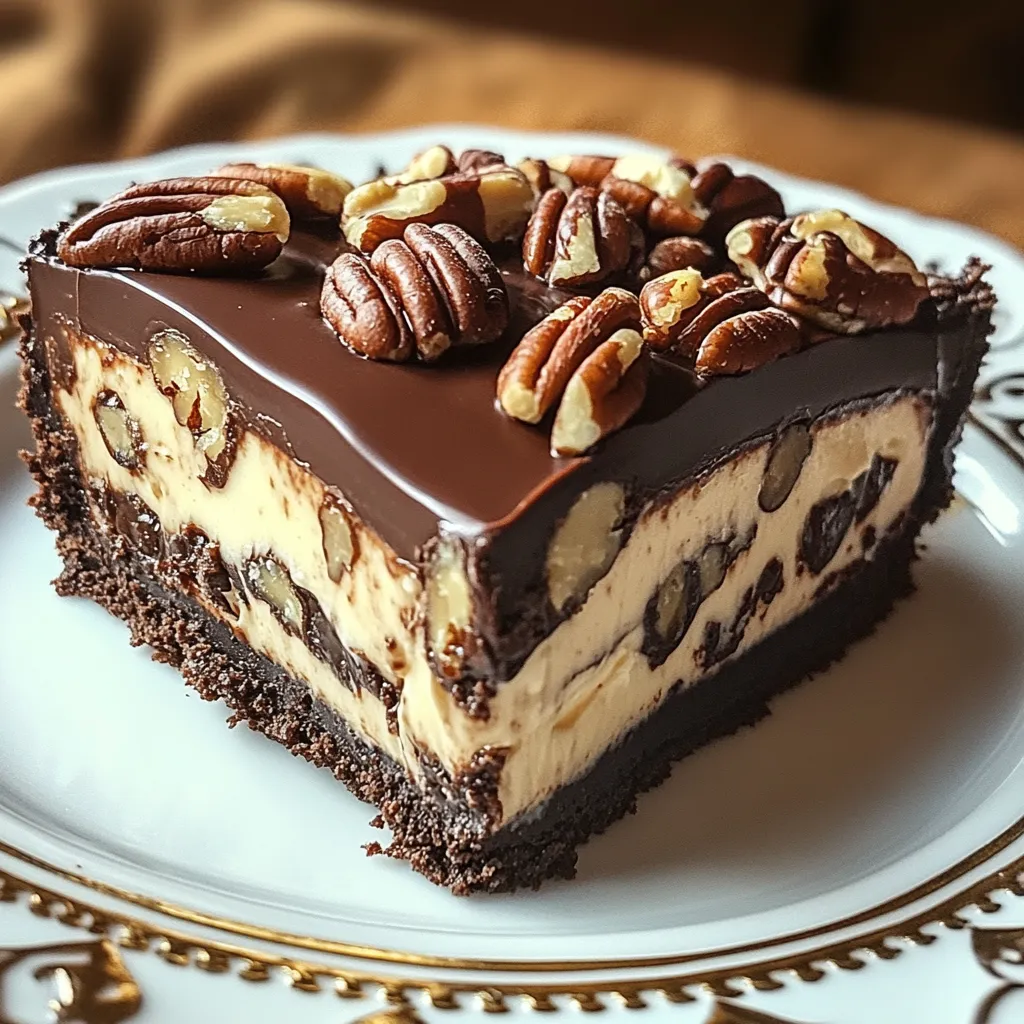
This super creamy chocolate dessert is packed with crunchy pecans for an unbeatable mix of textures every time you dig in. The nutty crust pairs perfectly with the rich, velvety filling. Top it all with shiny ganache for that classy finish. It’s a total crowd-pleaser that feels both fancy and wonderfully cozy at the same time.
One Christmas, I brought this as the big dessert for our family party. My brother-in-law, who usually skips sweets, came back for seconds before the night was over. Maybe it’s the combo of pecan and chocolate in a fluffy filling, but honestly, even folks who don’t go for dessert can’t seem to resist this one.
Dreamy Components
- Vanilla Extract: Rounds out the chocolate and nut flavors. Going with real vanilla gives you a richer taste than the fake stuff.
- Cream Cheese: Lays down a thick, creamy base that’s nice and tangy. Full-fat is where it’s at if you want the smoothest texture.
- Brown Sugar: Gives a deep molasses vibe that plays up the chocolate and nuts. Way more interesting than just plain white sugar.
- Eggs: Hold everything together. If you let them warm up first, your filling will be smoother and totally lump-free.
- Semi-Sweet Chocolate: Brings a bold but not-too-sweet chocolate flavor. Aim for 50-60% cacao for the best melt and depth.
- Heavy Cream: Keeps both the filling and ganache perfectly rich. The fat content is the secret to that dreamy mouthfeel.
- Pecans: Add crunch and tons of flavor. Toast them a little before chopping for surprisingly bigger taste.
- Unsalted Butter: Pulls the crust together and lets you decide exactly how salty things get.
- Graham Cracker Crumbs: Bring sweet, honey flavor and just the right amount of crunch to hold up all the good stuff on top.
Step-by-Step Directions
- Baking:
- Pour some hot water around your foil-wrapped pan until it’s halfway up the sides. Slide into that hot oven and let it bake for about 60-70 minutes. You want the edges set up, but the middle should still shimmy a little when you jiggle the pan.
- Water Bath Setup:
- Double-wrap your springform pan in thick foil so water can’t sneak in. Sit it in a bigger pan. Pour your ready-to-go cheesecake batter on the crust, and smooth the top.
- Mixing in the Chocolate:
- Bring the melted chocolate (not super hot, but still nice and loose) into the cream cheese mix. Fold it in with a spatula so you keep the batter airy. Toss in the chopped pecans and give everything one last even mix.
- Adding the Eggs:
- Crack in the eggs one by one, mixing each just until it vanishes. Too much mixing here will puff things up and cause cracks. Use gentle strokes to add vanilla and cream.
- Chocolate Melting:
- Melt chocolate in short bursts in the microwave or over a water bath, stirring every so often. Let it cool a bit before you mix it in, so you don’t get weird chocolate clumps.
- Crust Shaping:
- Press your crumbly crust mixture into a 9-inch springform pan. A measuring cup makes it easier to get an even layer. Once you’re happy with it, bake until it smells nutty and darkens a little, then let it chill out on a rack.
- Crust Mixing:
- Toss chopped pecans, graham crumbs, sugar, and butter into a bowl and mix until everything feels just damp, not greasy. You’re looking for something that sticks if you pinch it together.
- Filling Prep:
- Beat up the cream cheese until super smooth, about 2-3 minutes. Add white and brown sugars, then keep going until the mix gets paler. This step makes sure every piece turns out creamy and smooth.
 Save
Save
The first time I made this, water slipped into the pan because I didn’t wrap it tightly enough. Ended up with a soggy crust! Now I always double-wrap the pan in foil, way up the sides, and no more sogginess. This easy change really does guarantee a great dessert that holds together perfectly.
Simple Ganache
Once your cheesecake’s cold, make the ganache by warming cream just enough to see bubbles at the edges—not boiling. Pour it right on top of a bowl of chocolate chips and give it a couple minutes. Then gently stir from the middle out until it turns super shiny.
All the Extras
Spoon your ganache on the cooled dessert and use a spatula to nudge it to the edges. Want to look like a pro? Arrange pecan halves in a ring or right in the center. Fancy it up even more for parties by adding chocolate curls or a quick sprinkle of cocoa powder.
How to Serve
If you want perfect slices, dip your knife into hot water and wipe it each time. Let the dessert hang out on the counter about 20 minutes before eating—the flavors stand out more and the texture is creamier when it’s not fridge-cold.
Fun Swaps
This treat is super flexible. Craving dark chocolate? Use 70% cacao in both the filling and frosting. Want a little coffee kick? Mix in a spoon of espresso powder with the filling. To make it feel autumny, just toss a bit of cinnamon into your crust mixture.
Storing Leftovers
Pop the finished dessert in the fridge, loosely covered in foil so nothing sticks to your ganache. It’ll taste best for up to five days, though the bottom will soften a little over time. For longer keeping, wrap slices up in plastic and foil and freeze for two months. Let them come back to life in the fridge overnight before digging in.
 Save
Save
After making this more times than I can count, I think this chocolate-pecan cheesecake hits that sweet spot between looking impressive and being easy to pull off. The chocolate and nuts combo crushes every craving. Plus, you can make it ahead, so it’s perfect for parties or holidays. Everyone who tries it asks for the directions.
Recipe FAQs
- → What can I do if I need to leave out the pecans for allergy reasons?
- No problem! You can skip the pecans entirely while still keeping the cheesecake chocolatey and tasty. For a fun twist, swap in some mini chocolate chips (about 1/2 cup) instead of nuts. For the topping, try using chocolate curls, fresh fruit, or a sprinkle of cocoa powder.
- → Why do cracks form on my cheesecake, and how can I avoid them?
- Cracks usually happen if the temperature changes too fast or the batter gets overmixed. Keep everything smooth with these tips: 1) Use ingredients at room temperature, 2) Avoid mixing too much, especially after adding eggs, 3) Bake this cheesecake in a water bath (wrap your pan in foil and set it in a larger pan with hot water), 4) Let it cool slowly after baking, and 5) Don’t bake too long; the middle should still jiggle a bit when you turn off the oven.
- → Is it okay to swap out the type of chocolate in this recipe?
- Sure thing! The chocolate flavor can fit your preference. Dark chocolate makes it richer and less sweet, while milk chocolate gives it a sweeter, softer flavor. White chocolate works too—just cut your sugar by 1/4 cup since it’s already sweet. Use baking chocolate or high-quality bars for the smoothest results—skip chocolate chips, as they don’t melt as well.
- → Do I really need a springform pan to make this?
- A springform pan makes life easier for getting the cheesecake out without ruining the sides. If you don’t have one, a deep pie dish or a regular cake pan lined with parchment or foil (leaving overhanging edges to lift it out) can also work. If using a cake pan, freeze the cheesecake until solid enough to pop out cleanly.
- → How early can I prepare this cheesecake?
- This dessert is great for making ahead! Keep it chilled in the fridge, covered, for up to 3 days (add whipped cream last). If you need longer storage, freeze it for up to 2 months (don’t add toppings before freezing). Wrap it carefully in plastic wrap and foil; when ready, defrost in the fridge overnight before adding those final touches.