Melt butter with cream and sugar, mix in marshmallow creme and white chocolate. Add dry pudding mix, split it in two, blend cocoa into one half, layer both in a pan, swirl, chill, slice, and finish everything with melted chocolate on top.
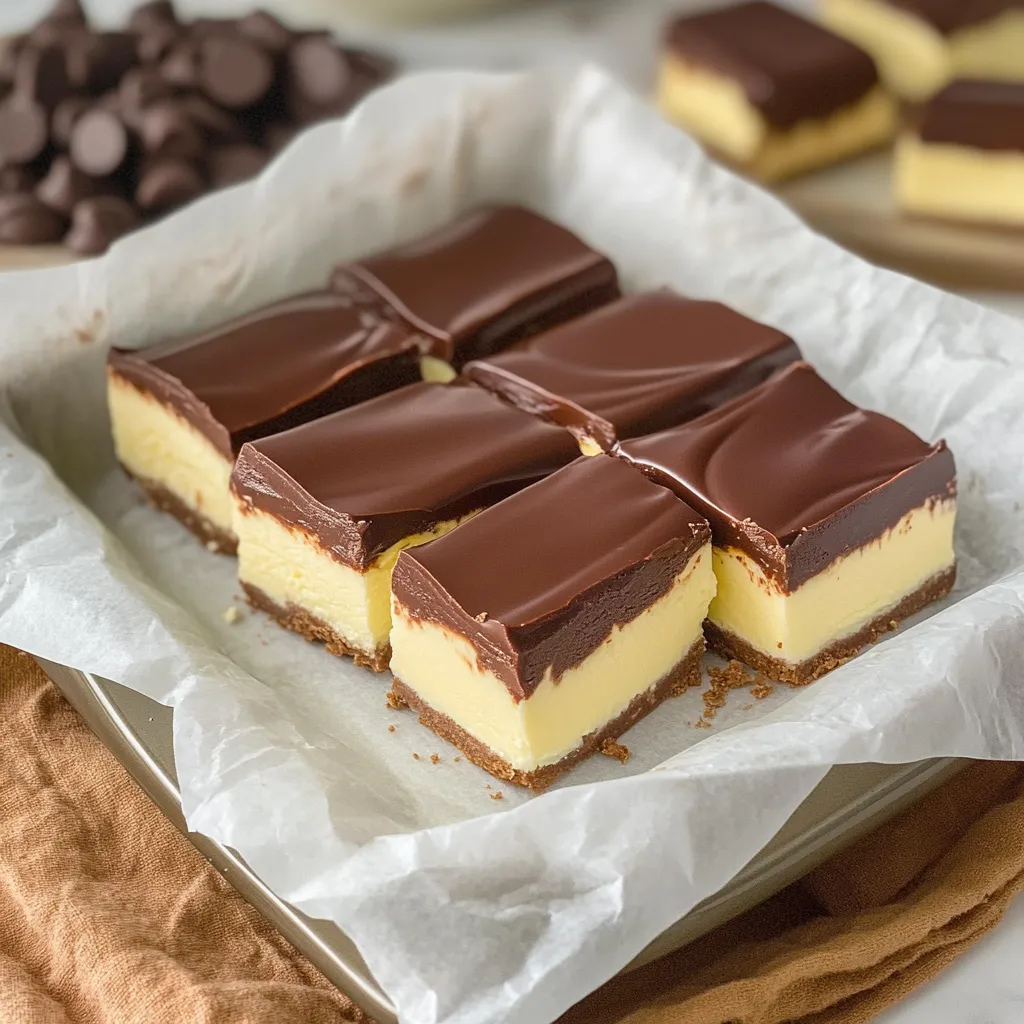
SaveClose-up view of Boston Cream Pie Fudge candy | homebitesbyana.com
When I whip up this Boston cream pie fudge, it's my not-so-secret trick for making cookie swaps and presents way easier. Came up with it a while ago, wanting to switch up my usual chocolate fudge for the neighborhood Christmas shindig. That silky vanilla "custard" base and thick chocolate top totally nail the Boston cream pie vibe but in tiny, super giftable pieces. And honestly? It looks way fancy but only takes about 15 minutes and super basic stuff you probably already have.
Why You’ll Want To Try This
You get the best of both fudge and Boston cream pie in every bite
All those pretty layers make a big splash on your dessert platter
No need for special gadgets—just your trusty saucepan and measuring cups
Makes awesome homemade gifts that don’t get stale fast
Last year, I dropped these in the treat boxes for my kids’ teachers and even got an email from my son's math teacher, calling it the best fudge ever and begging for the directions. When somebody you barely know is chasing you down for how you made it, you know it’s a win!
Standout Ingredients
Marshmallow creme – Makes the fudge super silky and worry-free, so you don’t need any candy skills or fancy tools. It's your fudge safety net!
White chocolate chips – Turn into that lush, sweet vanilla layer. Grab a decent brand so it melts smooth and tastes great.
Vanilla pudding mix – The magic touch! This powder adds straight-up Boston cream pie flavor, no need to make the pudding first.
Heavy cream – Brings the rich and creamy vibes. Don’t swap for milk or lighter stuff; it won’t set up right without the good fat.
Cocoa powder – Swirls in chocolate flavor, so you get chocolate and vanilla with zero extra fuss. Unsweetened is the way to go here.
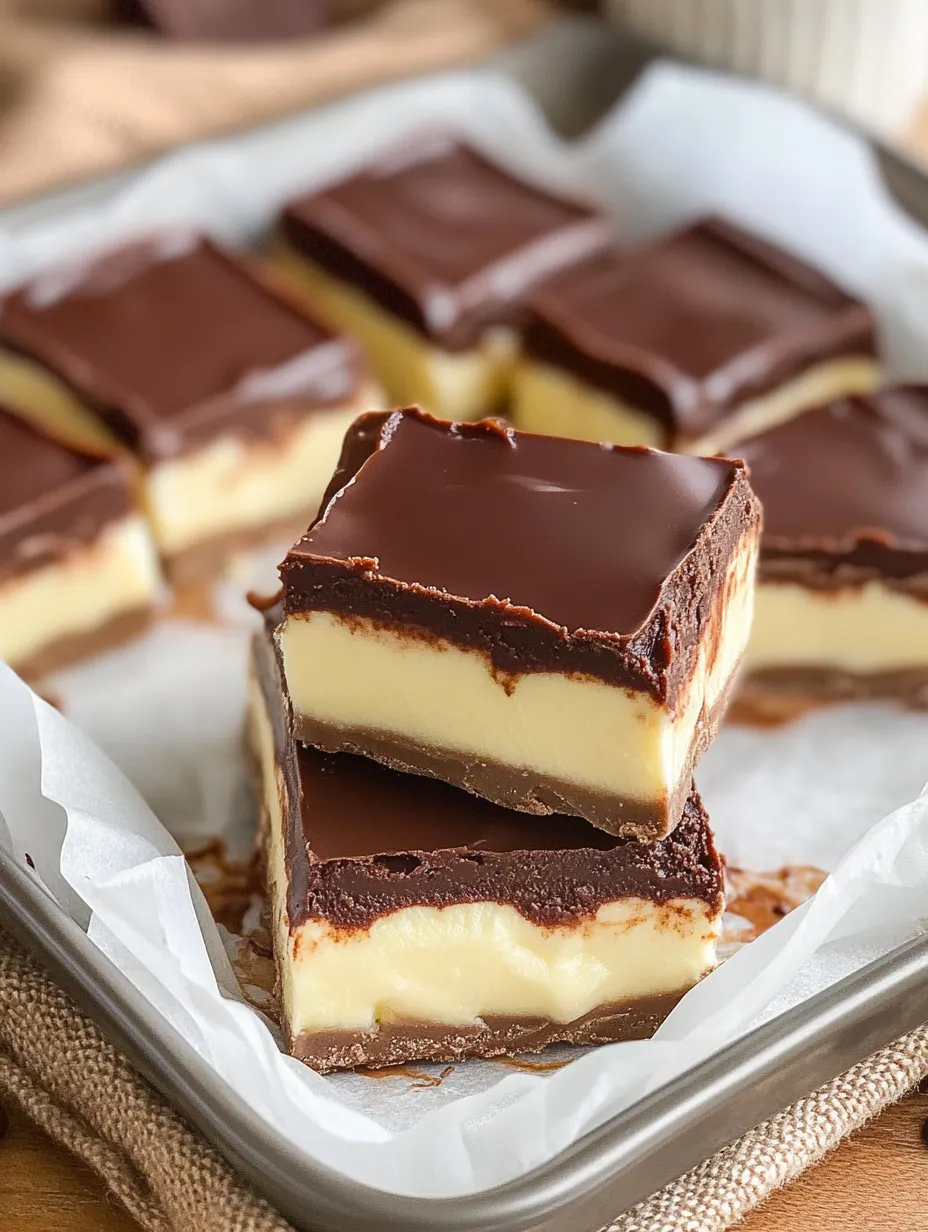
SaveBoston Cream Pie Fudge Directions | homebitesbyana.com
How To Do It
Cutting method – Let fudge chill all the way before you slice. Use a knife warmed under hot water for sharp, neat squares.
Chocolate dipping – For the top, just dunk the fudge into the chocolate. No need to cover the whole thing, and it’s so much simpler and less messy.
Layer swirling – When you drop the chocolate on, swirl gently. Don’t get carried away or you’ll lose the cool look. A couple of quick moves is enough!
Move fast – When it comes off the stove, get your act together—it sets up fast. Have all your stuff measured and ready before you start.
Ice water test – Drop a bit of fudge mix in an icy glass of water. If it holds its shape, you nailed it!
Stir nonstop – Stay right at the stove and keep it moving for about 7 minutes. It keeps things smooth and stops burnt bits.
Good To Remember
Don't rush chilling—let it fully set before cutting or serving
Parchment with extra hanging off helps you pull fudge out easily
Stack fudge in a single layer so that chocolate top stays looking sharp
I've been tweaking this one all through holiday seasons. The early versions missed that classic Boston cream pie hint—adding the vanilla pudding mix was a total game-changer. I also messed around with how much chocolate and vanilla to use until it finally hit that just-right balance. Now neither side takes over.
Serving Suggestions
Put these fudge bites on a plain white plate and let those pretty layers stand out. When I'm hosting, I'll stack them up on a tiered tray with my chocolate truffles for extra drama. They go great with coffee after a meal, and they're filling enough to work as the only sweet for smaller crowds. For gifts, drop them in mini cupcake wrappers inside a cute tin.
Fun Tweaks
Try a thin layer of raspberry jam before the chocolate for a fruity pop. Add a little espresso powder to the chocolate part if you're a coffee person. Few drops of peppermint extract in the chocolate give it a holiday kick. And if you want to go all out, sprinkle chopped toasted hazelnuts on the undried chocolate top.
Storage Tips
This fudge’s easy to keep—airtight at room temp, it’s good for 7 days, and in the fridge, up to two weeks. Stack with parchment to avoid sticking. If you need it to last, freeze for up to three months, then thaw in the fridge overnight. I usually make a double batch in early December so I’m covered when guests just drop by.
SaveNo-Fuss Boston Cream Pie Fudge | homebitesbyana.com
Easy Tricks
For sharp layers, let vanilla section chill for five minutes before you add the chocolate part
Wet your fingers a bit to spread the fudge into the corners of your pan without sticking
For a glossy topper, stir the chocolate and oil until they’re totally mixed before dipping
I’ve made this Boston cream pie fudge for bake sales, parties, and whenever friends or neighbors need a treat. There’s something about turning a classic dessert into these cute little bites that gets everyone excited. People always think it took forever to make (it didn’t!), and now it’s my go-to thing to bring year after year. Makes me look like I spent way more time than I did!
Recipe FAQs
→ Which vanilla pudding should I pick?
Go for the boxed instant vanilla pudding powder, not the ready-made pudding. It provides extra flavor and helps the fudge firm up. If you're out, use 2 tablespoons of powdered sugar and 1/2 teaspoon of vanilla extract instead, though the flavor will change slightly.
→ Why isn’t my fudge firm enough?
Soft fudge usually means it wasn't heated long enough or hot enough. Keep stirring the sugar blend for the full 7 minutes. A candy thermometer is super helpful — aim for 235-240°F (this is called the soft-ball stage). Double-check your ingredient amounts too!
→ Can I swap dark chocolate into the topping?
Of course! Dark chocolate adds a bolder contrast to the vanilla layer and gives it a slightly less sweet finish. If you prefer, milk chocolate works for a gentler, sweeter taste as well.
→ How long will my fudge stay good?
Keep your fudge in a sealed container, and it should last up to a week at room temp or two weeks in the fridge. If freezing, it'll be good for three months. Let it thaw in the fridge before eating.
→ Why is oil added to the chocolate layer?
A little vegetable oil makes the chocolate smoother for spreading. It also hardens with a slight gloss and helps avoid cracking when you slice or bite into the fudge.
→ Can I get creative with the flavors?
Totally! Mix 1/4 teaspoon of almond extract into the vanilla portion for a nutty taste. Toss in crushed cookies or sprinkles between the layers for crunch. A spoonful of espresso powder in the chocolate half would give a mocha vibe too!
Creamy Dessert Fudge
Rich chocolate on top, luscious vanilla in the middle, and layers of sweetness in every bite. This bite-sized candy is a nod to the traditional Boston cream pie, all in fudgy form.
Place parchment inside a square 8x8 pan, leaving some paper hanging over the edges to make it easy to pull out later. Keep it nearby.
Step 02
Combine the butter, cream, and sugar in a large pot. Heat it on medium and get the mixture bubbling.
Step 03
Lower the heat a bit and let it cook while stirring constantly for about 7 minutes. Check by dropping some into icy water—if it forms a soft ball that feels fudgy when pinched, it’s ready.
Step 04
Take the pan off the heat and quickly toss in the white chocolate chips. Stir until melted completely, then fold in the marshmallow creme till everything’s well blended.
Step 05
Stir in the vanilla pudding mix and vanilla extract until smooth. Now, pour most of this mix (about two-thirds) into the prepared pan.
Step 06
Add the cocoa to the remaining mix in your pot. Stir hard until it’s combined. Pour this darker layer on top of the one already in the pan.
Step 07
Grab a knife and cut through the layers a few times to make a marble effect.
Step 08
Let the whole thing come to room temperature, then divide it into 16 squares.
Step 09
Microwave the chocolate chips with oil in a heat-safe bowl. Do 30-second bursts, stirring after each one until smooth.
Step 10
Let the melted chocolate cool for about 15 minutes. Dip the tops of each fudge square in the chocolate and set them on parchment.
Step 11
Let the chocolate set up for about an hour before you dig in.
Notes
Get all your ingredients measured and ready to go because the fudge sets fast once cooked.
Use the dry vanilla pudding mix directly from the box, not the pudding you’d normally prepare with milk.
Keep the fudge fresh by storing it in a sealed container. On the counter, it lasts a week; in the fridge, about two.
For cleaner slices, dip your knife in hot water and wipe it clean between cuts.
Required Equipment
Square 8x8 dish
Parchment paper
Big pot
Sturdy mixing spoon or spatula
A sharp knife
Heatproof bowl for the microwave
Glass filled with icy water to check fudge readiness
Measuring utensils
Allergen Information
Review each ingredient for potential allergens and consult a healthcare professional if needed.
Includes dairy (cream, butter, white chocolate, pudding mix)
Soy may be present (from chocolate chips)
Nutrition Facts (Per Serving)
These details are for informational purposes only and don’t replace medical advice.

 Save
Save
 Save
Save
 Save
Save