
 Save
Save
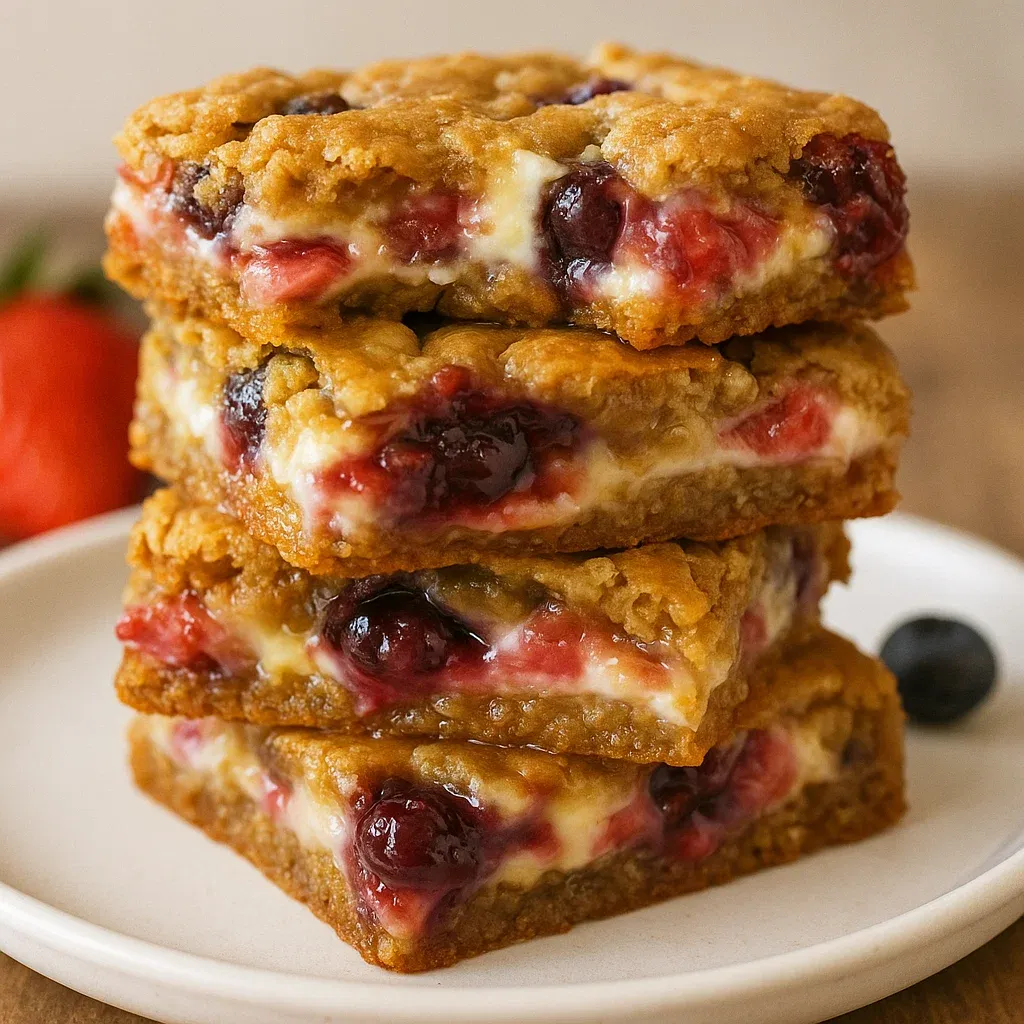
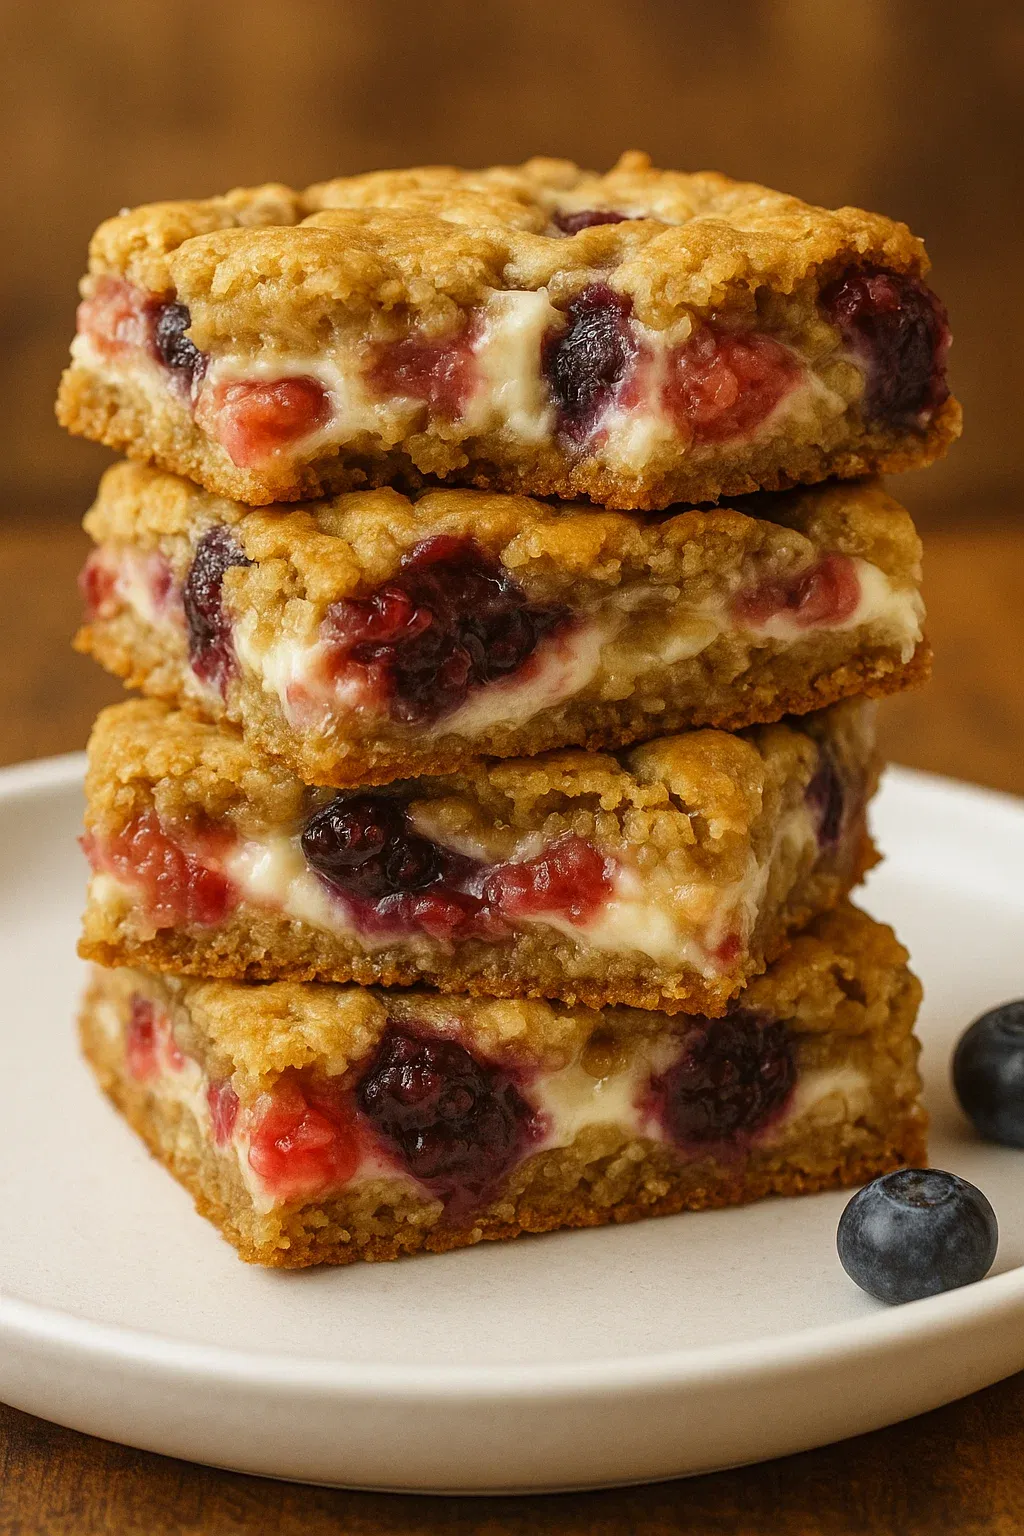
These layered treats merge chewy oatmeal cookies with silky white chocolate cheesecake and juicy seasonal berries. Each component complements the others, making a crowd-pleasing dessert that's both homey and fancy—perfect for family events, social gatherings, or when you're craving something a bit special.
I whipped these up for a backyard party last summer, and they vanished quicker than any other sweet on the table. The mix of tangy berries, sweet white chocolate filling, and rustic oatmeal cookie bits hits all the right notes for most everyone who tries them.
What You'll Need
- All purpose flour: gives the base its structure yet keeps everything soft
- Baking soda: adds just the right amount of rise so the cookie part isn't too heavy
- Ground cinnamon: brings cozy flavor that goes great with the oats
- Unsalted butter: should be soft enough to press with your finger
- Light brown sugar: makes everything moist with hints of caramel flavor
- Granulated sugar: helps make those nice crispy edges
- Eggs: hold everything together while adding richness
- Vanilla extract: brings out the goodness in every other flavor
- Quick cook oats: create that signature bite—don't swap with instant ones
- Cream cheese: grab the full-fat kind for the smoothest results
- Granulated sugar: tames the cream cheese's tanginess
- Egg: helps the cheesecake part set up properly
- White chocolate chips: melt into creamy sweetness that pairs wonderfully with fruit
- Fresh strawberries and blueberries: pick plump, firm ones for best flavor
Simple Preparation Steps
- Get Ready:
- Turn your oven to 350°F and put parchment in your 9×13 pan with extra hanging over the long edges. These flaps will help you lift everything out later. Give the short sides a quick spray so nothing sticks.
- Make The Cookie Mix:
- Blend flour, baking soda, cinnamon and salt in one bowl. In another, beat butter with both kinds of sugar for at least 2-3 minutes until it looks fluffy and pale. This step really matters for good texture. Drop in eggs one by one, mixing after each, then stir in vanilla. Slowly mix in the dry stuff just until it comes together—don't go overboard or you'll end up with tough cookies. Gently fold oats through the dough.
- Form The Bottom Layer:
- Push half your cookie mixture into the pan bottom. Slightly wet hands or a measuring cup bottom works great for evening it out. Put the leftover dough aside for later.
- Whip Up The Filling:
- Mix cream cheese with sugar until completely lump-free. Put in the egg yolk and mix well, then add the white part. This trick keeps your filling smooth. Carefully melt white chocolate in short microwave bursts, stirring often. Fold melted chocolate into your cream cheese mix until everything's well combined.
- Stack Everything Up:
- Spread filling evenly across your cookie base, going all the way to the edges. Scatter chopped berries across the top. Break remaining cookie dough into small chunks and drop them over the berries for a homestyle topping.
- Cook Till Done:
- Bake about 25-30 minutes until the top turns golden. The middle might wobble slightly but shouldn't look raw. Let it cool completely before putting in the fridge to get cold and firm. Taking your time here means you'll get clean slices later.
 Save
Save
The quick oats and cinnamon create that classic cookie flavor that takes me back to my grandma's kitchen. She always told me a truly good oatmeal cookie needs that chewy bite, and these bars nail it—especially against that creamy middle layer.
Keeping Them Fresh
These treats stay good in a sealed container in your fridge for 4-5 days. The cookie parts will get a bit softer over time but still taste great. It's best to only cut what you'll eat and leave the rest in one big piece to keep them from drying out.
For longer storage, you can wrap cut squares individually in plastic and pop them in a freezer bag. Just thaw them overnight in the fridge before eating. They hold up surprisingly well even after freezing.
Try Different Berries
You can switch up the fruit in lots of ways. Try blackberries with raspberries for more tang, or go all strawberry when they're super fresh and in season. If you want to use frozen berries, cut back by about 1/4 cup total and don't thaw them first, or they'll make everything too wet.
When berries aren't in season, try dried cranberries soaked in orange juice for about 20 minutes. The citrus flavor works really well with the white chocolate layer.
Ways To Serve
These bars are filling enough on their own, but you can dress them up for special times. Try warming a piece slightly and adding a small scoop of vanilla ice cream on top for a fancy dessert. When hosting brunch, cut them smaller and put them next to coffee or tea.
For parties with lots of sweets, cut them into tiny squares so folks can try multiple desserts. The pretty layers and colorful berries make these stand out on any dessert table.
 Save
Save
Recipe FAQs
- → What's the best way to store these cheesecake bars?
Pop the bars in an airtight container and keep them in the fridge. They’ll stay tasty for around 4 to 5 days when chilled.
- → Can I replace fresh berries with frozen ones?
Absolutely, frozen berries work great! Just ensure they’re thawed and drained first to keep the bars from getting soggy.
- → What if I don't like white chocolate chips?
No problem! Swap them out for dark or milk chocolate chips to suit your liking.
- → Which size pan gives the best results?
A 9x13-inch pan is just right for getting those bars thick and evenly cooked.
- → Do I need to separate the egg when making the cheesecake layer?
Yep, separating it is key! It keeps the mixture smooth and lump-free for that perfect creamy texture.
- → Can I freeze these bars for future snacking?
Sure can! Wrap each one tightly, store them in an airtight container, and they’ll last up to 2 months in the freezer. Let them thaw overnight in the fridge before eating.