 Save
Save
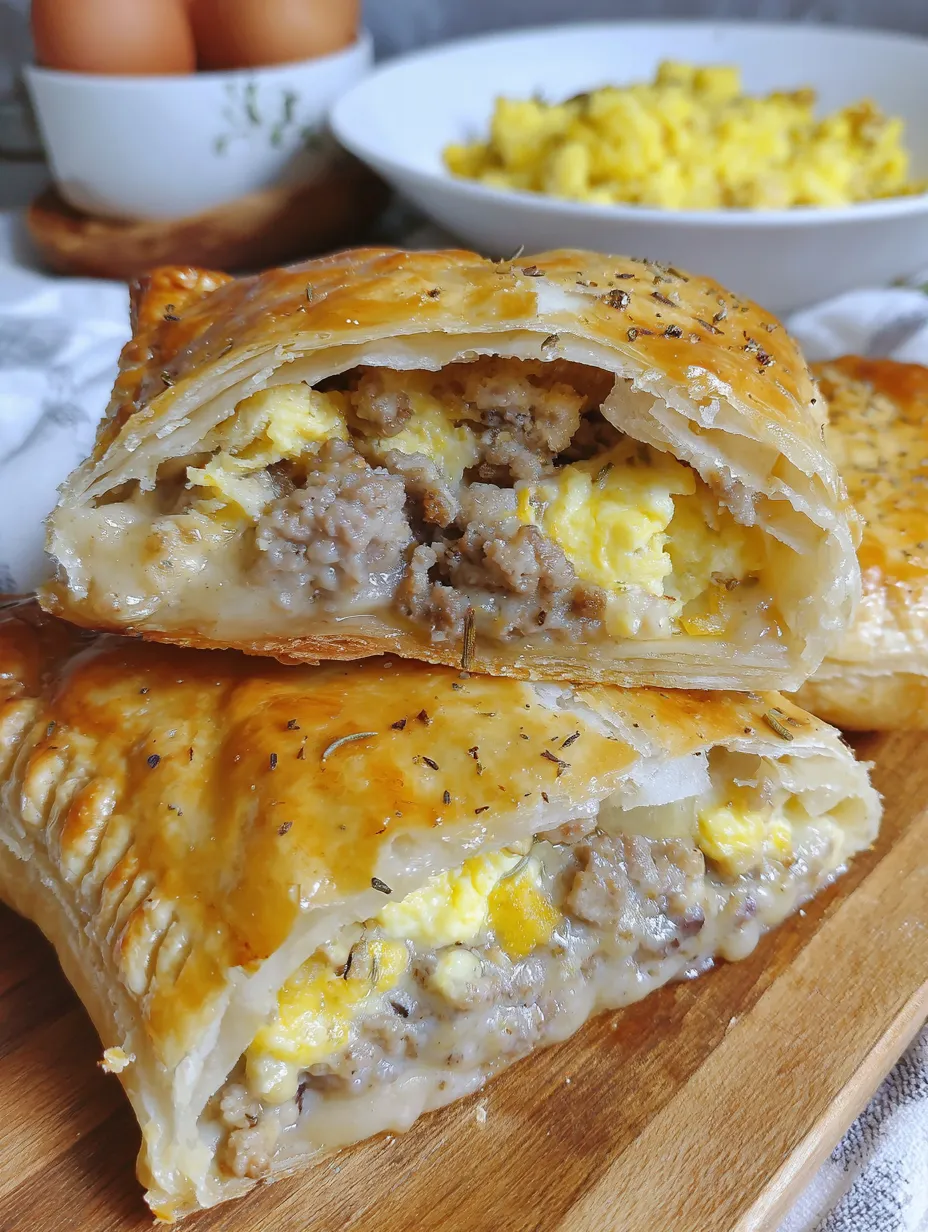
Once I started whipping up these savory breakfast pop-tarts, my whole morning vibe switched up. Forget super-sweet treats—these are all about a fluffy scrambled egg and creamy sausage gravy filling, bundled up inside a crispy, buttery shell. It’s like classic diner food you can take with you. I threw my first batch together because I was bored of my go-to breakfasts and wanted something that's quick to grab as I dash out the door. The mix of pepper-packed gravy with those melting eggs makes every bite cozy but totally refreshing, all thanks to that shattering pastry outside.
One afternoon last winter, I was pulling these out of the oven when my neighbor stopped by. She only needed a mouthful before telling me these beat out her grandma’s old-fashioned breakfast pastries. Now, she whips up extra every weekend so her family’s got a grab-and-go option all week long.
Hearty Ingredient Breakdown
- Sharp cheddar or jack cheese: Melts in with the filling, bumping up richness and helping everything stick together
- Vegetable shortening with butter: Using both makes your pastry extra flaky and tender
- Fresh eggs: Grab the freshest eggs—it makes the scrambled eggs soft and the pastry richer
- Whole milk: Makes your gravy super smooth and creamy
- All-purpose flour: This builds both your thick gravy and pastry structure
- Breakfast sausage (good quality): Go for sausage that’s nicely seasoned and a bit fatty, since that flavor anchors your gravy
- Fresh herbs (like sage or rosemary): Toss these in if you want more brightness and that classic breakfast scent
 Save
Save
Step-by-Step Cooking Guide
- Assembly and Baking Process
- Roll out half your dough on a floured counter till it’s about 1/8-inch thick, then chop into rectangles (think 3x4 inches). Lay half of them onto prepared pans, brushing just the edges with egg wash. Scoop your sausage gravy and eggs onto each bottom, leaving a gap right around the edge. Pop another dough rectangle on top (stretch it a tad if you need to), and use a fork to press and seal those edges tight. Give the tops a sweep of egg wash, sprinkle cheese if you’re feeling cheesy, and bake them about 25 minutes ‘til golden and crisp.
- Pastry Dough Creation
- Turn the oven on to 375°F and line some baking sheets with parchment. Toss flour and salt together in a bowl, then use a fork or pastry blender to cut in your shortening and butter till it’s all crumbly like gravel. In a different bowl, whisk up one egg with cold water and a splash of vinegar. Dump it into your flour mix and stir till it just clumps together—don’t mess with it too much so your crust stays soft.
- Seasoning and Egg Preparation
- Your gravy’s done? Take it off the heat, taste it, and add some salt, pepper, or even chopped herbs if you want. You want it a bit more seasoned than usual since it’ll get wrapped up. In a clean skillet, cook scrambled eggs just until they’re barely set and a little soft—they’ll finish in the oven. Let both the eggs and gravy cool while you get your dough ready.
- Building the Perfect Gravy
- Don’t drain away any sausage fat—just sprinkle your flour right over the cooked meat and keep stirring till it disappears. Let this cook a couple of minutes, mixing now and then to cook the raw taste out and build a thick base. Then pour in your milk a bit at a time, whisking like crazy so you don’t get lumps. Drop the heat and keep whisking till it’s nice and creamy, thick enough to cling to a spoon.
- Creating the Sausage Gravy Base
- Get a sturdy skillet hot on medium-high and add your sausage, chopping it up with a spoon as it browns. Keep cooking till crispy bits start sticking to the edges and the meat’s browned all over—should take 5-7 minutes. Don’t toss that fat left in the pan; that’s what makes the gravy awesome.
I’ve churned these out a bunch and realized nailing the texture of the gravy is the secret—it’s gotta be thick enough to stay put but loose enough to still feel silky. First time I made them, my gravy was too runny and leaked everywhere, messing up my pans.
Favorite Ways To Serve
Eat these when they’ve cooled a bit—hot but not lava—so the filling sets just right. Slice up some fresh fruit or toss a handful of greens on the side if you’ve got brunch plans. For a classic breakfast, these go great with crispy hash browns and cold OJ. They’re awesome for breakfast-for-dinner too, maybe with roasted veg on the side. I always grab coffee or tea to go with, to balance out that smoked, salty filling.
Fun Flavor Twists
Crumbled bacon works great in the filling instead of (or with) sausage if you want a different vibe. For spicy folks, swap cheddar for pepper jack, or use Swiss for something extra mellow. Mix up the herbs—try thyme, oregano, or chives for an updated taste. Toss in diced jalapeños and a shredded Mexican cheese if you want a Tex-Mex spin. For vegetarians, use a plant-based sausage plus sautéed mushrooms or spinach for extra flavor.
How To Store & Reheat
Stick extras in the fridge for up to four days, snug in an airtight container. For longer storage, wrap each one up with plastic and keep them frozen for up to a month. To reheat from the fridge, toss in a 350°F oven for 10 minutes and they’ll crisp up. If frozen, bake them straight from the freezer—just give them a minute or two more. Skip the microwave since it’ll zap the crust and make it soggy.
 Save
Save
I get asked for these pop-tarts all the time from friends and family now. It’s the best, putting classic breakfast flavors in something new and fun that’s both comforting and a little surprising. Making them does take a little hands-on time, but it’s actually pretty easy and a blast to put together. The payoff is totally worth every minute.
Recipe FAQs
- → Can these be prepped ahead of time?
- Totally! You can freeze them unbaked or bake first, then reheat later in a toaster or oven. They'll stay good for a few days.
- → How can I seal the edges properly?
- Start by brushing on some egg wash at the edges. Crimp them well with a fork to seal, pressing down firmly so nothing escapes in the oven.
- → Is it okay to use store-bought dough?
- For sure! Pre-made pie crust or puff pastry works great if you're short on time. Homemade dough has amazing texture though!
- → What can I do to avoid soggy bottoms?
- Keep the filling from being too wet, bake on the middle oven rack, or bake the pastry base for 5 minutes first before adding the filling.
- → Got any ideas for fun alternate fillings?
- How about ham and cheese, crispy bacon with cheddar, or spinach and feta for a veggie option? Just make sure fillings aren’t too damp!
