
 Save
Save
Making pasta from scratch in your own kitchen gives you a chewy bite and taste you just don't get from store-bought. Turning basic pantry stuff into soft, silky ribbons sets you up for loads of Italian favorites. Rolling out your own dough links you with dishes passed down for ages, and, honestly, there's something awesome about making something great from basic kitchen items.
I first tried whipping up pasta by hand after a rough week. Kneading dough let me tune everything out and actually helped calm my brain. That night turned into something special—my teenager, who almost never comments on dinner, came sniffing around the kitchen for a taste. Totally made my day.
Vibrant Ingredients Breakdown
- Salt: Brings out the subtle flavors in your dough best if you go with a fine sea salt so it dissolves well.
- Eggs: They bind everything together and bring a rich yellow color. Grab the freshest eggs you can for an ultra-bright noodle.
- Olive oil: Puts some bounce in the dough and helps keep it from getting dry as you roll. Stick with a lighter olive oil so the taste isn’t too strong.
- All-purpose flour: This gives pasta its backbone—enough protein to get chewy, not rubbery. Go for unbleached if you want better flavor.
Mastering Pasta from Scratch
Epic Flour Pile
Scoop your flour right onto a clean table and shape it into a tall mound. Make a little nest in the middle, just big enough for your eggs. The sides need to be thick so your eggs and oil don’t escape, but not so high that pulling in flour gets tricky.
Getting Eggs Involved
Drop your eggs, salt, and a swirl of olive oil into the center. Grab a fork and beat it all together, slowly pulling flour in from the sides. Go easy so nothing spills out before it thickens up.
Dough Comes Together
When it gets too heavy for a fork, get in there with your hands and add the rest of the flour. Knead for about 8-10 minutes until everything is nice and smooth. The dough should stick just a little—think the feel of your earlobe.
Letting It Chill
Wrap up your dough in plastic wrap and let it hang out on the counter for at least 30 minutes. This downtime chills out the gluten and makes rolling way easier.
Rolling Know-How
Chop the rested dough into smaller chunks. Use a pasta machine or rolling pin to flatten it out, adding a sprinkle of flour as you go. If you’re rolling by hand, keep going until it’s so thin you can see your fingers through it.
Time to Cut
Give your pasta sheets 5-10 minutes to air out before cutting. If using a machine, just pop them through the right blade. If going old school, dust with flour, fold gently, then slice into noodles as wide or skinny as you like.
Rolling out pasta really plugs you into classic Italian food-making. Simple steps and four ingredients add up to something way more exciting than you’d expect. The touch, smell, and taste all come together—the dough turns from messy to sleek, and the first bite is unforgettable.
 Save
Save
My grandma swore that mixing in semolina made the texture just right, and she could always tell exactly when the dough was finished by feel. Even though my kids never met her, every time they dig in to homemade pasta, they get a taste of her old kitchen wisdom.
Matching sauce with pasta thickness is key. Skinny noodles love lighter, runnier sauces that just coat them. Thicker, heartier pastas need chunky sauces to stand up to all that flavor. Roll your dough thick or thin depending on what’s going on top.
Boil homemade pasta in lots of water—at least 4 quarts for each pound—and don’t forget a generous handful of salt. The water should taste salty, almost like the ocean. Watch closely; fresh pasta moves from perfect to mushy in a blink.
Tasty Pairings
Your fresh noodles go with so much—anything from buttery herb sauces to deep, meaty ragù. If it’s your first batch, melt some butter, toss in whole sage leaves until crispy, and finish with grated Parmesan. This simple combo lets the pasta flavor shine through.
Plate fancy by grabbing a carving fork and winding up long noodles into a little pasta nest. Put it on a warmed plate and top with sauce and extras. Not only does it look cool, it keeps your pasta warm longer too.
Pair your pasta with crusty bread to scoop up sauce, and add a crisp salad with lemon dressing. The zippy salad balances out the rich, comforting noodles and gives your palate a fresh start between bites.
Personal Touches
For an authentic bite, swap in a third of semolina for some of the regular flour. This helps the sauce cling and the noodles keep a nice chew, even with chunkier sauces.
To mix in extra flavor, finely chop some fresh parsley, basil, or thyme and knead it in from the start. You’ll get tiny colorful flecks and a nice herby background taste.
If you need to skip the eggs, use only water and a splash more olive oil instead. It won’t be as rich, but the noodles won’t let you down—especially if you top them with something bold.
Leftover Solutions
Dust uncooked pasta with flour, curl it into nests, and freeze them flat on a tray. Once solid, stash in a sealed container. Just toss frozen noodles into boiling water and add a minute or so to cooking time.
Cooked pasta keeps in the fridge for about three days—toss in a bit of olive oil to stop sticking. Warm up by dunking briefly in boiling water or turn through a pan of sauce on low heat.
Leftover noodles make a killer frittata. Stir them into whisked eggs with cheese and herbs, then bake in an oven-friendly skillet. It’s a great call for lunch or a light supper.
Tossing and kneading pasta by hand is its own kind of magic—maybe that’s why generations of Italian grandmas insisted on it. Even with kitchens full of gadgets, there’s something special about the muscle memory. Try slowing down and just enjoying each step; the process can feed your soul as much as your appetite.
 Save
Save
Recipe FAQs
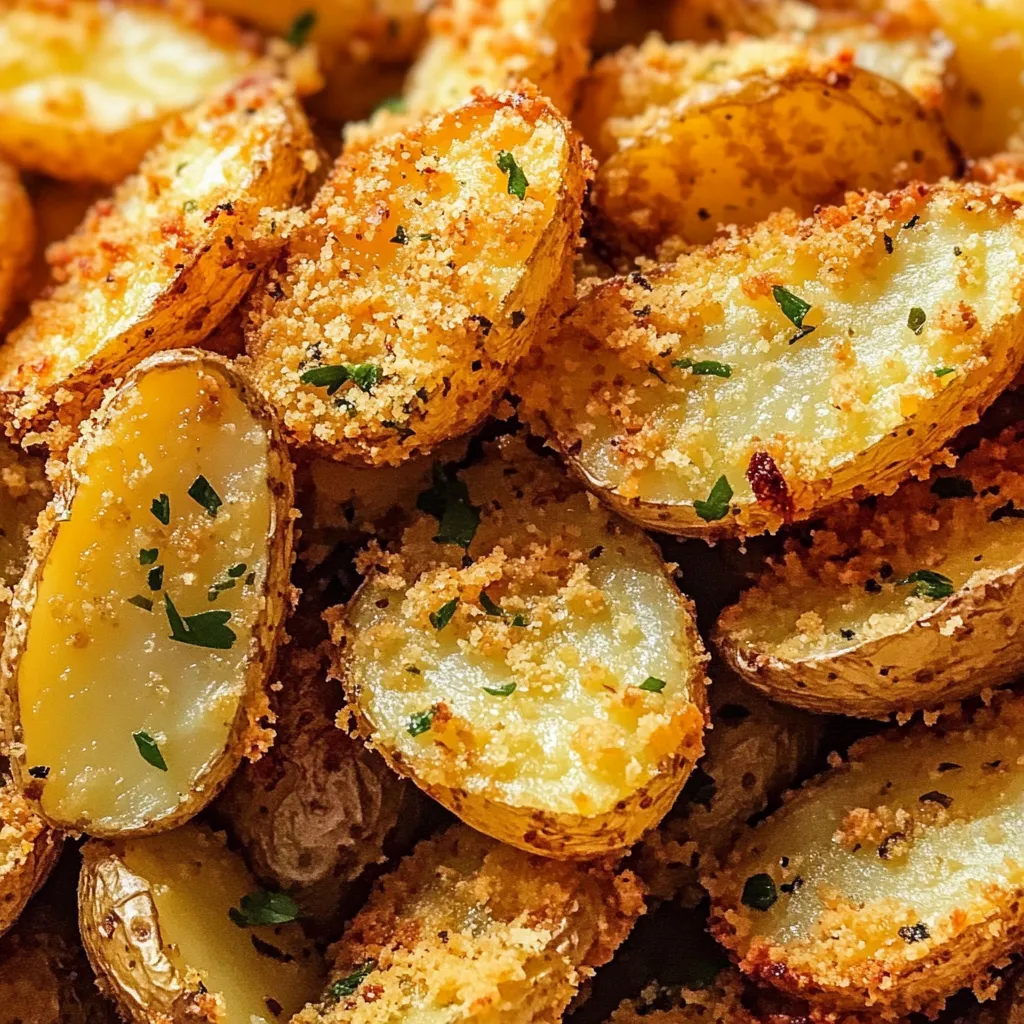
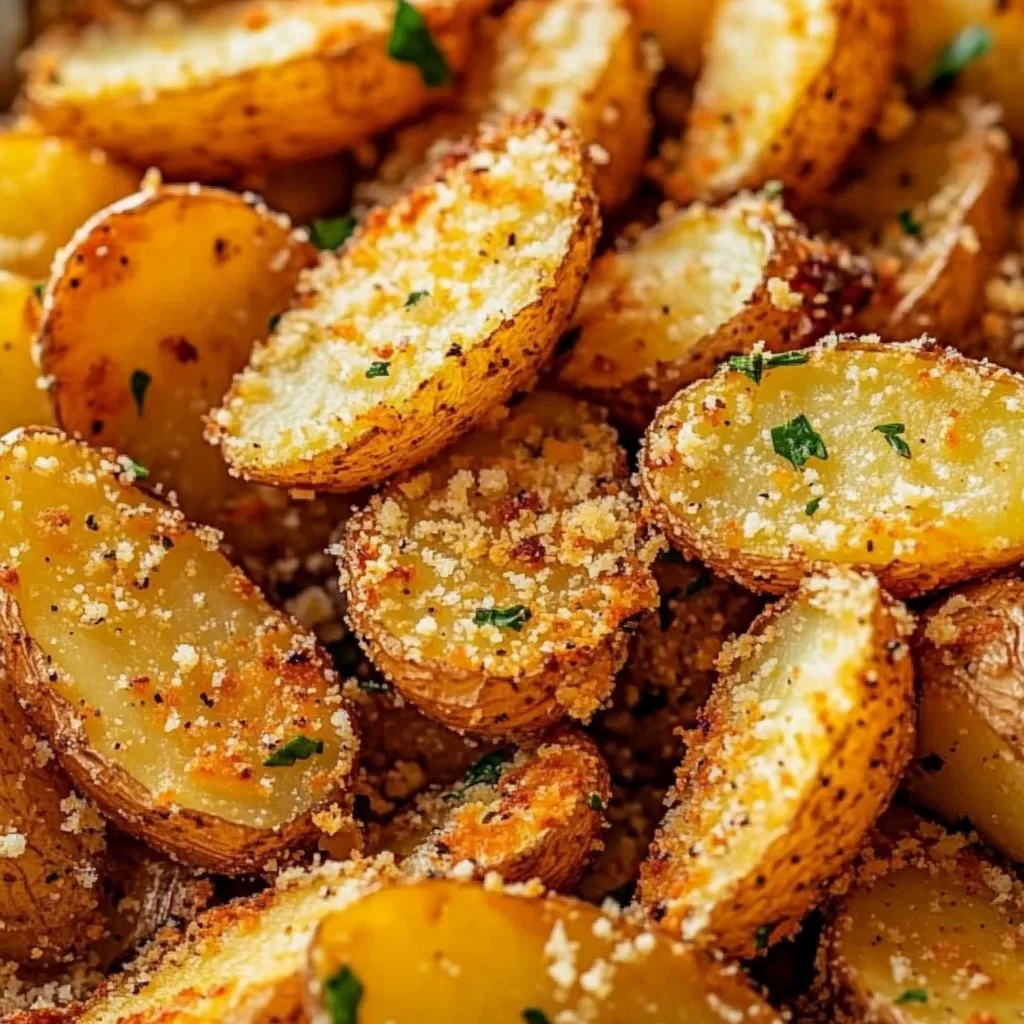
- → Are other potatoes an option here?
- Absolutely! While Yukon Golds are buttery and perfect, smaller red potatoes or fingerlings can do the trick. Just keep them bite-sized for even cooking.
- → What's the reason for scoring the potatoes?
- Scoring allows the seasonings to cling better and helps the potatoes soak in more flavor when they bake.
- → Can I bake this ahead of time?
- They're tastiest fresh from the oven when the cheese crust is at its crispiest. You can prep the ingredients earlier, but bake them right before eating.
- → What should I serve alongside these potatoes?
- They go great with roasted chicken, steak off the grill, or pretty much any main meat. Round it out with a green side like steamed veggies or a salad.
- → Why does my cheese stick to the pan instead of the potatoes?
- Be sure to use fresh Parmesan (not pre-shredded stuff), push the potatoes firmly into the cheese layer, and let them sit for 5 minutes before you remove them.