
 Save
Save
When I first whipped these up, my family stopped scrolling on their phones and actually checked out what I was making. You basically stuff some ground beef with cheese, wrap the whole thing in onion and bacon, then bake it till it's golden and sticky. They look fancy but are much easier than they seem! I saw people going wild for these online and figured, why not. Now I use them whenever I want to make dinner feel like a treat.
My kid, who usually runs to her room with food, actually sat down and ate these. She said, "honestly, not bad." For her, that's about the best praise I can get.
Essential Gear and Stuff
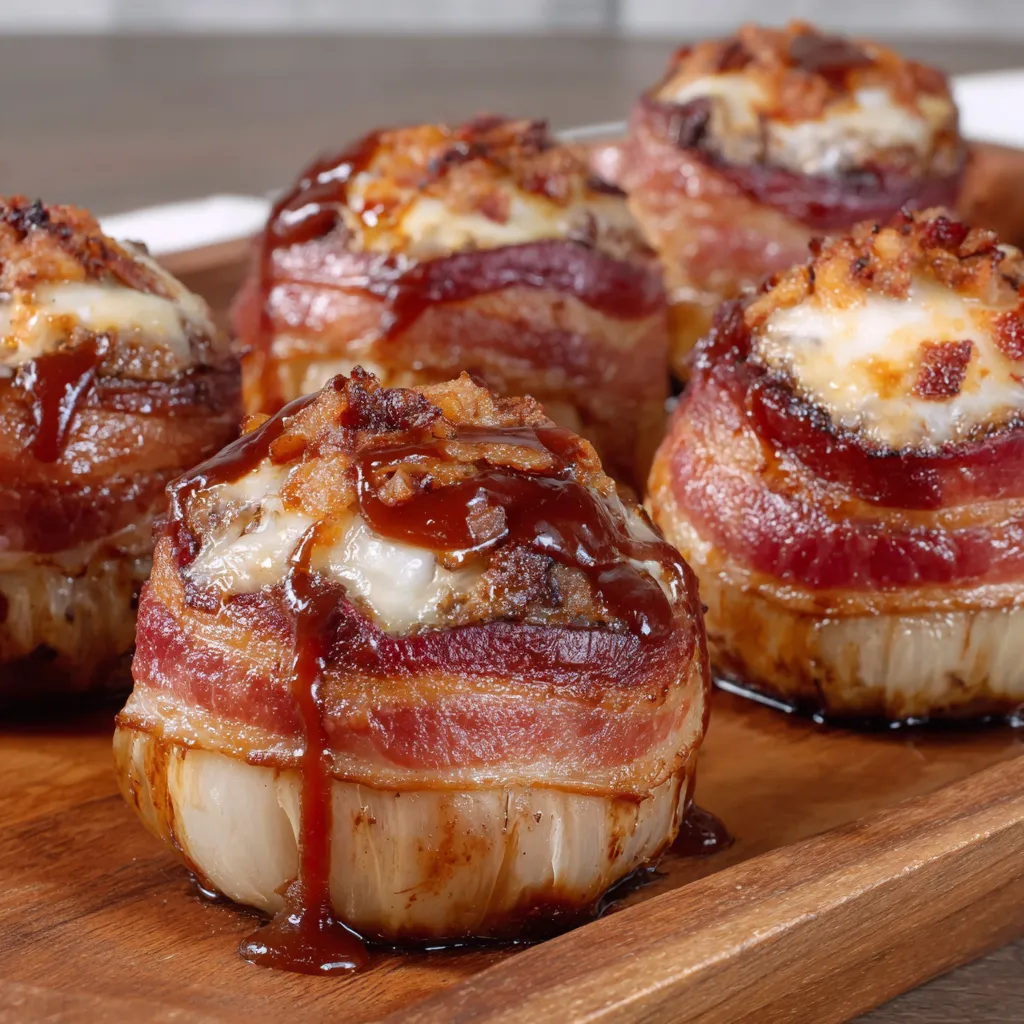
- Cheddar cheese cubes: This is the surprise in the middle that melts
- Ground beef: I go with lean, like 93/7, so they don’t get oily
- Center-cut bacon: This bundles everything and crisps up nicely
- Medium yellow onions: You’ll need the thick outside pieces for wrapping
- BBQ sauce: Slathered on at the end and mixed in for max stickiness
 Save
Save
Nailing the Process
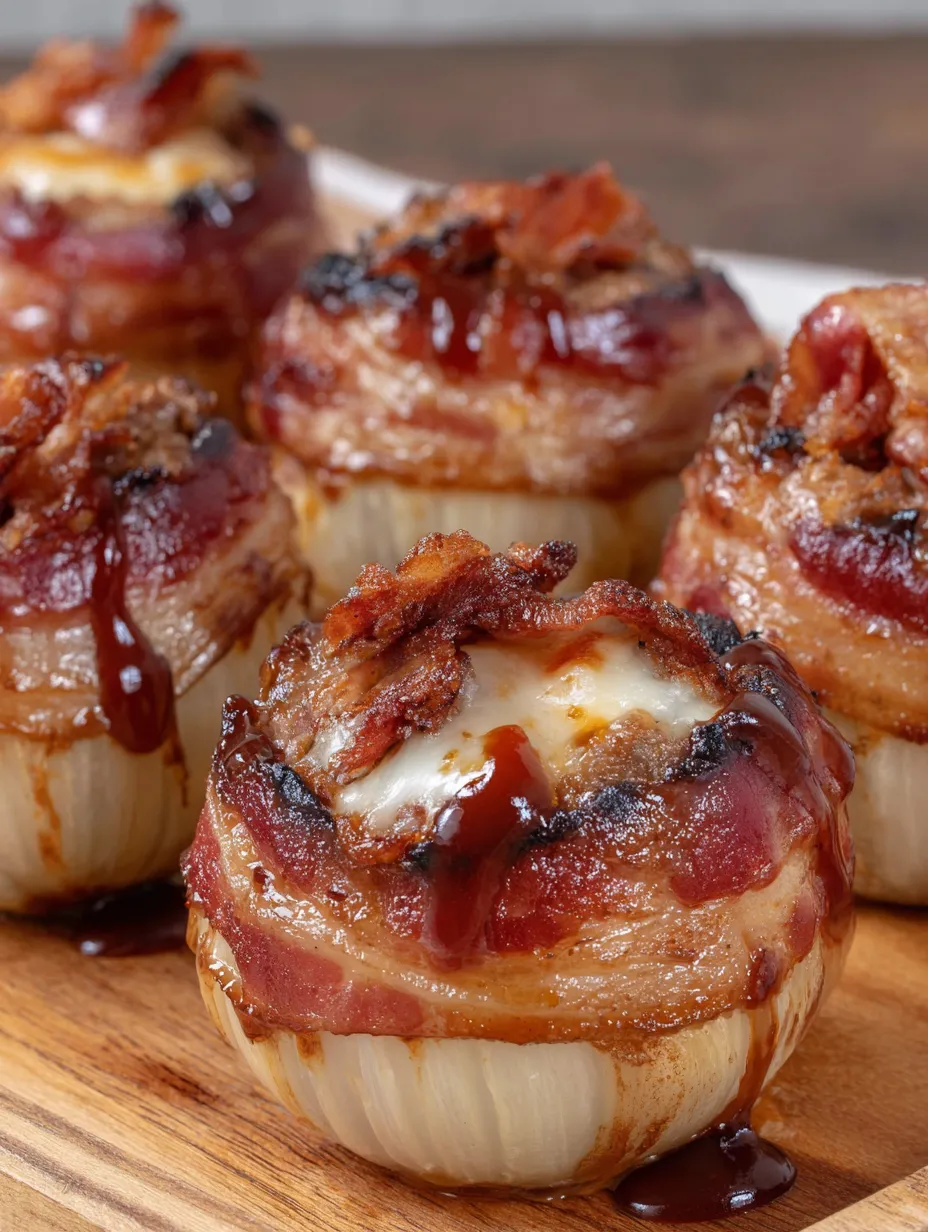
- Bake those babies
- Pop them in the oven for 30 minutes, brush on more BBQ, then let them go another 10 to 15 minutes. You're looking for crispy bacon and an inside temp of 160°F.
- Building your bombs
- Flatten some beef out, pop a cheese cube in the middle, fold the meat up, then close it all around the cheese. Tuck two onion layers around your ball, and finally, wind bacon strips crisscross-style over the whole thing.
- Mixing up the meat
- Combine your beef, egg, breadcrumbs, milk, a few generous squeezes of BBQ, and the seasonings. Don’t overmix or you'll end up with tough balls. Toss the bowl in your freezer for 15 minutes to firm the mix—it shapes way easier that way.
- Getting your onions prepped
- Fire your oven up to 425°F and get a pan lined with foil. Cut ends off your onions, peel 'em, and halve each one. Gently peel away the two thickest layers from each side to use as wraps.
Trust me, if you don't wrap that bacon up tight, your first batch might fall apart everywhere. I learned to really secure it, and now they always stay put.
Serving Ideas
These are pretty filling – toss a salad or roast up some veggies if you're doing a main course vibe. Cut them in half for parties, people freak out when they spot the layers. They're awesome with an ice-cold beer too.
Mix It Up
Swap in your favorite cheese (pepper jack kicks up the heat) or go for wild BBQ sauces. I've thrown in chopped jalapeños for some zing, and ground turkey works if you're trying to lighten things up.
Get Ahead of the Game
You can assemble these little bundles early and stash them in the fridge for a few hours. Just note, if you bake them straight from cold, they'll need a few extra minutes in the oven.
 Save
Save
People act like I'm super creative whenever I make these, but honestly, it's just jazzed-up meatballs. They seem tricky, but it's really just stacking good ingredients smartly. Sometimes the easiest meals feel the fanciest.
Recipe FAQs
- → How do I keep my stuffed onions from falling apart?
- Make sure you wrap the bacon snugly around them. Avoid making the meat mix too soft. Toothpicks can help keep everything together if needed.
- → Can I prepare stuffed onions in advance?
- Totally! Assemble them ahead and refrigerate for up to a day. When baking, just add 5-10 minutes to the cook time if they're cold.
- → What if the onion layers rip when separating?
- Try soaking the whole onions in hot water for a few minutes first. It softens them, so peeling and separating become much simpler.
- → How can I tell if stuffed onions are fully cooked?
- Check with a meat thermometer; they should read 160-165°F. The bacon should be crisp, and the onions should be fork-tender.
- → Can I try a different cheese for the filling?
- Cheddar melts beautifully and stays in place, but mozzarella or pepper jack also work. Just make sure the meat completely seals the cheese.